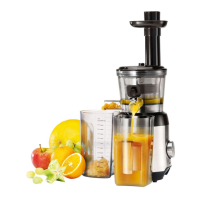
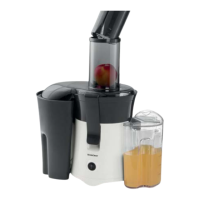
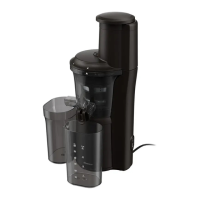
The SilverCrest SSJ 300 C1 is a slow juicer designed for domestic use, intended for juicing well-ripened and peeled fruits and vegetables. It operates by slowly pressing ingredients to extract juice, minimizing heat and oxidation, which helps preserve nutrients. The appliance is not suitable for commercial or industrial environments.
Technical Specifications:
- Power Supply: 220–240 V ~ (AC), 50–60 Hz
- Power Consumption: 300 W
- Protection Class: II /
- Revolutions per Minute: 60 ± 15%
- CO Time (Continuous Operation Time): 15 minutes
- Juice Container Capacity: Approx. 900 ml (usable volume: approx. 600 ml to the Max. marking)
- Container for Fruit Pulp and Vegetable Mash Capacity: Approx. 1200 ml
- Food-Safe Parts: All parts of the appliance that come into contact with food are food-safe.
Usage Features:
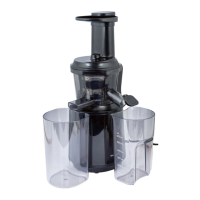
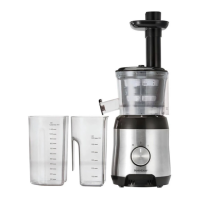
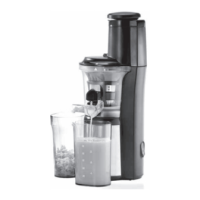
The main components include:
- Pusher: Used to gently push ingredients into the feed tube.
- Feed Tube: Where fruits and vegetables are inserted for juicing.
- Housing Lid: Covers the juicing mechanism and ensures safe operation.
- Sieve Tray Holder: Supports the sieve tray assembly.
- Juice Outlet: Where the extracted juice flows out.
- Stopper: Controls the flow of juice from the juice outlet.
- On/Off Switch: Controls the power to the appliance (I for ON, O for OFF, R for Reverse).
- Appliance Base: The main unit containing the motor and controls.
- Power Cable with Mains Plug: Connects the appliance to the power supply.
- RESET Button: Used to reset the safety cut-out after a blockage.
- Juice Container: Collects the extracted juice.
- Container for Fruit Pulp and Vegetable Mash: Collects the discarded pulp.
- Outlet for Fruit Pulp and Vegetable Mash: Where the pulp is expelled.
- Sieve Tray: Part of the juicing assembly.
- Removable Sieve Frame: Holds the sieve in place.
- Sieve (Stainless Steel): Filters the juice from the pulp.
- Transport Screw: The auger that presses the ingredients.
- Cleaning Brush: Provided for cleaning the components.
Assembly and Operation:
Before first use, all removable parts must be thoroughly cleaned. The appliance should be assembled with the power cable unplugged.
- Place the sieve tray (14) onto the appliance base (8), ensuring the three catches align with the slots and the markings match.
- Insert the removable sieve frame (15) into the sieve tray (14).
- Place the stainless steel sieve (16) into the removable sieve frame (15), aligning the markings.
- Place the transport screw (17) onto the drive shaft, twisting and pressing until it clicks into place.
- Position the housing lid (3) onto the sieve tray (14), aligning the markings.
- Turn the lid (3) clockwise until the markings align and it clicks firmly into place. The appliance has a safety device and will only operate when the lid is correctly fitted.
- Slide the pulp container (12) under the pulp outlet (13).
- Slide the juice container (11) under the juice outlet (5).
- Open the stopper (6) to allow juice to flow into the container.
Preparing Ingredients:
- Use only well-ripened, peeled fruits and vegetables to prevent the sieve (16) from blocking.
- Remove large seeds or stones.
- Cored fruits like apples and pears can be processed with skin and core. Other stones (peaches, plums) and large seeds (melons) must be removed.
- Fruits with thick peels (citrus, kiwi, root vegetables) must be peeled.
- Remove stalks from grapes.
- Cut ingredients into pieces small enough to fit the feed tube (2).
- Cut fibrous ingredients (e.g., celery) into 3–5 cm long and 1.5–2 cm wide pieces.
- Soak or pre-boil dried foods (beans, rice) and allow hot ingredients to cool to room temperature.
- Do not use ice cubes, deep-frozen foods, or very hard fruits like coconuts.
- Raisins are not suitable for juicing due to low juice content.
- Soak carrots in water for 24 hours before juicing and cut into small pieces (approx. 1.5 x 1.5 cm) for optimal yield.
Juicing:
- Plug the power cable (9) into a mains socket.
- Add a portion of ingredients into the feed tube (2).
- Set the On/Off switch (7) to "I" (ON). The appliance will start.
- Ingredients are usually drawn in automatically. If not, gently push with the pusher (1).
- Continue adding ingredients while processing; do not switch off the appliance.
Reset Function/Safety Cut-out:
The appliance has a safety cut-out to protect the motor from overheating. If ingredients get stuck and the appliance turns off, the safety cut-out has tripped.
To reset:
- Set the On/Off switch (7) to "O" and unplug the power cable (9). Allow to cool for 10–15 minutes.
- Turn the lid (3) anticlockwise until the markings align.
- Remove the lid (3) and clear any stuck food pieces.
- Carefully remove the sieve tray (14) and turn the appliance base (8) over.
- Plug the power cable (9) into a socket.
- Press the RESET button (10) on the underside of the appliance base (8).
- Unplug the power cable (9) and turn the appliance base (8) over.
- Reassemble the appliance and resume juicing.
- If food gets stuck, try switching the On/Off switch (7) to "R" (Reverse) several times briefly. If this doesn't help, disassemble and remove the blockage.
Processing Times (for 500g of fruit/vegetables):
- Apples: Cut into suitably sized pieces. Can be processed with skin and core. Approx. 1:40 min.
- Carrots: Peel and cut into 1.5 x 1.5 cm pieces. Soak for 24 hours for optimal yield. Approx. 1:45 min.
- Grapes: Remove main stalk. Seedless grapes are better. Approx. 1 min.
- Pineapple: Peel and cut into suitably sized pieces. Can be processed with stalk. Approx. 2 min.
- Tomatoes: Remove greenery, cut into wedges. Approx. 2:20 min.
- Celery: Process fresh. Cut into 3-5 cm long and 1.5-2 cm wide pieces. Use green leaves for color. Approx. 1:30 min.
- Spinach: Chop leaves coarsely. Approx. 7:40 min.
Maintenance Features:
Cleaning and Care:
- Always unplug the power cable (9) before cleaning or fitting/removing accessories.
- Never clean the appliance base (8) under running water or immerse it in liquids.
- Regularly clean the juice outlet (5) and pulp outlet (13) after every use to prevent blockages and damage.
- Clean the appliance housing and power cable (9) with a lightly moistened cloth, using mild detergent for stubborn dirt.
- Clean the sieve tray (14), sieve (16), sieve frame (15), transport screw (17), juice container (11), pulp container (12), lid (3), and pusher (1) with the supplied cleaning brush (18) in warm water with a little washing-up liquid. Rinse thoroughly.
- To clean the pulp outlet (13), pull out the black rubber plug on the underside of the sieve tray (14) to allow water to run through. Use the cleaning brush (18) handle to dislodge stuck pulp. Reinsert the plug after cleaning.
- All removable parts, except the cleaning brush (18), are dishwasher-safe. Place them in the top rack, ensuring they are not jammed, and use a program with max. 60°C.
- Ensure all parts are completely dry before re-using the appliance.
Storage:
Store the cleaned and dried appliance in a clean, dust-free, and dry location, away from direct sunlight if not used for a long period.
Disposal:
The appliance must not be disposed of with normal household waste. It is subject to Directive 2012/19/EU and must be taken to designated collection points, recycling depots, or disposal companies. Packaging materials are recyclable.