Do you have a question about the SilverStone SST-RV01B Raven Series and is the answer not in the manual?
| Brand | SilverStone |
|---|---|
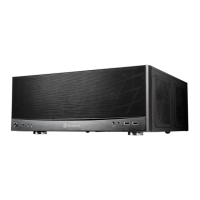
| Model | SST-RV01B Raven Series |
| Category | Computer Hardware |
| Language | English |
Instructions for removing the top cover by rotating the knob to UNLOCK.
Instructions for releasing side panels by switching a clip to OPEN.
Procedure to remove the expansion card supporter using thumb screws.
Steps to open front door and remove 5.25" drive bay covers and metal tabs.
How to press the 5.25" drive bay button to the UNLOCK position.
Instructions for installing an optical drive into the chassis and aligning with the front panel.
Securing the optical drive by pressing buttons to LOCK and closing the front door.
Procedure to remove the hard drive tray as shown in the diagram.
Installing the hard drive into the tray and securing it with screws.
Reinstalling the hard drive tray into the chassis, noting optional SATA support.
Fastening motherboard standoffs and installing the motherboard with screws.
Removing expansion slot cover and installing an expansion card securely.
Installing the power supply, aligning with screw holes and securing with screws.
Ensuring cables are connected, then reinstalling the expansion card supporter.
Reinstalling the side panels onto the main chassis.
Reinstalling the top cover and rotating the knob to LOCK to complete installation.
Instructions to remove the side panel filter by unscrewing 5 screws.
Instructions to remove the hard drive filter by pressing the handle upwards.
Procedure to remove the power supply filter by pressing the handle and pulling.
Removing the back cover by unscrewing a screw and releasing three hooking points.
Installing radiator mounting supporters and securing them with the radiator.
Mounting the assembled radiator bracket onto the chassis and securing it.