SRP9170/80 P25 Portable Radio – User Manual
© ComGroup Australia 2010 Page 23 TNM-U-E-0091 1.4a
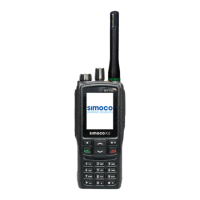
The “M” or “Back” key takes the radio back to the Phone Book Edit Default Screen.
A “Reset” function key press (if configured) takes the radio back to the default screen
display.
If “Delete” is selected, pressing “OK” removes the selected phone entry from the phone book
and takes the radio back to the default screen display.
If “Add” is selected, pressing “OK” takes the radio to the Add New Entry sub-menu.
If “Edit” is selected, pressing “OK” takes the radio to the Edit Phone Entry sub-menu.
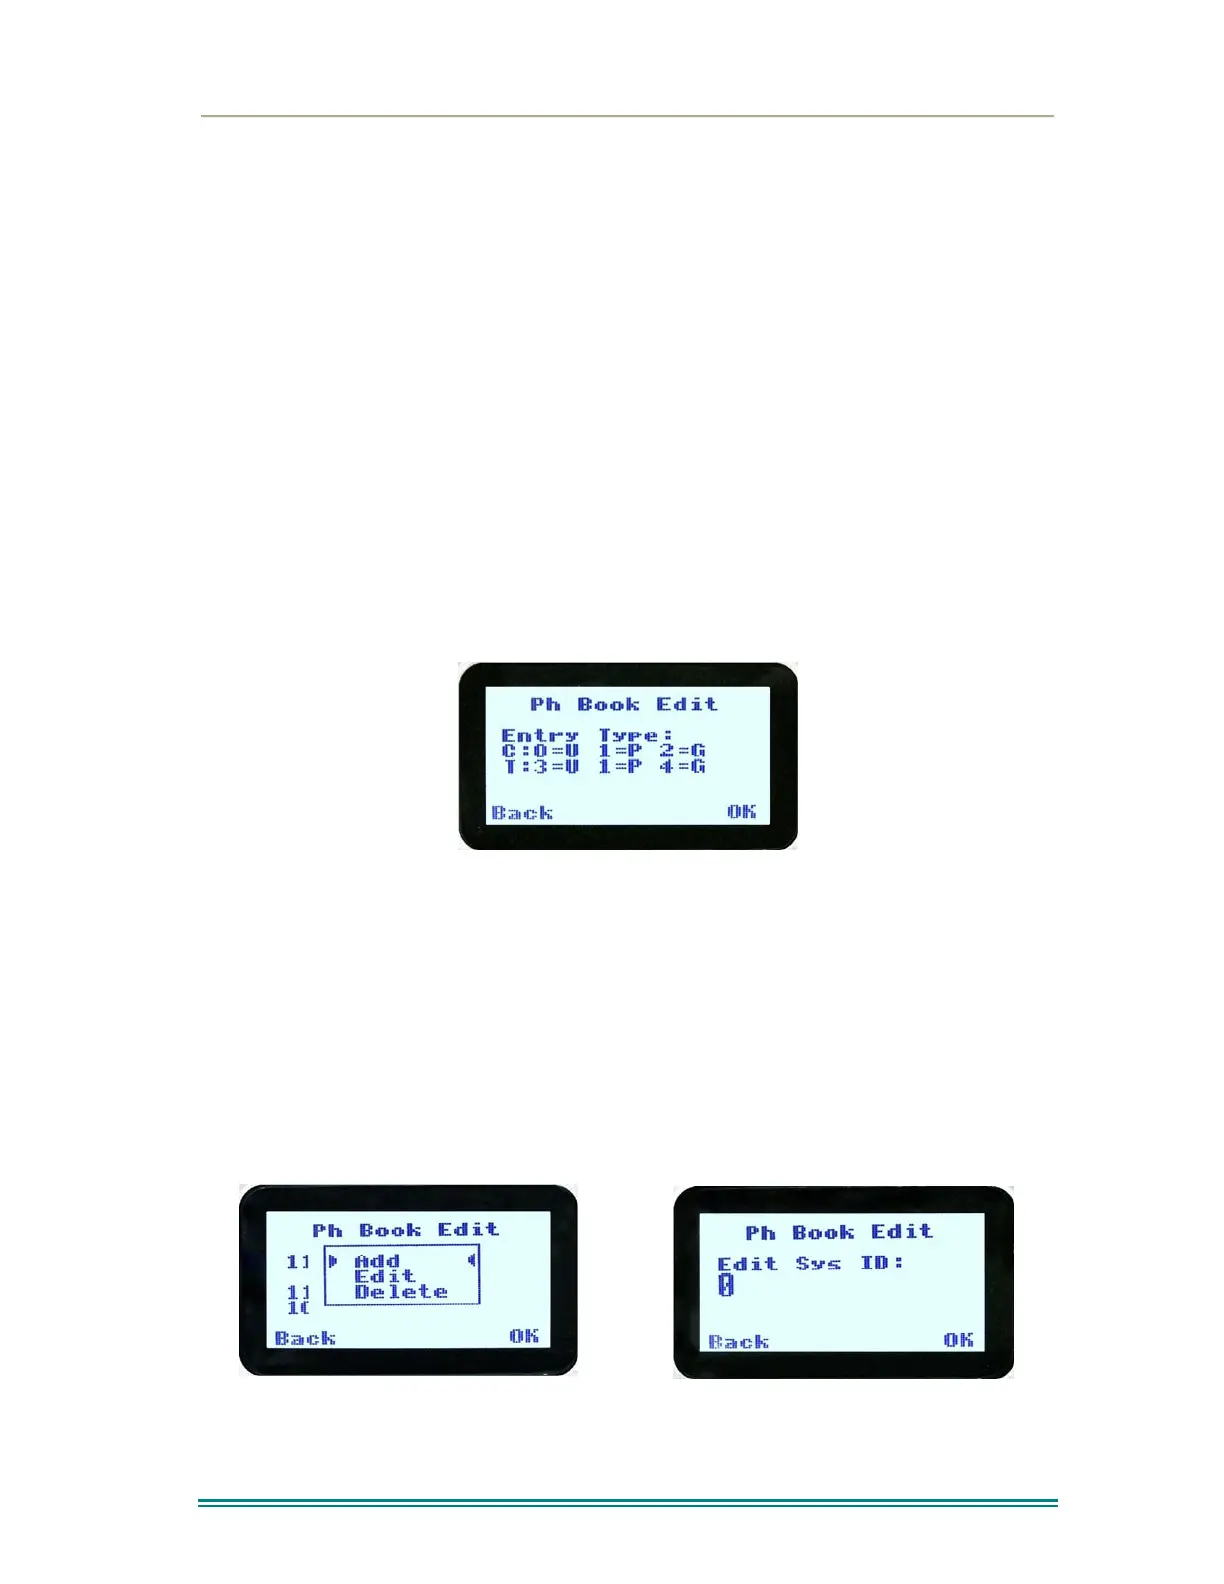
4.2.5.3 Phone Book Edit – Add New Phone Entry
The first edit screen is the entry type screen. There are 6 possible types of Phone Book
entries. These are:
Conv.Unit ID (Option 0) Conv.PSTN (Option 1) Conv.Group (Option 2)
Trunk Unit ID (Option 3) Trunk PSTN (Option 1) Trunk Group (Option 4)
Make the selection 0 – 5 and select OK.
From here, enter the System ID value as described in the Phonebook Edit section.
4.2.5.4 Phonebook Edit
This selection is used to edit an existing phone book entry. The operation is similar to adding
a phonebook entry in previous section. In this example, editing a P25 Trunked ID is shown.
It is also possible to edit a P25 Conventional ID and a P25 Group Entry. Note that some
steps will be missing for a Conventional channel.
The first step is to edit the System ID, if required.
Upon entering this screen, the current trunked System ID of the selected phone entry is
displayed.