Inserting and Removing
Before insertion, please clean your ear and make sure the
battery door is closed properly. Follow the procedure for
inserting your Simple Ear device listed below:
(Fig. A)
(Fig. B)
(Fig. C)
(Fig. D)
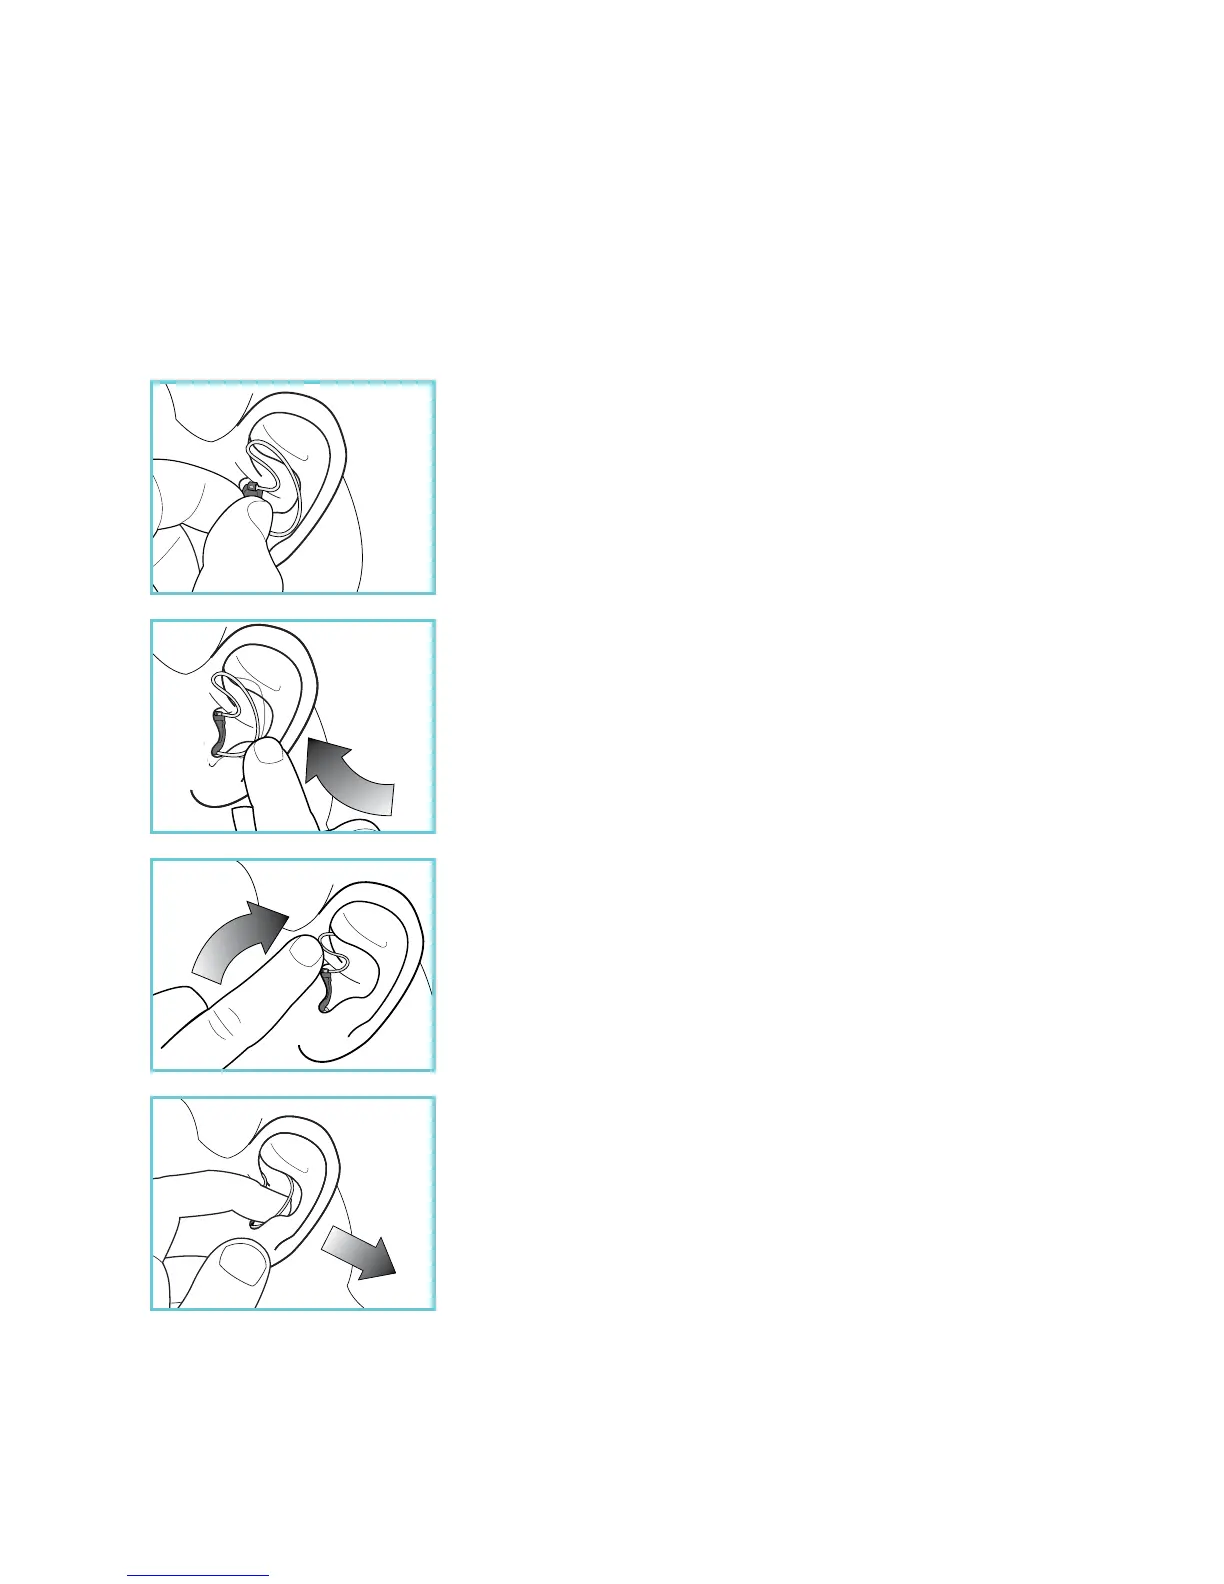
Step 1 - Hold the device with your
thumb and index nger. (Fig. A)
Step 2 - Insert the device into the
ear canal. (Fig. B)
Step 3 - Gently push the retention
tube into the back part of the ear.
(Fig. C)
Step 4 - Tuck the tip of retention
tube into the top/helix area of the
ear and run your nger around the
concha of your ear to ensure that
the lock is not slipping out
Removal - Run the index nger
around the edge of the concha until
the nger is able to pull up retention
tube, remove the device out from
the ear. (Fig. D)
NOTE: Some irritation may occur due to becoming
accustomed to wearing a hearing device. If swelling or
redness occurs, discontinue use and visit your Doctor.