31
Adjustments & Service
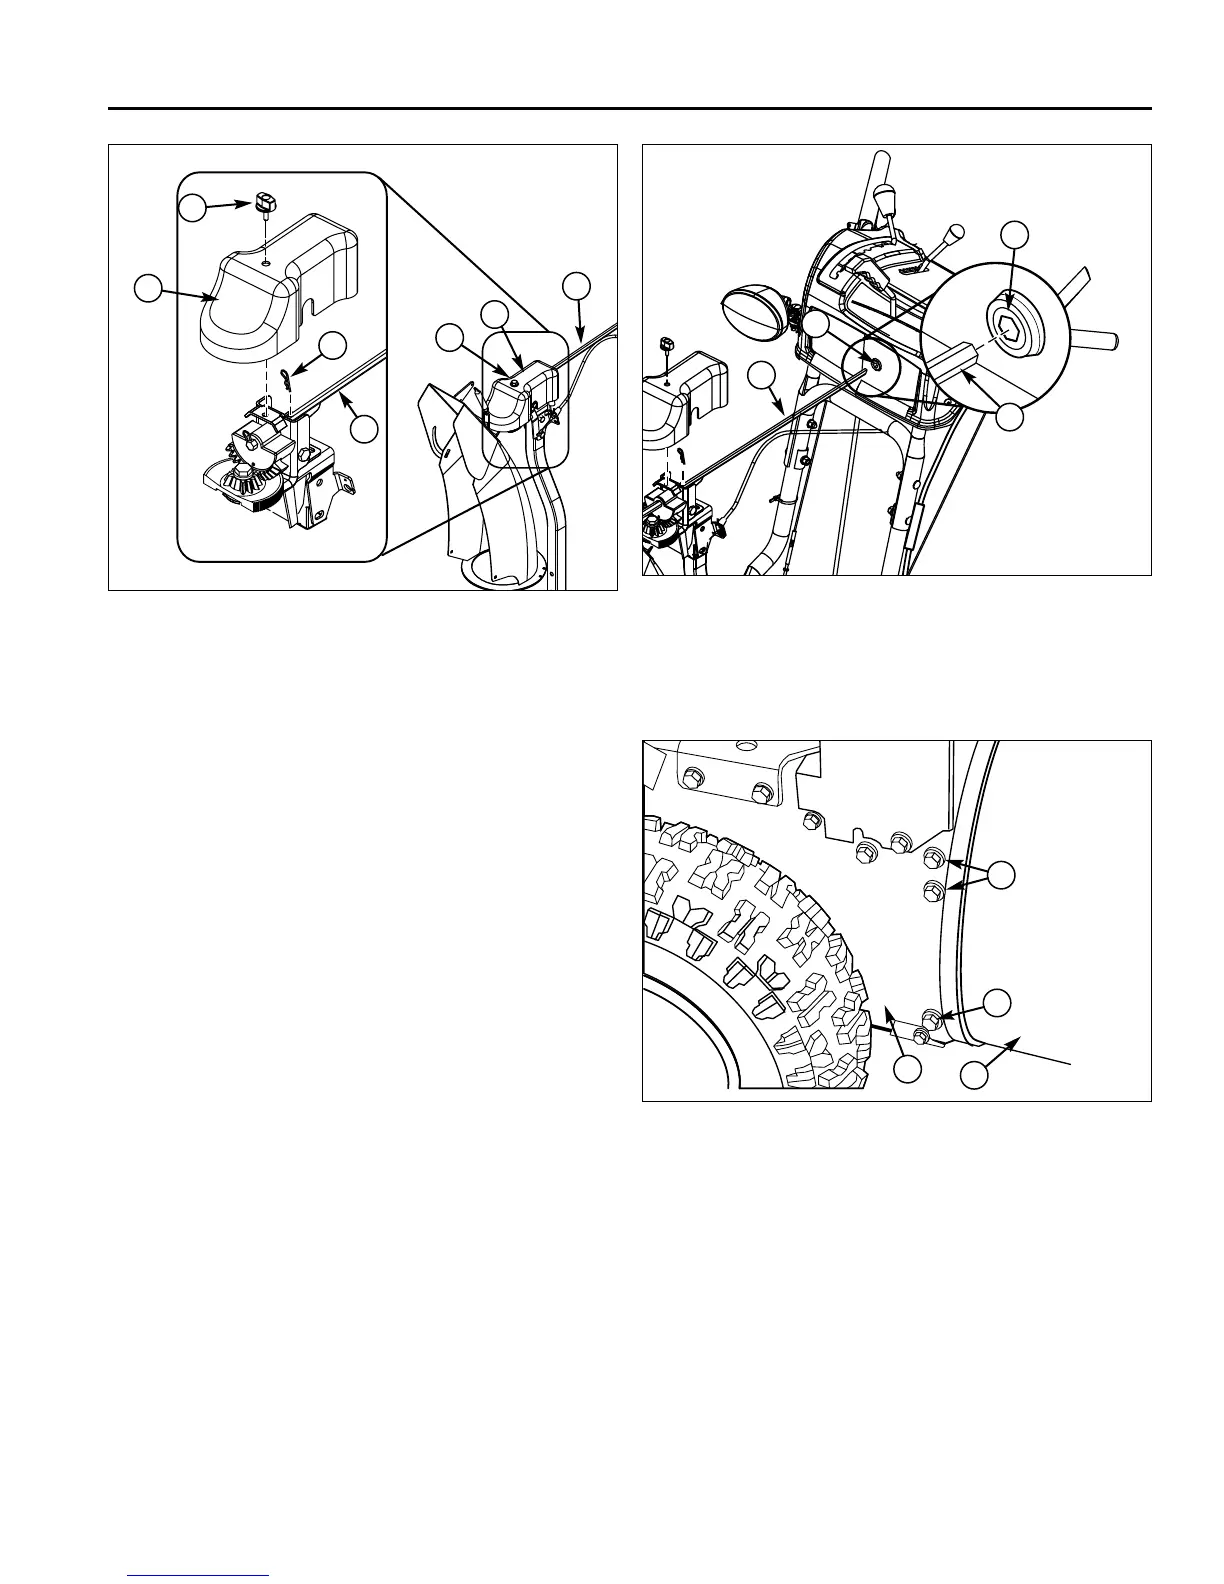
Figure 32. Frame and Axle Housing
A. Upper Capscrews
B. Lower Capscrews
C. Auger Housing
D. Frame
B
Figure 30. Spout Rotator Rod
A. Special Nut
B. Cover
C. Hair Pin
D. Spout Rotator Rod
A
B
C
D
A
B
D
A
D
C
Figure 31. Install Spout Rotator Rod
A. Hex Dash Opening
B. Spout Rotator Rod
15. Index or point the spout rotator to the center of the
machine so the rotator control is in the center of the
dash panel.
16. Slide spout rotator rod (B, Figure 31) into hex dash
opening (A).
17. Insert hair pin (C, Figure 30) into spout rotator rod
(D).
18. Install cover (B) and secure with special nut (A).
19. Install the auger drive belt (D, Figure 29) onto the
impeller pulley (H).
20. Slip the auger drive belt (D) under the idler pulley (K).
21. Adjust the auger drive belt. See “How To Adjust The
Auger Drive Belt” in the Service section.
22. Adjust the belt guide. See “How To Adjust The Belt
Guide” in the Service section.
23. Install the belt cover (A, Figure 24). Tighten screws
(B).
24. Check the adjustment of the cables. See “How To
Check And Adjust The Cables” in the Adjustment
section.
25. Install the bottom panel (B, Figure 28).
26. Tighten the capscrews (A) on each side of the bottom
panel (B).
27. Connect the spark plug wire.
A
B
A
B