12
www.simplicitymfg.com
INSTALLATION
A
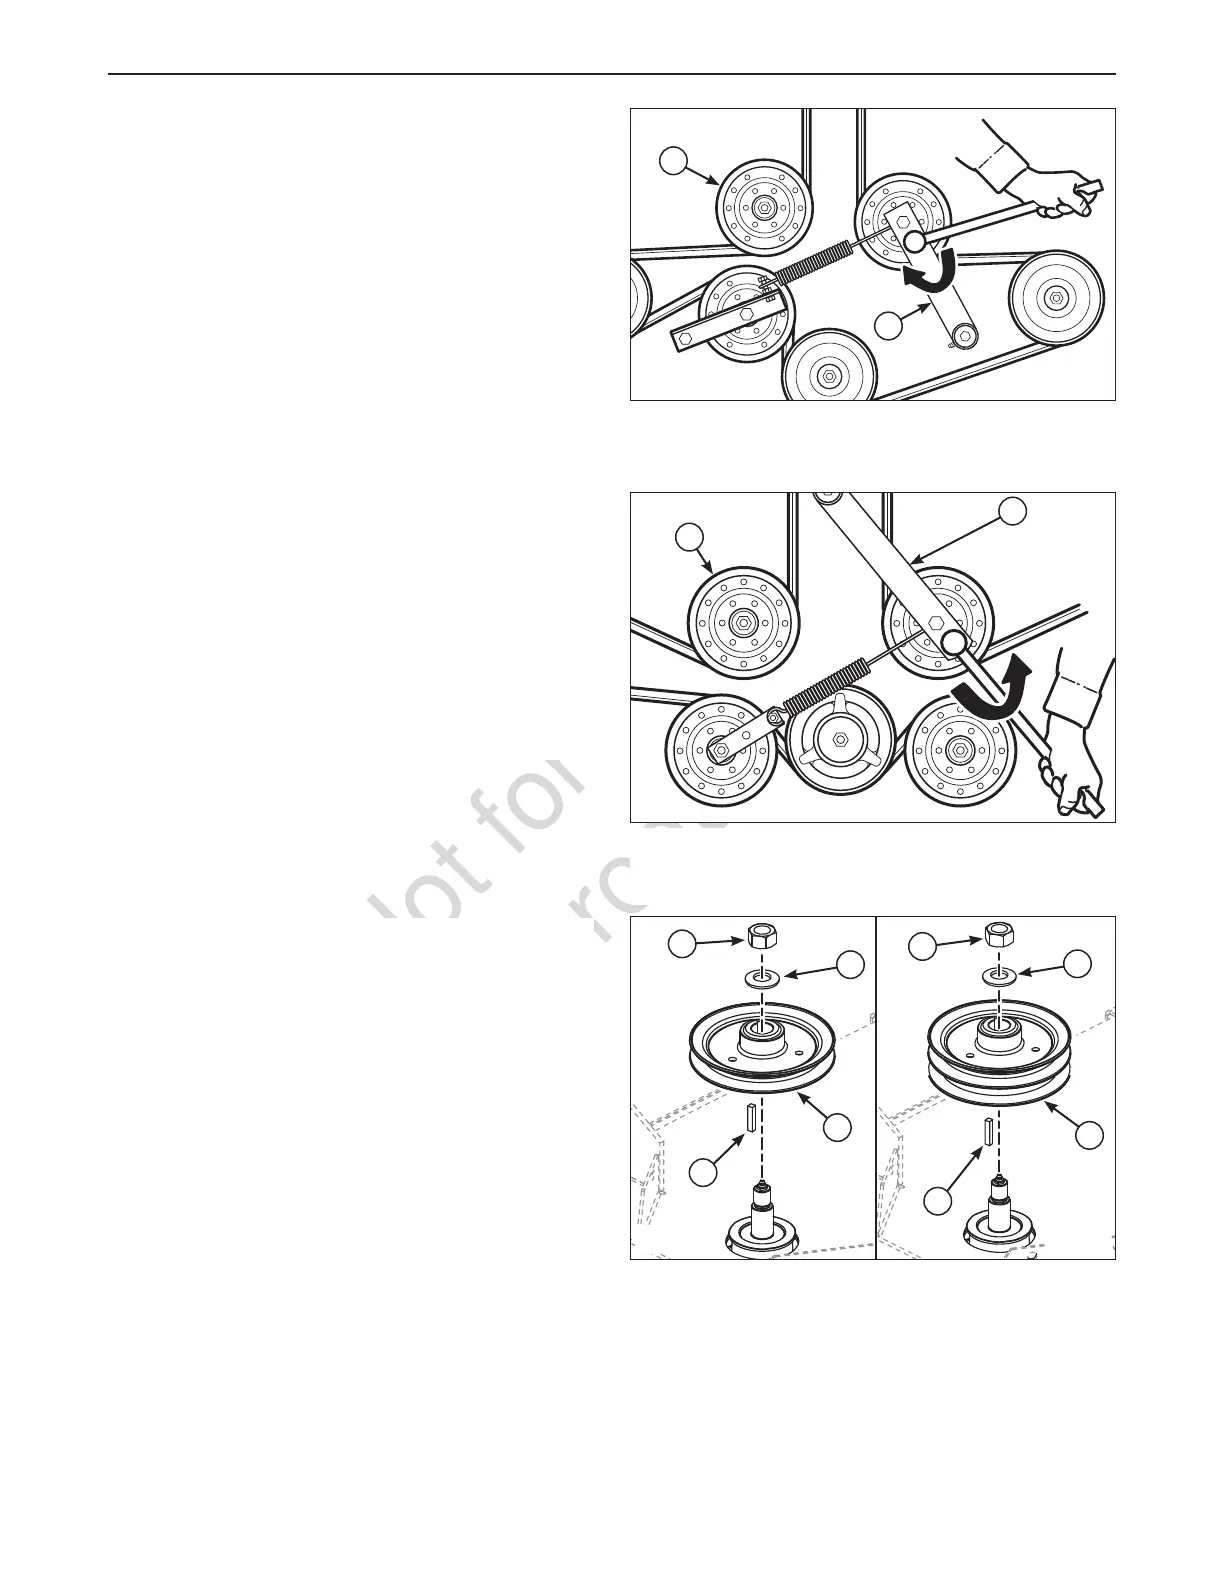
Figure 11. Mower PTO Belt
A. Idler Arm
B. Stationary Idler Pulley
B
Remove the Spindle Belt
Models with 52” Mower Decks:
1. Using a 1/2” breaker bar, place the square end
in the square hole located in the end of the idler
arm (A, Figures 11). Carefully rotate the breaker
bar clockwise, which will relieve the tension on the
belt exerted from the idler arm.
2. Slide the drive belt over the edge of the stationary
idler pulley (B). Carefully release the tension on
the breaker bar. Remove the belt from the right-
hand (discharge side) spindle pulley.
A
B
Figure 12. Mower PTO Belt
A. Idler Arm
B. Stationary Idler Pulley
Models with 61” Mower Decks:
1. Using a 1/2” breaker bar, place the square end in
the square hole located in the end of the idler arm
(A, Figures 12). Carefully rotate the breaker bar
counter-clockwise, which will relieve the tension
on the belt exerted from the idler arm.
2. Slide the drive belt over the edge of the stationary
idler pulley (B). Carefully release the tension on
the breaker bar. Remove the belt from the right-
hand (discharge side) spindle pulley.
Figure 13. Switching the Spindle Pulley
A. 3/4-16 Hex Nut
B. 3/4” Spring Washer
C. Spindle Pulley
D. 1/4” Key
E. Double Spindle pulley
A
B
D
C
A
B
E
D
Remove the Spindle Pulley
1. Remove the 3/4-16 hex nut & 3/4” spring washer
(A & B, Figure 13) securing the spindle pulley (C)
to the spindle shaft. Use a 1” wrench on the flats
of the blade end of the spindle shaft to prevent the
shaft from spinning. Save the 1/4” key (D).
Install the Double Spindle Pulley
1. Install the double spindle pulley (E, Figure 13) and
1/4” key (D) onto the spindle shaft.
2. Install the 3/4” spring washer (B) with the cone
facing up. Install the 3/4-16 hex nut (A) and
torque to 85-90 ft. lbs (115-122 Nm). Use a 1”
wrench on the flats of the blade end of the spindle
shaft to prevent the shaft from spinning.
Remove
Install