2
Installation Instructions Hitch & Tube Group
Figure 4. Hitch w/ROPS Installation
A. Hitch & Plate E. Spacers
B. Pins, Hair F. Lockwashers, 1/2
C. Capscrews, Hex, G. Nut, 1/2-13
1/2-13 x 2-1/2 H. Pin, Clevis
D. Inner Supports I. ROPS Side Plate
B
A
H
C
E
F
G
D
I
Figure 5. Hitch w/3 Point Hitch Installation
A. Hitch & Plate C. 3 Point Hitch
B. Pins, Hair D. Clevis Pins
A
B
D
C
B
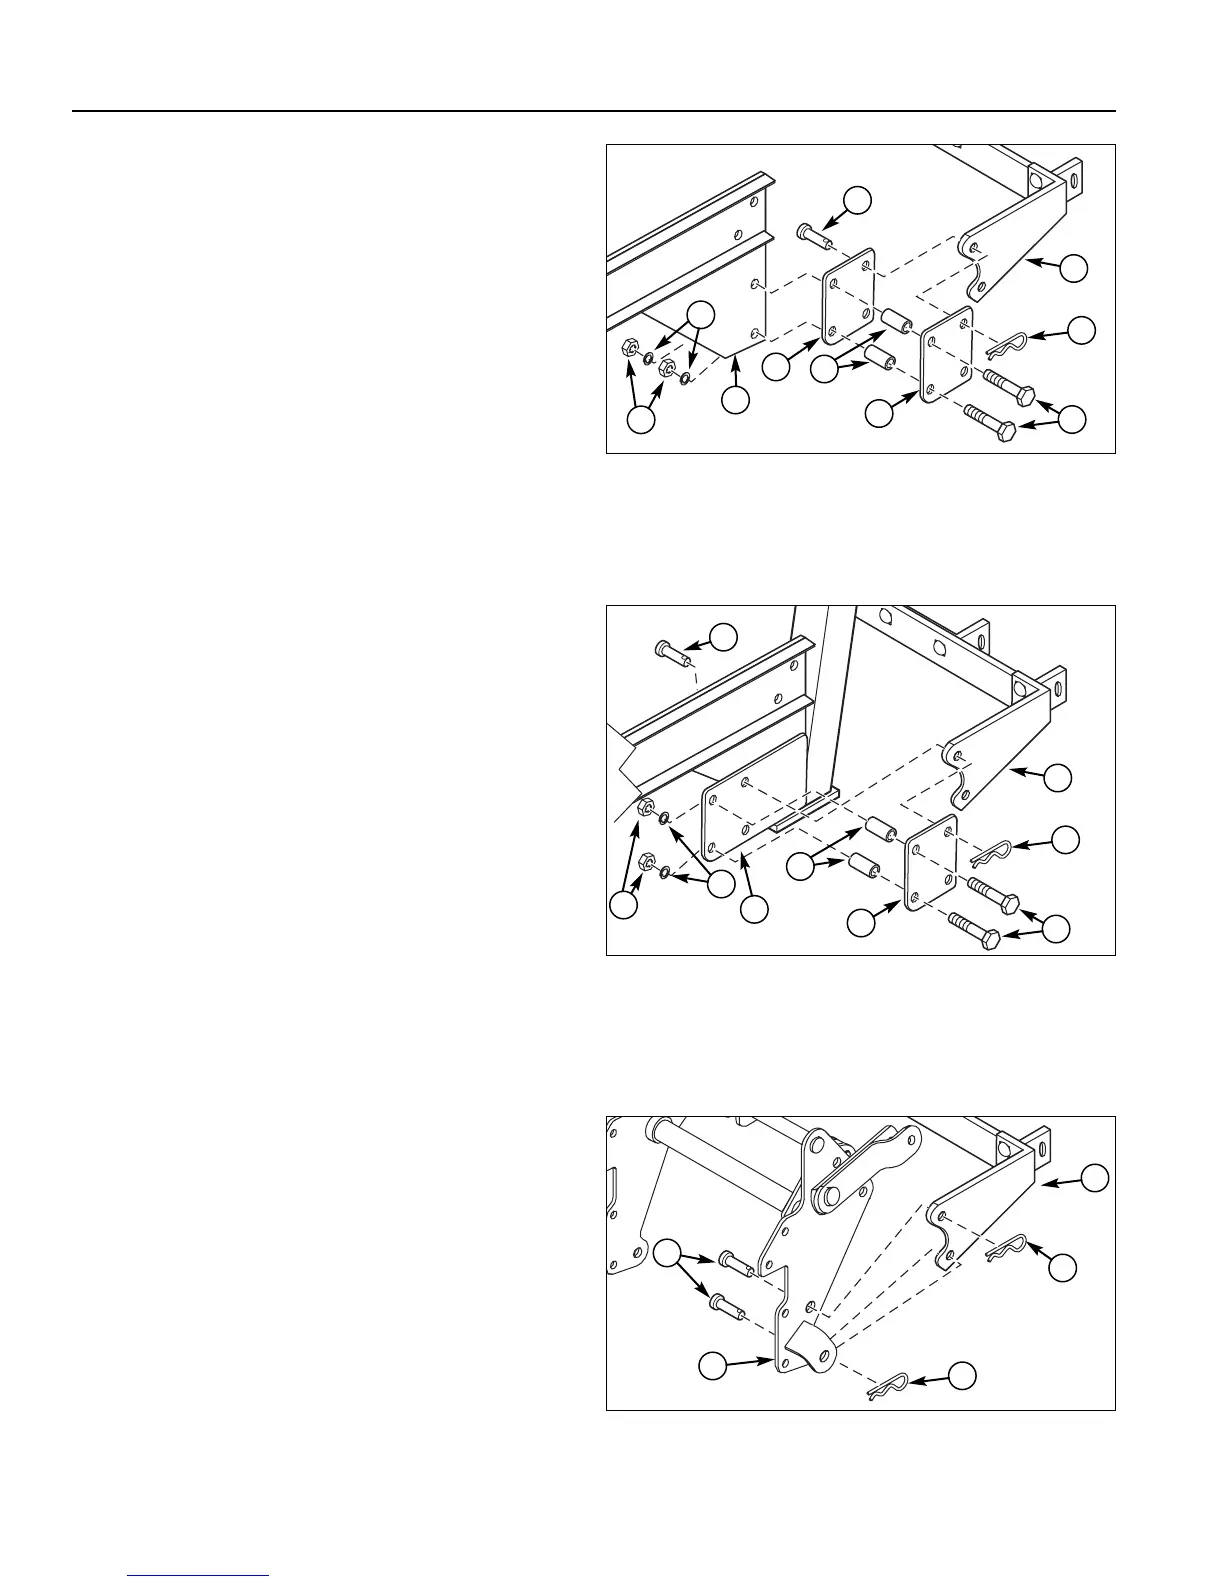
Figure 3. Hitch Standard Installation
A. Hitch & Plate E. Spacers
B. Pins, Hair F. Lockwashers, 1/2
C. Capscrews, G. Nut, 1/2-13
1/2-13 x 2-1/2 H. Pin, Clevis
D. Inner Supports I. Tractor Frame
B
A
C
E
D
D
F
G
H
I
Standard Units
1. Slide capscrews (C, Figure 3) through one inner sup-
port (D), spacers (E), a second inner support (D) and
tractor frame (I). Secure with lockwashers (F) and
nuts (G).
2. Install hitches and plate (A, Figure 3) by sliding clevis
pins (H) through tractor frame (I) as shown, one inner
support (D), hitch & plate (A) and second inner sup-
port (D). Secure with hair pin (B).
Units with ROPS
1. Slide capscrews (C, Figure 4) through the inner sup-
port (D), spacers (E) and ROPS side place (I).
Secure with lockwashers (F) and nuts (G).
2. Install hitches and plate (A, Figure 4) by sliding clevis
pins (H) through ROPS side plate (I), hitch & plate (A)
and inner support (D). Secure with hair pin (B).
Units with 3-Point Hitch
1. Install hitches and plate (A, Figure 5) by sliding clevis
pins (D) through 3 Point Hitch (C), and hitch & plate
(A). Secure with hair pins (B).
 Loading...


