Do you have a question about the Simplicity S210 and is the answer not in the manual?
Key safety warnings to prevent electric shock hazards when using the sewing machine.
Important precautions to prevent burns, fire, electric shock, or personal injury.
Reminder to keep safety instructions for future reference and safe operation.
An introductory message welcoming new users and encouraging familiarization with the machine.
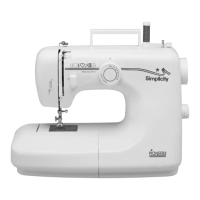
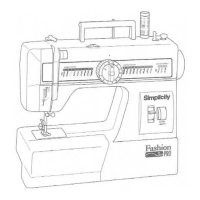
Identifies key components visible from the front of the sewing machine.
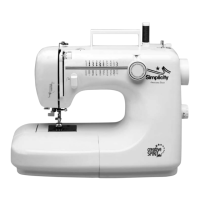
Identifies key components visible from the back of the sewing machine.
Detailed descriptions of numbered parts on the front of the sewing machine.
Detailed descriptions of numbered parts on the back of the sewing machine.
Lists and describes the various presser feet and accessories included with the machine.
Initial steps for preparing the sewing machine for operation.
Information on how and where to store sewing machine accessories.
Instructions for removing and attaching both snap-on and screw-on presser feet.
Guide for converting the machine to free-arm sewing for easier access to small areas.
Instructions on adjusting presser foot pressure for different fabric weights.
Explanation of how to lower the feed teeth for free-motion sewing or darning.
Steps to adjust the machine's leveling screw to ensure stability.
Guidance on adjusting the stretch stitch setting when stitches are not forming properly.
How to use the stitch selector dial to choose different stitch patterns.
Explanation of the 'N' (normal) and 'S' (stretch) settings for stitch ranges.
How to adjust the stitch width from 0 to 5 for various sewing applications.
How to adjust the stitch length from 0 to 4 for different stitch types.
Instructions on using the reverse lever to secure seams.
Description of seam guide markings on the needle plate for consistent seam widths.
General information on thread tension adjustments for balanced stitches.
Guidance on adjusting the upper thread tension dial for optimal stitch formation.
Instructions for adjusting the lower thread tension on the bobbin case.
Step-by-step instructions for winding thread onto a bobbin.
Guide to removing the bobbin from its case and inserting a new bobbin.
Instructions for correctly inserting the bobbin case into the sewing machine shuttle.
Detailed steps for threading the upper thread through the machine.
Procedure for bringing the bobbin thread up through the needle plate.
Essential tips to ensure successful and high-quality sewing.
Step-by-step guide on how to start sewing a seam on the machine.
Recommendations for matching needles, threads, and fabrics for best sewing results.
Using the straight stitch for seaming two or more layers of fabric.
Using the straight stitch for temporary basting seams.
Using the straight stitch for decorative topstitching and precise edgestitching.
Using the straight stitch for creating gathers and flounces.
Using the straight stitch with a zipper foot to insert zippers.
Using the straight stitch with a zipper foot to insert piping into seams.
Using the straight stitch with a hemmer foot for narrow hemming.
Using the zigzag stitch for overedging fabric edges to prevent raveling.
Using the straight stitch for reinforcing stress points like pocket corners.
Using the zigzag stitch for creating satin stitch appliqués.
Using the zigzag stitch with a button attaching foot to sew on buttons.
Using a narrow zigzag stitch for flexible and durable seams on knit fabrics.
Using the knit blindhem stitch for stretchy hems on knit fabrics.
Using the three-step zigzag for strong overcasting of seam allowances.
Using the three-step zigzag stitch for repairing small rips and tears.
Using the three-step zigzag to attach flat elastic to fabric.
Using the double action stitch for quick seaming of tricot and soft fabrics.
Using the double action stitch to create elastic casings for waistbands and cuffs.
Using the blindhem stitch for creating neat, invisible hems.
Using the blindhem stitch for creating folk art style appliqués.
Using the blindhem stitch to attach decorative braid to fabric surfaces.
Instructions for creating made-to-measure classic buttonholes.
Instructions for creating bolder buttonholes using cord or heavy thread.
Using the faggoting stitch for joining lightweight fabrics in heirloom sewing.
Creating a scallop hem finish using the satin stitch.
Applying decorative topstitching along finished edges of garments.
Using the cording foot to guide decorative threads for embellishment.
Using the triple stretch stitch for durable seams on bias curves.
Using the triple stretch stitch for seaming heavy or double knit fabrics.
Applying bold, contrasting topstitching using the triple stitch.
Using the rick rack stitch for overcasting heavier stretch fabrics.
Using the rick rack stitch for decorative edge finishes on neckbands and hems.
Using the arrowhead stitch to create decorative flat fell seams.
Using the honeycomb stitch for decorative topstitching over ribbon.
Recreating mock smocking effects using the honeycomb stitch.
Using the overcast stitch to seam and overcast rib knit trim simultaneously.
Creating decorative casings for narrow ribbon using elastic overlock stitch.
Using elastic overlock stitch to create a picot or scallop edge hem.
Using the feather stitch creatively for crazy quilt patchwork projects.
Applying decorative stitches to trims for clothing or home decor.
Applying decorative edging stitches to add color and dimension.
Creating cross stitch patterns on towels or fabric for a handmade look.
Techniques for free-motion sewing to create monograms on fabric.
Guide to free-motion sewing for outline quilting on fabric designs.
Using free-motion sewing for darning holes or tears in fabric.
Guidelines for selecting the correct needle size and how to replace it.
Instructions for cleaning lint and debris from the feed teeth and shuttle area.
Step-by-step guide for replacing the sewing machine's light bulb.
Recommendations for oiling the sewing machine for optimal performance.
Common causes and solutions for when the top thread repeatedly breaks.
Troubleshooting steps for issues related to lower thread breakage.
Identifying and resolving common reasons for skipped stitches.
Causes and solutions for needles breaking during sewing.
Diagnosing and fixing issues where stitching forms loops on the fabric surface.
Addressing problems causing seams to shrink or pucker during sewing.
Troubleshooting thread bunching or 'nesting' on the underside of fabric.
Solutions for inconsistent stitch quality and fabric feeding problems.
Diagnosing and resolving issues causing the machine to be noisy or run roughly.
| Brand | Simplicity |
|---|---|
| Model | S210 |
| Category | Sewing Machine |
| Language | English |