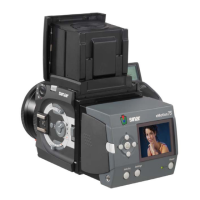
3.2 Sinar p3 View Camera
Assembly
The Adapter Plate is attached to the Sinarback by means of four recessed screws that are
supplied with it. In no case should the three red-sealed screws on the Sinarback be turned.
When these seals are broken, all Sinar Photography AG warranties become void.
A. Remove the CCD protective cover from the Sinarback Digital Back.
B. Attach the Sinarback eVolution to the Adapter Plate by first starting the
four screws loosely and only then tightening them gradually in several steps, alternating
these steps diagonally.
C. Before storing the Sinarback away, attach the CCD protective cover that is
supplied with it.
D. Couple the Sinarback eVolution 75H to your Sinar p3 view camera, by:
a) aligning the bottom edge of the Adapter Plate with the corresponding ledge of the
camera,
b) then press the Adapter Plate to the camera until it engages.
c) By grasping it, make sure that the Adapter Plate is engaged securely, so that the Sinar
back cannot fall off.
E. Attach the desired lens to the front standard of the camera and verify that the bellows
has been assembled correctly, so that the image data can be transmitted properly from
the Sinarback to the software.
Sinar Photography AG - Farbhofstrasse 21 - 8048 Zürich/Switzerland
Phone +41 (0)44 217 80 30 - Fax +41 (0)44 217 80 50 - contact@sinar.ch - www.sinar.ch
13.10.10 - Seite 6