EasyManua.ls Logo

Singer 101 Series - Page 12

Singer 101 Series
20 pages
Print Icon
To Next Page IconTo Next Page
To Previous Page IconTo Previous Page
Loading...
To
Remove
the
Cloth
Plate
Raise
the
needle
to
its highest
point,
also
raise
the
presser
foot.
Unscrew
the
bobbin
winder
spool
pin
and
take
out
the
four
screws
which
hold
the
cloth
plate
to
the
bed
of
the
machine,
then
raise
the
cloth
plate
clear
of
the
stitch
regulator
and
draw
it
to the
left under
the presser
foot
to
remove
it
from
the
machine.
To
Time
the
Sewing
Hook
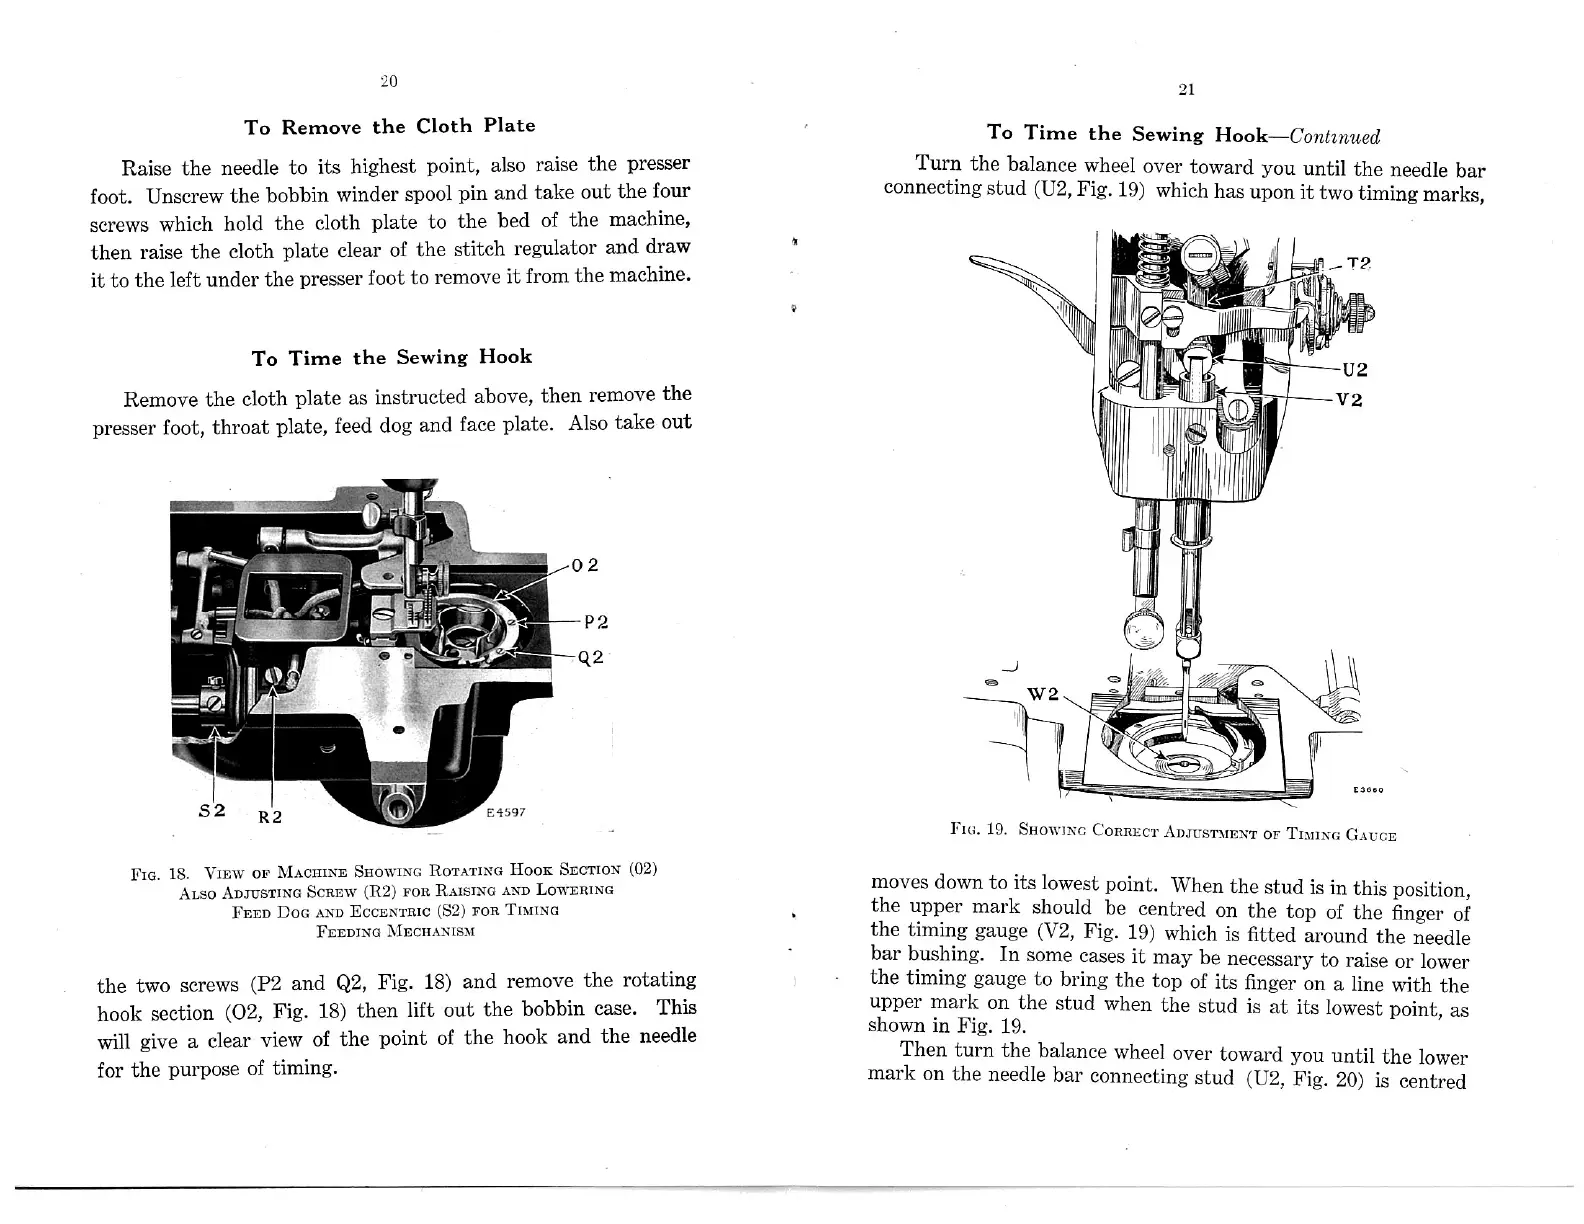
Remove
the
cloth
plate
as
instructed
above,
then
remove
the
presser
foot,
throat
plate,
feed
dog
and
face
plate.
Also
take
out
FIG.
18.
VIEW
OF
SHOWING
HOOK
SECTION
(02)
ALso
SCREW
FOR
AND LOWERING
FEED
Doc;
ECCENTRIC
FOR
TIMING
FEEDING
the
two
screws
(P2
and
Q2,
Fig.
18) and
remove
the
rotating
hook
section
(02,
Fig.
18)
then
lift out
the
bobbin
case.
This
will
give
a
clear
view
of
the
point
of
the hook
and
the needle
for
the
purpose
of
timing.
To
Time
the
Sewing
Turn
the
balance
wheel
over
toward
you
until
the
needle
bar
connecting
stud
(U2,
Fig.
19)
which
has
upon
it
two
timing
marks,
-
I
CORRECT
OF
TIMING
moves
down
to its
lowest
point
When
the
stud
i
'
'
'
.
s
in
this
pos1t10n,
the
upper
mark
should
centred
on
the
top
of
the
finger
of
the
timing
gauge
(V2,
Fig.
19)
which
is
fitted
around
the
needle
bai
bushing.
In
some
cases
it may
be
necessary
to
raise
or
lower
the
bring
the
top
of
its
finger
on
a
line
with
the
upper
mar
on
t e
stud
when
the
stud
is
at
shown
Its
lowest
pOInt,
as
Then
turn
the
balance
wheel
over
toward
you
until
the
lower
mark
on
the
needle
bar
connecting
stud
(U2,
Fig.
20)
is
centred
20
MACHINE
ROTATING
ADJUSTING
(R2)
RAISING
AND
(SQ)
MECHANISM
21
Hook—Continued
'
.
'
\
l
will
”III.
ell
/”
.. .,
E3650
F ‘ ‘ . , ‘ ,
I(-.
19. SHO“
no
ADJUSTMENT
GAUGE
'
be
timingkgaugehto
'
'
in
Fig,
19.