Do you have a question about the Singer 107G201 and is the answer not in the manual?
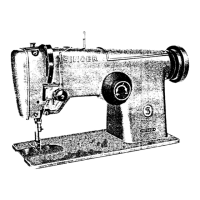
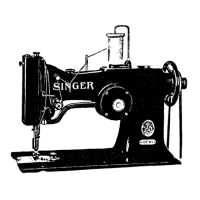
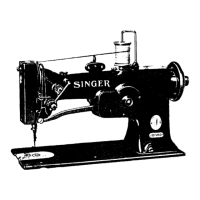
Lists general specifications like needle bar stroke, presser bar lift, and bed dimensions.
Explains the eccentric mechanism for zig-zag stitch width adjustment.
Specifies using Singer Oil "Type B or D" for machine lubrication.
Stresses the necessity of regular oiling for proper function and wear prevention.
Warns against operation without proper lubrication observed.
Specifies Singer Needles, Catalog 1901, chromium finish.
Advises selecting needle size based on thread fit through the eye.
Provides a chart correlating needle sizes with cotton and silk thread sizes.
Warns to wind synthetic threads with the smallest tension possible.
Steps to remove the bobbin case cap by operating the latch.
Securing the bobbin winder and placing the bobbin on its spindle.
Guides threading through tension bracket, discs, and to the bobbin.
Holding the bobbin and placing it into the bobbin case with tension spring forward.
Guiding thread through slots in the bobbin case edge.
Steps to place the threaded bobbin case onto the center stud and engage the latch.
Turning pulley until needle bar is at its highest point.
Loosening set screw, inserting needle to stop, and tightening screw.
Turning machine pulley until needle bar is at its highest position.
Turning pulley to lower and raise needle, then drawing up needle thread to catch bobbin thread.
Tensions depend on material used.
Regulating needle tension with thumb nut "AB" when presser foot is down.
Adjusting bobbin tension with screw "J" in the bobbin case cap.
Width can be set while machine is operating using knob "L".
Loosen nut "O", shift lever "N" on scale for width regulation.
Limits bight to a desired width.
Turn knob "T" at machine pulley for stitch length (forward feed only).
Limits stitch length to a certain number of stitches per inch.
Spring set for normal conditions, ensuring free movement and light tension.
Use thumb screw "AC" to increase (clockwise) or decrease (counter-clockwise) pressure.
Pressure should be as light as possible while ensuring proper feeding.
Adjustments tested only when needle bar frame is stationary for straight-away stitching.
Insert needle as far as it will go, ensure it is not bent.
Loosen pulley set screws "AR" and turn pulley until needle bar is at lowest position.
Turn hook until point "AK" is at needle center, 1/16 inch above eye.
Hook point should pass needle closely but not touch it.
To take up lost motion in feed driving and lifting connections.
Ensure underside of feed dog does not drop low enough to strike the hook.
Verify hook and needle timing before running belt and commencing sewing.
| Brand | Singer |
|---|---|
| Model | 107G201 |
| Category | Sewing Machine |
| Language | English |