EasyManua.ls Logo

Singer S-10 User Manual

Singer S-10
30 pages
To Next Page IconTo Next Page
Page #1 background imageLoading...
Page #1 background image
Service Manual
104 73 43-26
15 April 2014
S-10
© 2014 SVP Worldwide - All Rights Reserved.
SINGER is the exclusive trademark of The Singer Company S.à.r.l or its Aĸliates.
© 2014 The Singer Company Limited S.à.r.l or its Aĸliates. All rights reseved.
Question and Answer IconNeed help?

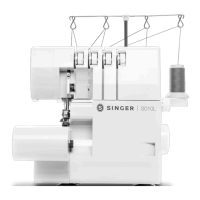
Do you have a question about the Singer S-10 and is the answer not in the manual?

Singer S-10 Specifications

General IconGeneral
BrandSinger
ModelS-10
CategorySewing Machine
LanguageEnglish

Summary

Replacing External Parts (1) Face Cover

Replacing the face cover

Procedure for removing and attaching the face cover.

Replacing External Parts (2) Bed Cover

Replacing the bed cover

Procedure for removing and attaching the bed cover.

Replacing External Parts (3) Front Cover

Replacing the Front cover

Procedure for removing and attaching the front cover.

Replacing External Parts (4) Rear Cover

Replacing the Rear Cover

Procedure for removing and attaching the rear cover.

Adjusting the Needle Drop Position

Adjusting the Needle Drop Position

Procedure to set the needle position relative to the needle plate hole.

Adjusting the Hook Timing

Adjusting the Hook Timing

Procedure to set the correct timing between needle and rotary hook.

Adjusting the Needle Bar Height

Adjusting the Needle Bar Height

Procedure to set the distance between needle eye and hook race.

Adjusting the Clearance between Needle and Hook

Adjusting the Clearance between Needle and Hook

Procedure to set the clearance between needle and rotary hook.

Adjusting the Backlash between the Rotary Hook Gear and Lower Shaft Gear

Adjusting the Backlash between the Rotary Hook Gear and Lower Shaft Gear

Procedure to adjust backlash between rotary hook and lower shaft gears.

Adjusting the Needle Stop Position

Adjusting the Needle Stop Position

Procedure to set the needle stop position above the needle plate.

Adjusting the Needle Thread Tension

Adjusting the Needle Thread Tension

Procedure to set the correct needle thread tension.

Adjusting the Tension Release Mechanism

Adjusting the Tension Release Mechanism

Procedure to adjust the tension disks' opening mechanism.

Replacing the Thread Tension Unit

Replacing the Thread Tension Unit

Procedure for removing and installing the thread tension unit.

Replacing and Adjusting the Needle Threader

Replacing and Adjusting the Needle Threader

Procedure for replacing and adjusting the needle threader components.

Adjusting the Height of the Embroidery Foot

Adjusting the Height of the Embroidery Foot

Procedure to set the correct height of the embroidery foot.

Replacing the Printed Circuit Board A

Replacing the Printed Circuit Board A

Procedure for removing and installing Printed Circuit Board A.

Replacing the LCD Module

Replacing the LCD Module

Procedure for removing and installing the LCD module.

Replacing the Printed Circuit Board F

Replacing the Printed Circuit Board F

Procedure for removing and installing Printed Circuit Board F.

Adjusting the Tension Solenoid

Adjusting the Tension Solenoid

Procedure to adjust the tension solenoid gap.

Replacing the DC Motor and Adjusting the Motor Belt Tension

Replacing the DC Motor and Adjusting the Motor Belt Tension

Procedure for replacing DC motor and adjusting belt tension.

Replacing the Carriage Unit

Replacing the Carriage Unit

Procedure for removing and installing the carriage unit.

Adjusting the Y-sensor

Adjusting the Y-sensor

Procedure to adjust the Y-sensor gap for home position.

Adjusting the X-sensor

Adjusting the X-sensor

Procedure to adjust the X-sensor gap for home position.

Adjusting the X and Y-sensors (Simple Adjustment)

Adjusting the X and Y-sensors (Simple Adjustment)

Procedure for simple adjustment of X and Y sensors.

Adjusting the Y-motor Gear

Adjusting the Y-motor Gear

Procedure to adjust Y-motor gear to reduce noise.

Adjusting the X-motor Gear

Adjusting the X-motor Gear

Procedure to adjust X-motor gear to reduce noise.

Adjusting the Y-carriage Supporter

Adjusting the Y-carriage Supporter

Procedure to eliminate vertical play in the Y-carriage.

Replacing the Switching Power Supply

Replacing the Switching Power Supply

Procedure for removing and installing the switching power supply.
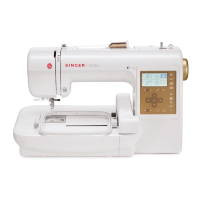
Related product manuals