10
Adjusting the Needle Stop Position
1. Remove the face cove, bed cover and front cover
(do not disconnect any connector).
2. Turn the power switch on and press the start/stop
button twice.
3. Turn the power switch on and press the start/stop
button twice.
4. Loosen the setscrew.
5. Turn the upper shaft shield plate in the
direction “B” if the needle stop position is higher
than 12.9 mm.
Turn the upper shaft shield plate in the direction
“A” if the needle stop position is lower than
14.4 mm.
6. Set the right side of the shield plate at the center
of the slit of the sensor and tighten the setscrew.
7. Turn the power switch off and attach the front
cover, bed cover and front cover, bed cover and
face cover.
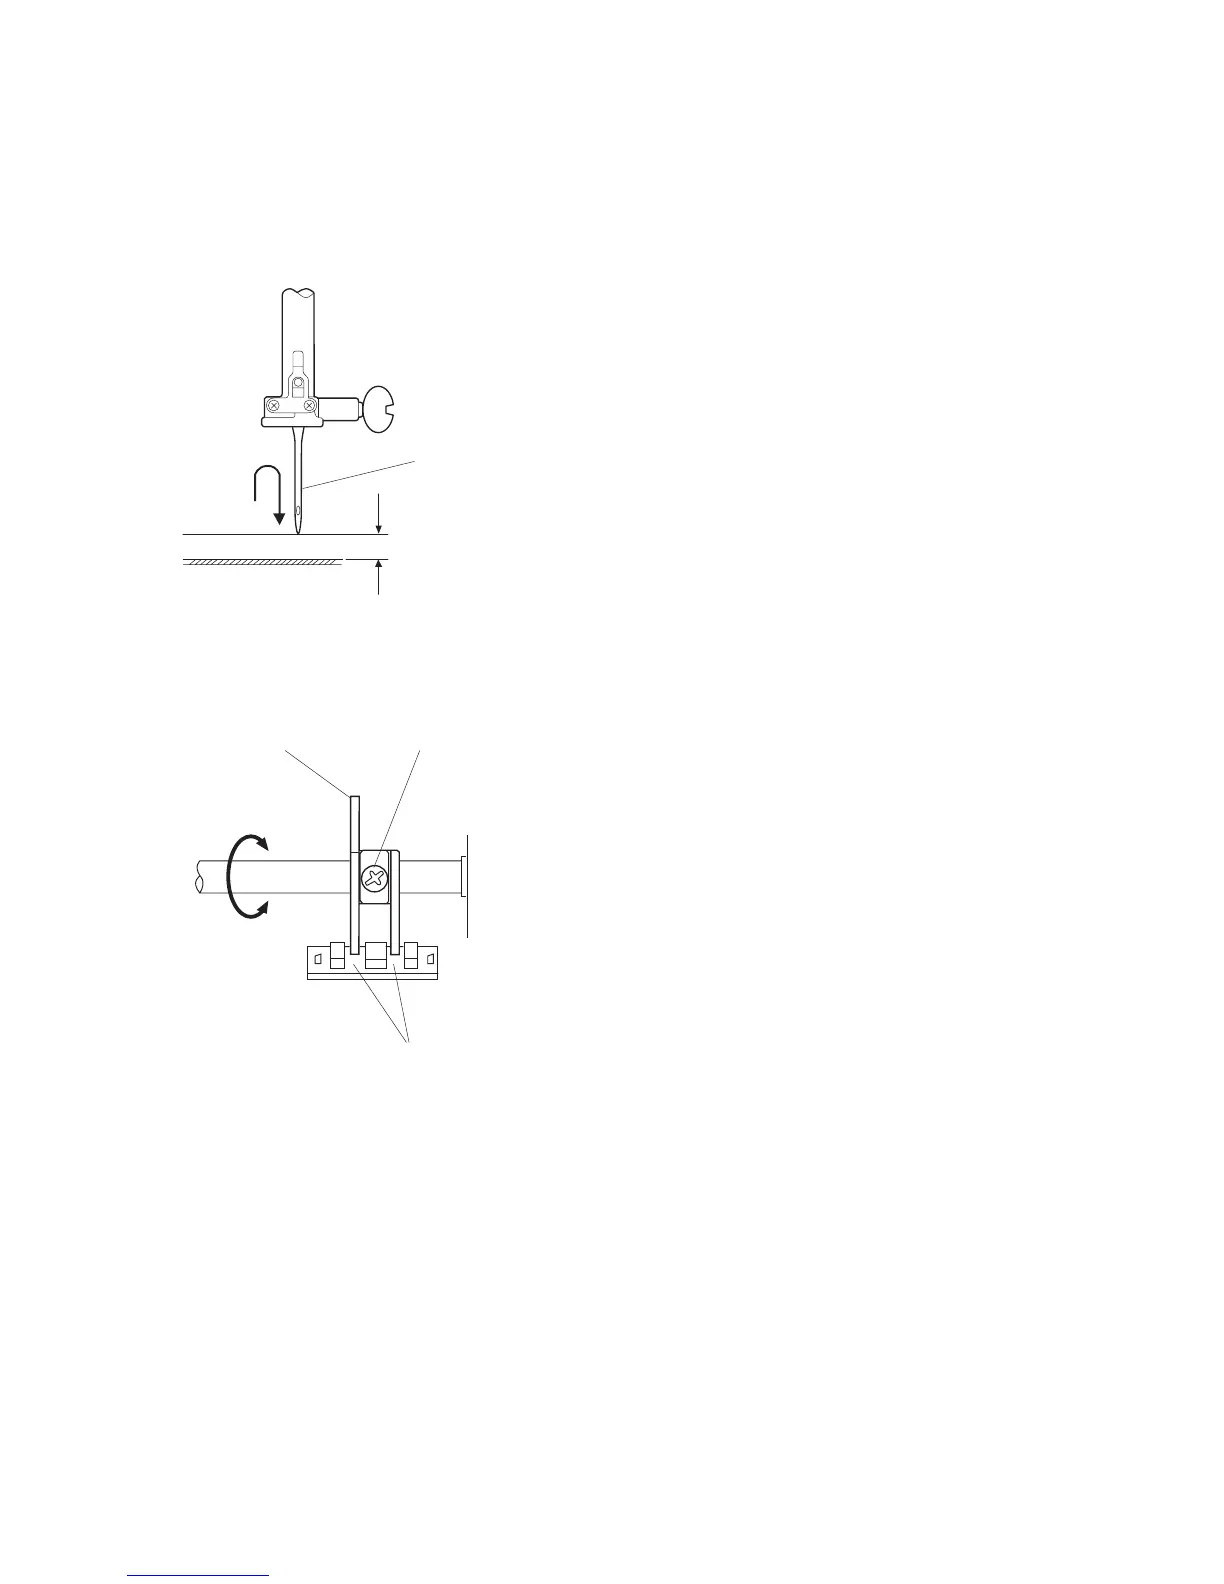
The needle should stop 12.9-14.4 mm above the needle plate surface when machine stops.
Setscrew
#11 needle
12.9-14.4 mm
Shield plate
Slit of sensor
B
A