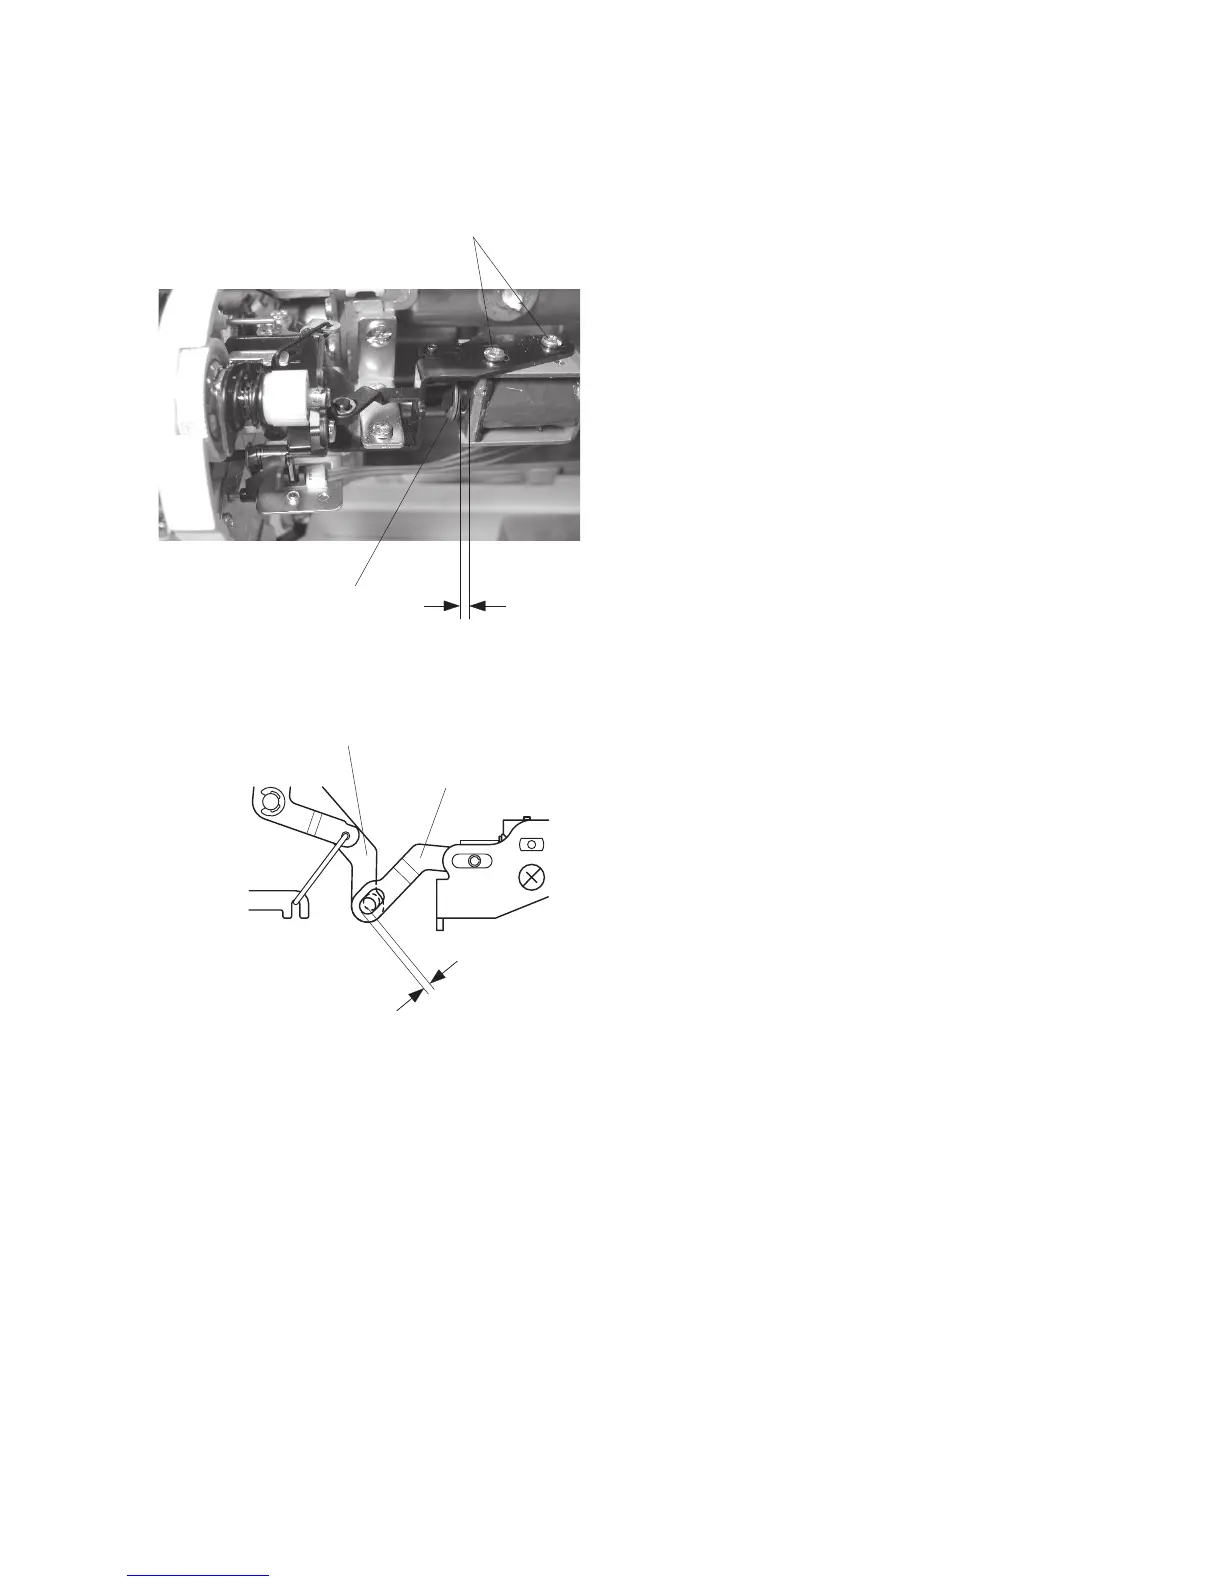
19
Adjusting the Tension Solenoid
1. Remove the face cover, bed cover and front cover.
2. Lower the presser foot lifter.
Loosen the 2 setscrews.
3. Slide the solenoid to make a 1.6 mm gap between
the solenoid and snap ring while shifting the sole-
noid to the right (See fig. A).
4. Tighten the setscrews.
5. Attach the front cover.
Setscrews
1.6 mm
Snap ring
Shift the solenoid to the right to eliminate the gap.
Thread tension release base
Thread tension release rod
Fig. A