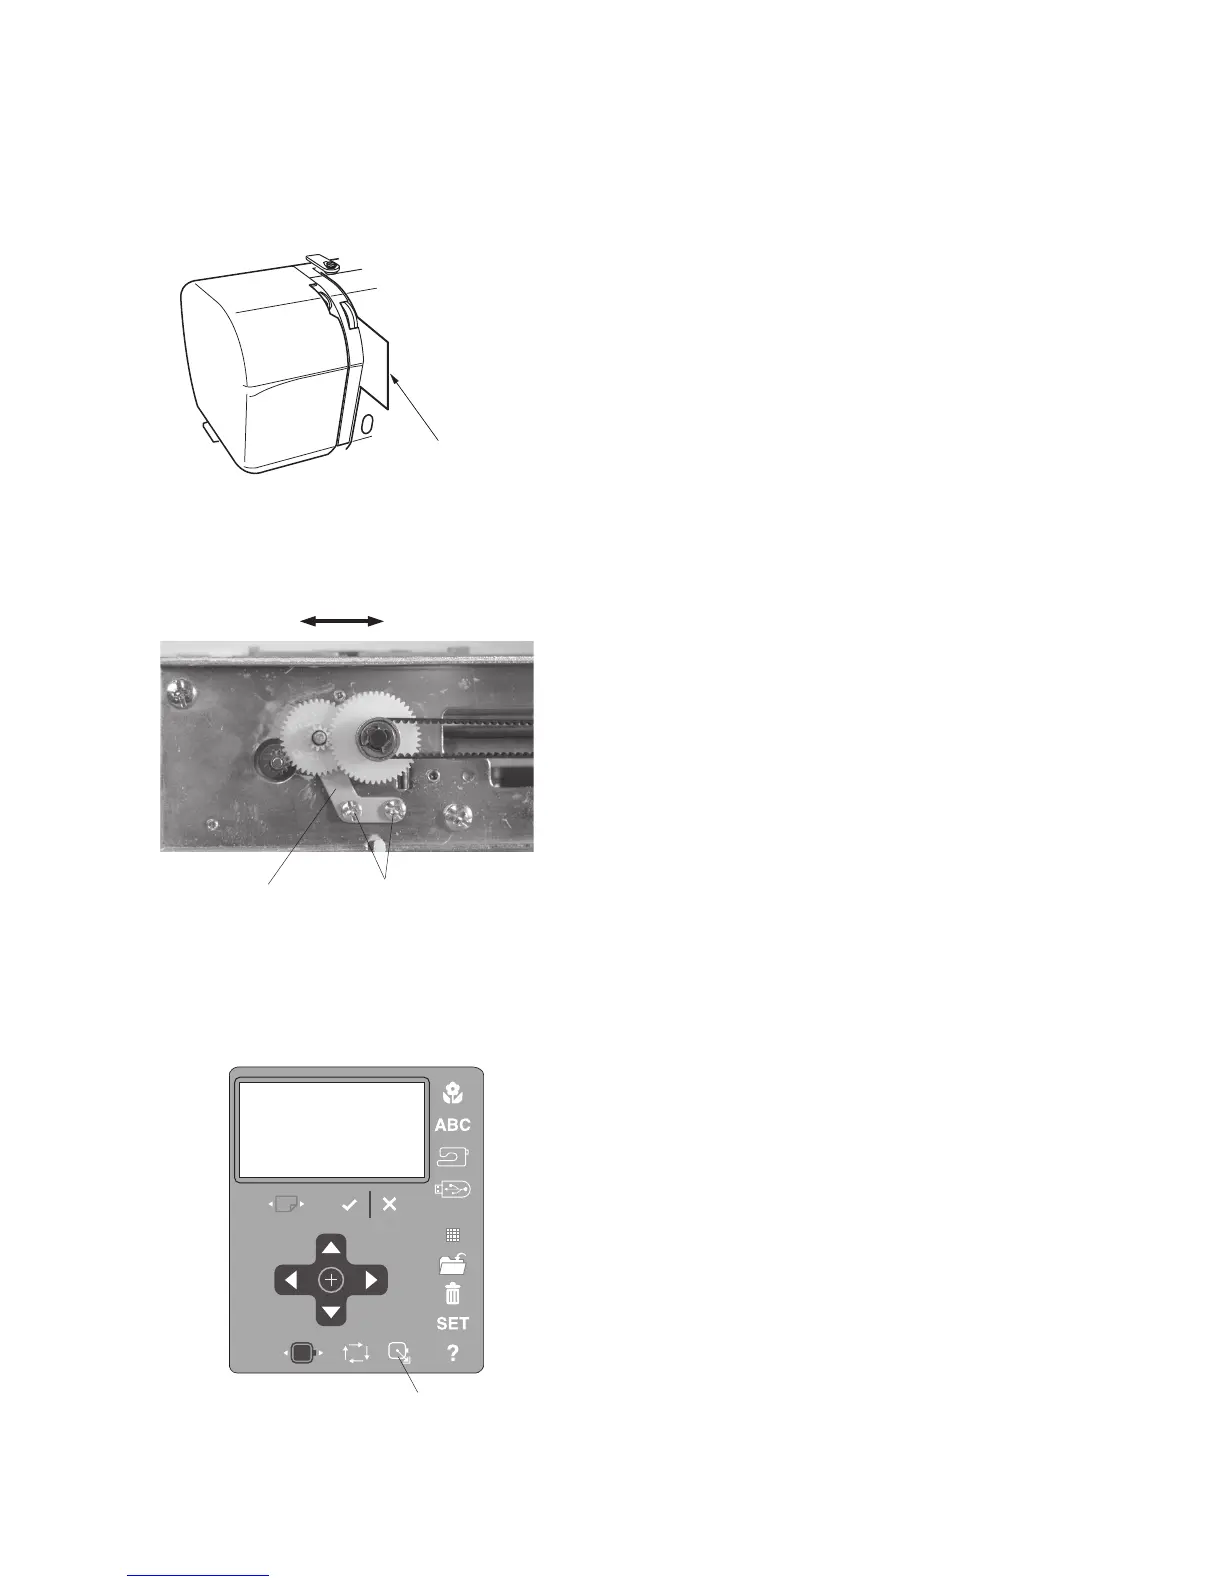
26
Adjusting the X-motor Gear
1. Remove the face cover, bed cover and front
cover (do not disconnect the connectors).
2. Turn the power switch on and press the lettering
key and select Gothic font.
Enter 3 large “A” and press the OK key.
3. Insert a piece of paper between the tension disks
to unable the thread sensor and lower the presser
foot.
4. Run the machine and loosen the setscrews.
While the carriage is moving in the direction of
the arrow, adjust the idler position so the gear
noise is lowest and tighten the setscrews.
5. Attach the carriage unit, front cover, bed cover
and face cover.
6. Press the home position key to move the carriage
to the home position.
7. Turn the power switch off and remove the piece
of paper.
If the machine is noisy when sewing an embroidery design, adjust the X-motor gear as
follows.
Carriage
movement
Setscrew
Home position key
Piece of paper
Idler gear set plate