24
Adjusting the X and Y-sensors (Simple Adjustment)
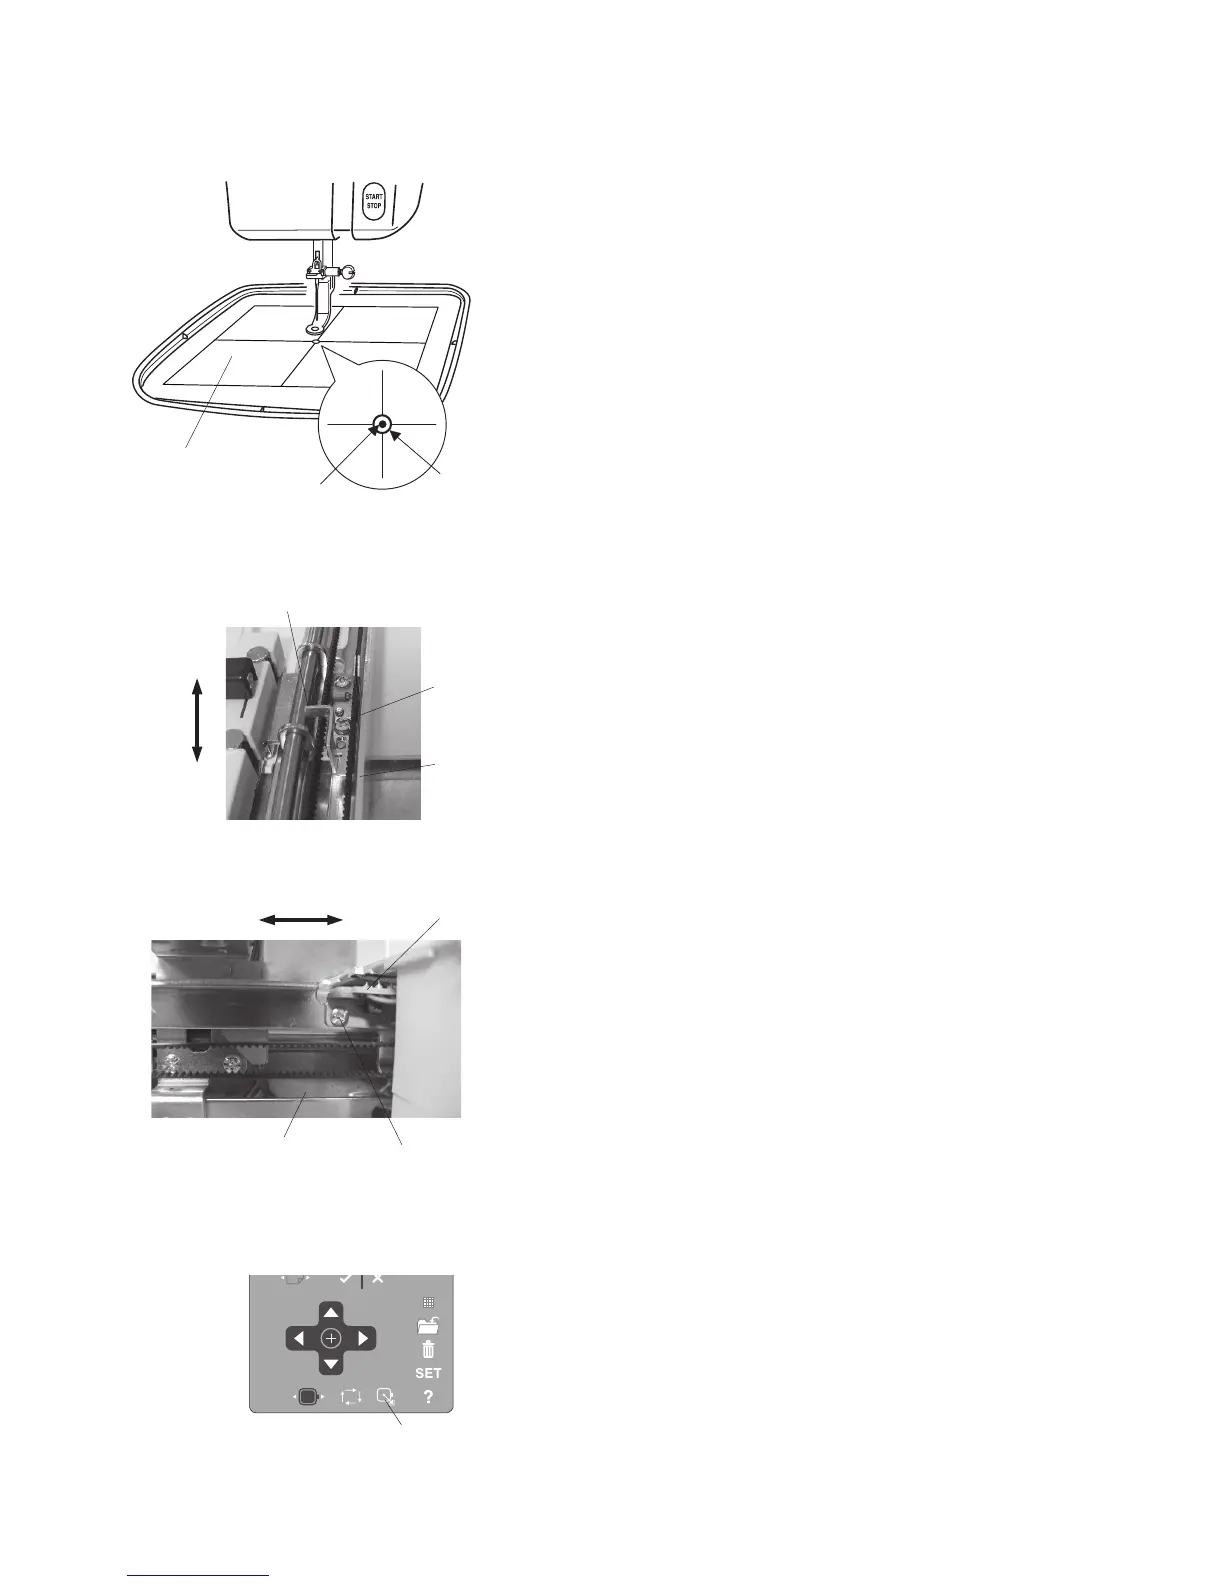
1. Remove the bed cover and carriage cover.
2. Attach the hoop to the carriage and place the
template on the hoop.
3. Turn the power switch on and select the built-in
design pattern #1.
4. Turn the hand wheel to lower the needle bar.
Check if the needle drops in the center of the hole
in the template.
5. If the needle does not drop in the center, turn the
power switch off and adjust the position of the
Y-shield plate or X-sensor (refer to the previous
pages).
6. Turn the power switch on and select pattern #1.
Check if the needle drops in the center of the
hole.
7. Press the home position key to move the carriage
to the home position.
8. Turn the power switch off and detach the hoop.
Attach the carriage cover and bed cover.
If the needle is off the center to aft:
.................Move the Y-shield plate in the direction A.
If the needle is off the center to forward:
.................Move the Y-shield plate in the direction B.
If the needle is off the center to the left:
....................... Move the X-sensor in the direction C.
If the needle is off the center to the right:
....................... Move the X-sensor in the direction D.
Template
Needle
Hole in the template
B
A
C D
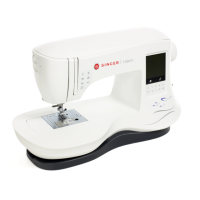
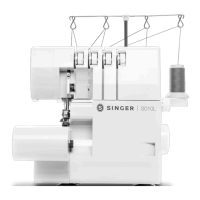
Y-shield plate
Home position key
X-sensor
Setscrew (A)
Setscrew (B)
Y-carriage
X-carriage