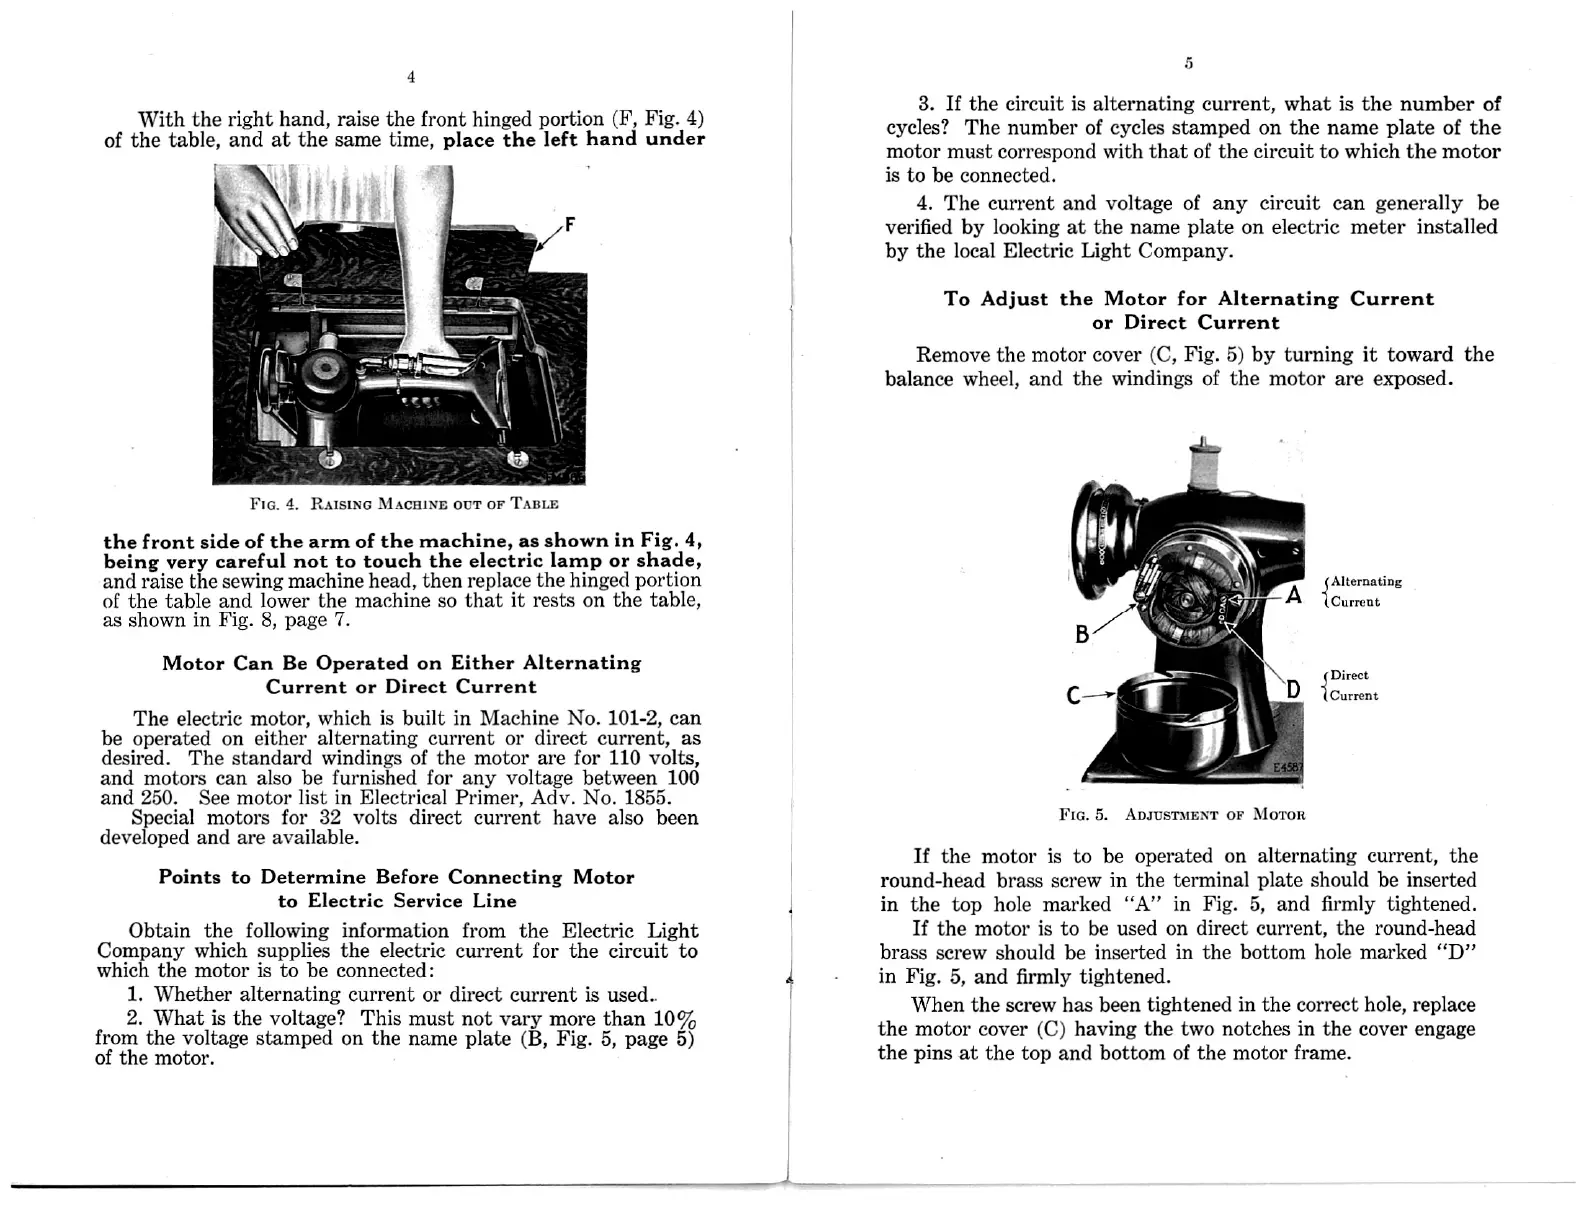
With
the right
hand,
raise
the front hinged portion
(F, Fig. 4)
of the table, and
at the same time, place the
left
hand
under
FIG. or
TABLE
the front side
of the arm
of the machine,
as shown
in Fig. 4,
being very
careful not
to
touch
the electric
lamp or shade,
and
raise the sewing
machine head, then replace
the hinged
portion
of the table and lower the
machine so that it
rests on the table,
as shown in Fig. 8, page
7.
Motor Can Be
Operated on Either
Alternating
Current
or Direct Current
The
electric motor,
which is built in Machine No. 101-2, can
be
operated on either alternating current or
direct current, as
desired.
The standard windings of the motor are for 110 volts,
and motors can
also be furnished for any voltage between 100
and 250. See motor list in Electrical
Primer, Adv. No. 1855.
Special motors for 32 volts direct current have also been
developed and are available.
Points to Determine Before Connecting
Motor
to Electric Service Line
Obtain the following information from the Electric Light
Company which supplies the electric current
for the circuit to
which the motor is to be connected:
1. Whether alternating current or
direct current is used..
2. What is
the voltage? This must
not vary more than 10%
from
the voltage stamped on the
name plate (B, Fig.
5, page 5)
of the motor.
3. If the circuit is alternating current, what is the number of
cycles?
The number of cycles stamped on the name plate of the
motor must correspond with that of the circuit to which the motor
is to
be connected.
4. The current and voltage of any circuit can generally be
verified by looking at the name plate on electric meter
installed
by the local
Electric Light Company.
To
Adjust the
Motor for Alternating
Current
or Direct
Current
Remove the motor
cover (C, Fig. by turning it toward the
balance wheel, and the
windings of the motor are exposed.
Current
FIG. 5.
or
If the motor is to
be operated on alternating current,
the
round-head
brass screw in
the terminal plate should be inserted
in
the
top
hole marked “A"
in Fig. 5, and firmly tightened.
If the motor is to be used on direct
current, the round-head
brass screw should be inserted in the bottom hole marked
“D”
in Fig.
5, and firmly
tightened.
When the screw has been tightened in the correct hole, replace
the motor cover (C) having the two notches in the cover engage
the pins at the top and bottom of the motor frame.
4
4.
Rusmc MACHiNE our
.')
5)
{Alternating
Current
\D {Direct
ADJUSTMENT
Moron
 Loading...