Do you have a question about the Singer 145W204 and is the answer not in the manual?
Details Type B and Type D oils for manufacturing machines, highlighting benefits like stain prevention.
Lists Type E thread lubricant, Type F motor oil, gear lubricant, and ball bearing lubricant for various applications.
Identifies the specific Singer sewing machine models covered by these instructions.
Details the specifications of the 145w204, a two-needle lock stitch machine for heavy-duty work.
Details the specifications of the 145w304, a long-arm variant used for large work like door panels.
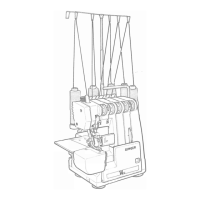
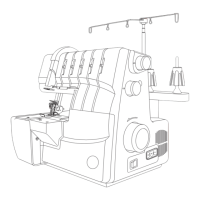
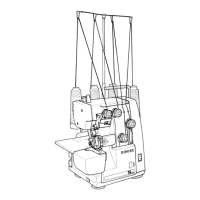
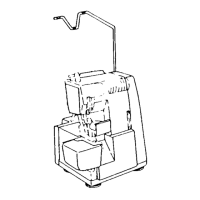
Illustrates specific points on the machine where oil should be applied for effective lubrication.
Details the daily oiling requirement for the felt pad in the bobbin case for smooth operation.
Explains a method to identify the twist direction (left or right) of a thread using a simple test.
Instructions on setting up and operating the bobbin winder for the 145w204 model.
Details how to adjust the bobbin tension screw and bracket for even thread winding.
Instructions on setting up and operating the bobbin winder for the 145w304 model.
Step-by-step guide on inserting bobbins into the bobbin case and threading them correctly.
Illustrates the correct way to thread the bobbin for proper tension and sewing.
Shows a diagram of how the bobbin case should be threaded with the thread passing through slots.
Guides the user through the specific path for threading the left-hand needle, including oiler and guides.
Details the thread path for the right-hand needle, covering oiler, guides, and tension discs.
Describes the method of bringing bobbin threads up to the needle threads for sewing.
Identifies the controls (plunger J, button K) used for regulating stitch length for forward/backward needle and feed dog movement.
Warns against changing needle movement without also changing feed dog travel to maintain timing.
Illustrates visual cues for perfect, tight needle, and loose needle thread tensions.
Provides instructions on adjusting needle and bobbin thread tensions using specific nuts and screws.
Details how to adjust the needle bar rock frame and shaft to achieve the correct presser bar distance.
Describes loosening gears and tapping them to align hook points with needle eyes for correct timing.
Explains how to adjust hook saddles to ensure hooks run close to needles without striking.
Describes the purpose of the needle guard in preventing needle strikes on the hook.
Explains how to adjust the feed dog’s position by loosening a screw on the feed lifting cam fork.
Explains loosening screws and turning adjusting screws to take up play in the feed eccentric.
Instructions for removing the arm shaft connection belt, with a caution about pinching.
Details aligning the timing plate and collar arrows to ensure correct feed timing after belt replacement.
Guides on drawing back slides, pressing lock stud, and turning pulley to re-engage the clutch.
Explains loosening the bushing screw and tapping the bushing to set backlash between gears.
Provides a table of hook saddle bearing part numbers for different gauge ranges.
| Brand | Singer |
|---|---|
| Model | 145W204 |
| Category | Sewing Machine |
| Language | English |