Do you have a question about the Singer 241-13 and is the answer not in the manual?
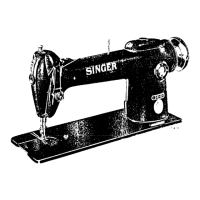
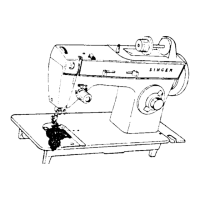
Details the different classes of Singer 241 machines, including work type, stitches per inch, and presser bar lift.
Specifies the maximum operating speed in stitches per minute for different models of the Singer 241 machine.
Emphasizes using only Singer parts and needles for optimal machine performance and longevity.
Instructions on how to adjust the knee lifter mechanism for proper operation, including setting stop screws.
Details on the automatic lubrication system's oil reservoir, fill levels, and recommended oil types.
Guidance on checking the oil flow through the window to ensure proper lubrication during operation.
Advice on lubricating specific parts before operating a machine that has been idle for an extended period.
Lists recommended needle classes and sizes for various types of work and thread materials.
Specifies the correct thread twist (left or right) for the needle and bobbin for optimal stitching.
Key operational advice including balance wheel direction, avoiding operation without fabric, and fabric feeding.
Detailed instructions on how to properly remove the bobbin case from the sewing hook.
Instructions for attaching and positioning the bobbin winder mechanism for winding bobbins.
Guidance on threading the bobbin winder and adjusting thread tension for even bobbin winding.
Step-by-step instructions for placing the bobbin into the bobbin case correctly.
Detailed process for threading the bobbin case, including tension spring and delivery eye.
Instructions on how to insert the threaded bobbin case back into the machine.
Procedure for installing the needle into the needle bar at the correct height and orientation.
Detailed, step-by-step guide for routing the upper thread through the machine's components.
Instructions on how to bring the bobbin thread up through the throat plate to meet the needle thread.
Guidance on how to start sewing after preparing the machine and threads.
Steps for properly removing the sewn material from the machine.
Illustrates the appearance of a perfect stitch where needle and bobbin threads interlock correctly.
Shows the stitch appearance when the needle thread tension is too tight or bobbin tension too loose.
Shows the stitch appearance when the bobbin thread tension is too tight or needle tension too loose.
Instructions on how to increase or decrease the tension of the needle thread.
Instructions on how to increase or decrease the tension of the bobbin thread using the tension screw.
Details on how to adjust the pressure applied to the material by the presser foot.
Instructions on how to change the stitch length using the stitch regulator plunger.
Guidance for mechanics on setting and adjusting the thread take-up spring for correct operation.
Information on stop screws that limit the maximum stitch length on the feed eccentric.
Method to prevent unauthorized alteration of the stitch length by removing the regulator plunger.
Detailed procedure for setting the needle bar to the correct height relative to the hook timing.
Further instructions on setting the needle bar height and hook timing for correct needle bar bushing alignment.
Steps to ensure the sewing hook is correctly timed with the needle bar and needle.
Instructions for adjusting the oil flow regulator to control lubrication to the sewing hook.
Detailed steps for removing the sewing hook, including related parts and timing.
Instructions for replacing the sewing hook shaft, including gear marking and alignment.
Procedure for removing the needle bar link and thread take-up assembly.
Information on setting the timing screws for the feed and feed lifting eccentrics.
Instructions for removing the oil pump, noting the left-hand thread for the impeller.
Important warnings for mechanics regarding precision, 'Superfinish' surfaces, and avoiding damage.
| Class | 241 |
|---|---|
| Stitch Type | Lockstitch |
| Needle Type | DBx1 |
| Type | Industrial |
| Stitch Options | Adjustable stitch length |
| Number of Stitches | Single |
| Bobbin Type | Standard |