Do you have a question about the Singer 300W101 and is the answer not in the manual?
Specifies oil for minimum stain on fabrics, even after long storage.
Specifies oil for minimum stain on fabrics, even after long storage.
Lists Type E (thread lubricant) and Type F (motor oil).
Recommended grease for gear lubrication on manufacturing sewing machines.
Pure grease for ball bearings in motors, transmitters, and power tables.
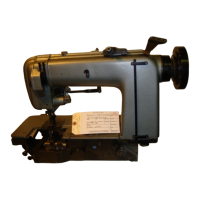
Covers models 300w101, 300w201, and 300w401.
Highlights attention to pages 6 and 7 for lubrication.
Details differences in needles and loopers for each model.
Lists tasks like attaching bibs, banding, and stitching canvas.
Explains compound feed and automatic oiling for bearings.
Specifies maximum RPM and initial break-in period.
Instructions for assembling iron work, legs, brackets, and treadles.
Steps for setting up the thread unwinding mechanism.
Details on connecting the foot lifter to the machine.
Instructions for attaching the oil pan and rubber bushings to the table.
Explains how the system lubricates bearings via centrifugal force.
Warns to use Type B or D oil and the specified pressure oil can.
Step-by-step guide to filling the arm shaft oil reservoir.
Instructions for filling the bed shaft oil reservoir.
Lists parts needing daily oiling, e.g., needle bar bearings.
Lists parts requiring less frequent oiling, e.g., tension release.
Illustrates thread path through threading points for loopers.
Steps to move loopers out of sewing position for easier threading.
Recommends specific tweezers for threading loopers.
Illustrates thread path through threading points for needles.
Instructs to turn pulley until needle bar is at highest position.
Guides on pulling approximately two inches of thread through the needle.
Instructions on how to insert needles correctly into the needle clamp.
Lists needle types, sizes, and how to order them.
Specifies that both left and right twist thread can be used.
Explains using thumb screw and lock screw for pressure adjustment.
Turn thumb screw downward to increase pressure on material.
Turn thumb screw upward to decrease pressure on material.
Guides on setting needle thread tension for proper stitch formation.
Advises light looper thread tension for average sewing.
Explains how the stitch indicator plate denotes stitch lengths.
Detailed steps using plunger and button for length adjustment.
Caution against altering needle movement without adjusting feed dog travel.
Adjusting feed lift crank timing screw for proper feed bar height.
Ensuring proper alignment of the clamp with the rock shaft timing flat.
Loosening screws to position feed dog sidewise for needle entry.
Loosening screws for feed rocker and feed bar assembly adjustment.
Adjusting feed eccentric for stitch length and slot clearance.
Tightening clamp screws and set screw to lock the feed dog.
Ensuring full depth of teeth shows above the throat plate.
Using jack screw and lock nuts to adjust feed dog height.
Moving feed lift eccentric for earlier or later feed dog rise.
Verifying parallel alignment of teeth with the throat plate surface.
Inserting needles and setting stitch regulators before positioning.
Positioning needles in feed dog holes with appropriate clearance.
Instructions for inserting loopers and angling them for clearance.
Adjusting looper holder for clearance with needle scarfs.
Checking clearance between looper heel and loop deflector.
Monitoring how the looper point passes the needle eye.
Using timing screws to ensure consistent looper point pass.
Aligning looper timing mark with pulley arrow for positioning.
Adjusting needle bar position for proper looper clearance.
Positioning guards near needles without causing rubbing.
Checking guards don't interfere with needle thread during sewing.
Loosening screws to move loop deflectors for correct relation to needles.
Tightening loop deflector screws after achieving proper clearance.
Steps to loosen screws and remove gear, bushings, and shaft.
Ensuring spreader clears loopers with a paper-thickness gap.
Loosening screws to move spreader holder for alignment.
Tilting spreader holder to align points with thread groove.
Adjusting spreader to be level with needle points.
Ensuring approximately 1/16 inch distance between spreader and needles.
Loosening screws to detach the spreader shaft bracket.
Moving eccentric to increase or decrease spreader's sidewise travel.
Warning about maintaining clearance between shaft and eccentric strap.
Positioning needle thread guide relative to the upper screw.
Positioning the take-up end relative to its holder.
Modifying guide/take-up position to control thread draw.
Explains its role in releasing needle tension when presser foot is raised.
Moving button or plate to set correct release timing.
Moving guide/rod to manage more or less thread for stitching.
Tilting thread guide to change looper thread ratio in the stitch.
Explains puller feed operates slightly faster than compound feed.
Adjusting upper feed roll pressure for proper material feeding.
Steps to remove cover plate and loosen screws for access.
Instructions for replacing the feed roll and reassembling securely.
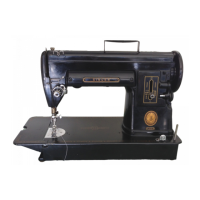
| Brand | SINGER |
|---|---|
| Model | 300W101 |
| Stitch Options | 6 |
| Needle Threader | No |
| Type | Mechanical |
| Operation | Mechanical |
| Presser Feet | All-purpose foot, zipper foot, buttonhole foot |
| Included Accessories | Needles, bobbins, screwdriver, seam ripper |
| Warranty | 25 years limited warranty |