-6-
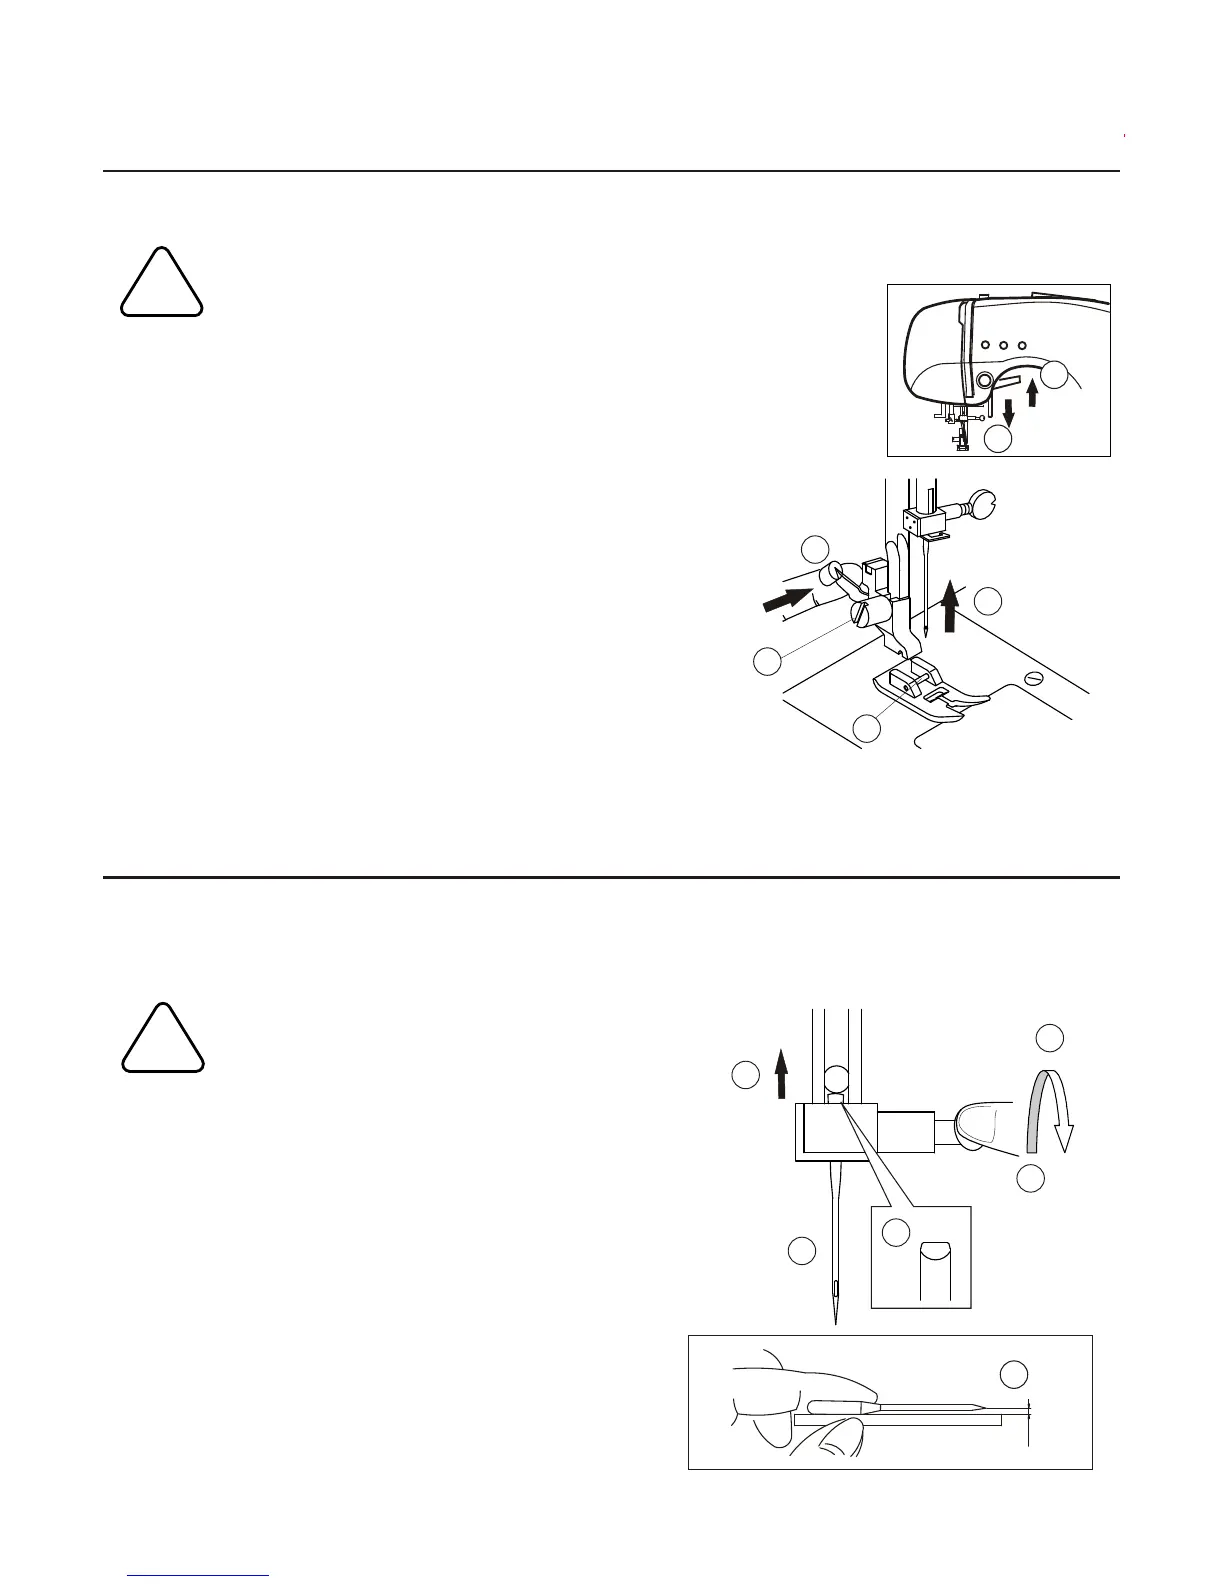
CHANGING THE PRESSER FOOT
The presser foot must be changed according to the stitch you sew, or work you do.
CAUTION:To prevent accidents.
Turn off the power switch before you change the presser foot.
1.Turn the hand wheel toward you until the
needle is at its highest point.
2.Raise the presser foot lifter.
3.Remove the presser foot by pushing the
presser foot release lever toward you.
4.Place desired foot with its pin directly under
the slot in presser foot holder.
5.Lower the presser foot lifter and the presser
foot will snap into place.
REMOVING THE PRESSER FOOT HOLDER
INSERTING THE NEEDLE
Select a needle of the right type and size for the fabric to be sewn.
CAUTION:To prevent accidents.
Turn off the power before removing the needle.
1.Turn the hand wheel toward you until the
needle is at its highest point.
2.Loosen the needle clamp screw.
3.Remove the needle.
4.Insert new needle into needle clamp with
the flat side to the back and push it up as
far as it will go.
5.Tighten the needle clamp screw.
A.Do not use bent or blunt needles.
Place needle on a flat surface and check
to see if bent.
55
A
3
4
1
5
AA
3
2
1
!
!
4
You may need to remove the presser foot holder to use
some presser feet.
To remove, raise the presser foot lifter and loosen the
presser foot thumb screw (A).
To attach, tighten the screw after raising the presser foot
holder.
22