EasyManua.ls Logo

Singer 5511 User Manual

Singer 5511
63 pages
To Next Page IconTo Next Page
Page #1 background imageLoading...
Page #1 background image
5511
Manuel d'Instruction
Instruction Manual
Manual de Instrucciones

Table of Contents

Question and Answer IconNeed help?

Do you have a question about the Singer 5511 and is the answer not in the manual?

Singer 5511 Specifications

General IconGeneral
TypeMechanical
Built-in Stitches11
Stitch Width5 mm
Adjustable Stitch LengthYes
Adjustable Stitch WidthYes
Needle ThreaderYes
Free ArmYes
Reverse StitchYes
Sewing Speed750 stitches per minute
Max Stitch Length4 mm
BobbinClass 15
Presser Feet4
Weight6.6 kg
Buttonhole Styles1-step

Summary

Important Safety Instructions

Danger: Electric Shock Precautions

Essential warnings and precautions to prevent electric shock hazards.

Warning: Injury Prevention

Safety guidance to avoid burns, fire, electric shock, or personal injury during operation.

Principal Parts of the Sewing Machine

Connecting Machine to Power Source

Two-Step Presser Foot Lifter

Adjusting Presser Foot Pressure

Guide to adjusting presser foot pressure for optimal sewing on various fabric types.

Sewing Machine Accessories

Winding the Bobbin

Inserting the Bobbin

Threading the Upper Thread

Raising the Bobbin Thread

Thread Tension Adjustment

Choosing Stitch Patterns

Three Needle Position Dial

Stitch Width and Length Dials

Stitch Width Dial Function

How to adjust the zigzag stitch width for different patterns.

Stitch Length Dial for Zigzag

Adjusting stitch length for zigzag stitch density and satin stitches.

Stitch Length Dial for Straight Stitch

Adjusting stitch length for straight stitching based on fabric type and thickness.

Sewing a Straight Stitch

Reverse Sewing and Work Handling

Removing the Work

Procedure for safely removing the sewn fabric from the machine.

Cutting the Thread

How to use the built-in thread cutter.

Sewing a Blind Hem

Creating Buttonholes

Preparing for Buttonholes

Steps to prepare the fabric and machine for accurate buttonhole creation.

Buttonhole Side Balance Adjustment

Sewing Buttons

Installing the Extension Table

Attaching Presser Foot Components

Attaching the Presser Foot

Steps to attach a presser foot to the shank.

Removing the Presser Foot

Steps to detach a presser foot from the shank.

Attaching Edge/Quilting Guide

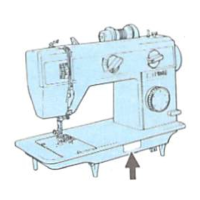
How to attach and adjust the edge or quilting guide.

Needle, Fabric, and Thread Selection Chart

Dropping the Feed Dog

Inserting and Changing Needles

Changing the Light Bulb

Related product manuals