Do you have a question about the Singer 625 and is the answer not in the manual?
Steps for cleaning and lubricating Class 626 sewing machines.
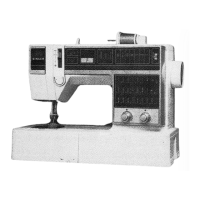
Steps for cleaning and lubricating Classes 620, 625, and 628 machines.
Procedure to remove the arm top cover hinge components.
Procedure to replace and adjust the arm top cover hinge.
Steps for removing the rotating hook assembly.
Steps to install and reassemble the rotating hook.
Procedure for timing the rotating hook with the needle bar.
Adjusting the hook's distance from the needle.
Removal, replacement, and adjustment of the bobbin push-button.
Steps for removing, replacing, and adjusting the bobbin driver.
Steps to remove and disassemble the needle-thread tension assembly.
Steps to reassemble and replace the needle-thread tension assembly.
Procedures for adjusting the needle-thread tension.
Steps for removing and replacing the throat-plate position bracket.
Steps to remove the release mechanism assembly.
Steps to reinstall and adjust the release mechanism.
Adjusting the release mechanism and loading cam.
Procedures for removing and replacing the cam stack.
Steps to correctly time the cam stack.
Adjusting index pins for proper cam stack operation.
Setting com-selector-arm stops and aligning indicators.
Removing and replacing the cam-selector-arm shaft return-spring.
Procedures for removing and replacing the bight-amplitude and pattern selector.
Adjusting the bight-amplitude mechanism.
Adjusting the stop-plates for bight-amplitude control.
Steps to remove and replace the needle-bar driving arm.
Adjusting the needle-bar driving arm for proper alignment.
Troubleshooting chainstitch defects and adjusting machine settings.
Checking eccentric assemblies and trademark medallion.
Proper storage and use of the needle-threader attachment.
Removing and replacing the needle-threader and hook.
| Brand | Singer |
|---|---|
| Model | 625 |
| Category | Sewing Machine |
| Language | English |