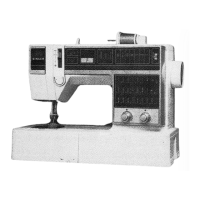
Do you have a question about the Singer 626 and is the answer not in the manual?
Procedures for removing the arm top cover, holding ring, and stitch indicator chart.
Steps for fastening a new hinge, replacing the stitch indicator, and adjusting the lid.
Steps to remove the rotating hook assembly, including marking gears.
Instructions for installing the rotating hook assembly and aligning gears.
Instructions for the removal and replacement of the bobbin push-button assembly.
Details on removing, replacing, and adjusting the bobbin driver.
Steps to remove and take apart the needle-thread tension assembly.
Instructions for reassembling and reinstalling the needle-thread tension assembly.
References for adjusting needle-thread tension and related components.
Procedure for removing and replacing the throat-plate position bracket and its components.
Steps to remove the selector mechanism assembly and related parts.
Instructions for reassembling and installing the release mechanism components.
Procedures for adjusting the release mechanism for proper operation.
Guidance on pre-setting the loading cam relative to the cross-shaft boss.
Steps for removing and replacing the cam stack and fashion disc.
Procedure for timing the cam stack by aligning the timing mark with the rear follower.
Procedure for setting the index pins to ensure proper alignment of selector arms.
Adjusting stops for com-selector arms and aligning indicators.
Steps for removing and replacing the bight-amplitude and pattern selector.
Procedures for assembling and adjusting the bight-amplitude and pattern selector.
Adjusting stop-plates for the bight-amplitude lever to control stitch width.
Steps for removing and replacing the needle-bar driving arm.
Procedure for centralizing the needle-bar driving arm using the bight lever.
Adjustments for chainstitch defects, including settings and throat plate checks.
Adjustments for bobbin case radial setting and pull-off finger.
Guidance on storing and using the needle-threader attachment for Class 620 machines.
Steps for removing and replacing the needle-threader assembly.
Procedure for removing and replacing the needle-threading hook.
| Brand | Singer |
|---|---|
| Model | 626 |
| Category | Sewing Machine |
| Language | English |