MORE
^ I;
PRESSURE^vil
LESS
PRESSURE
LOCK
NUT
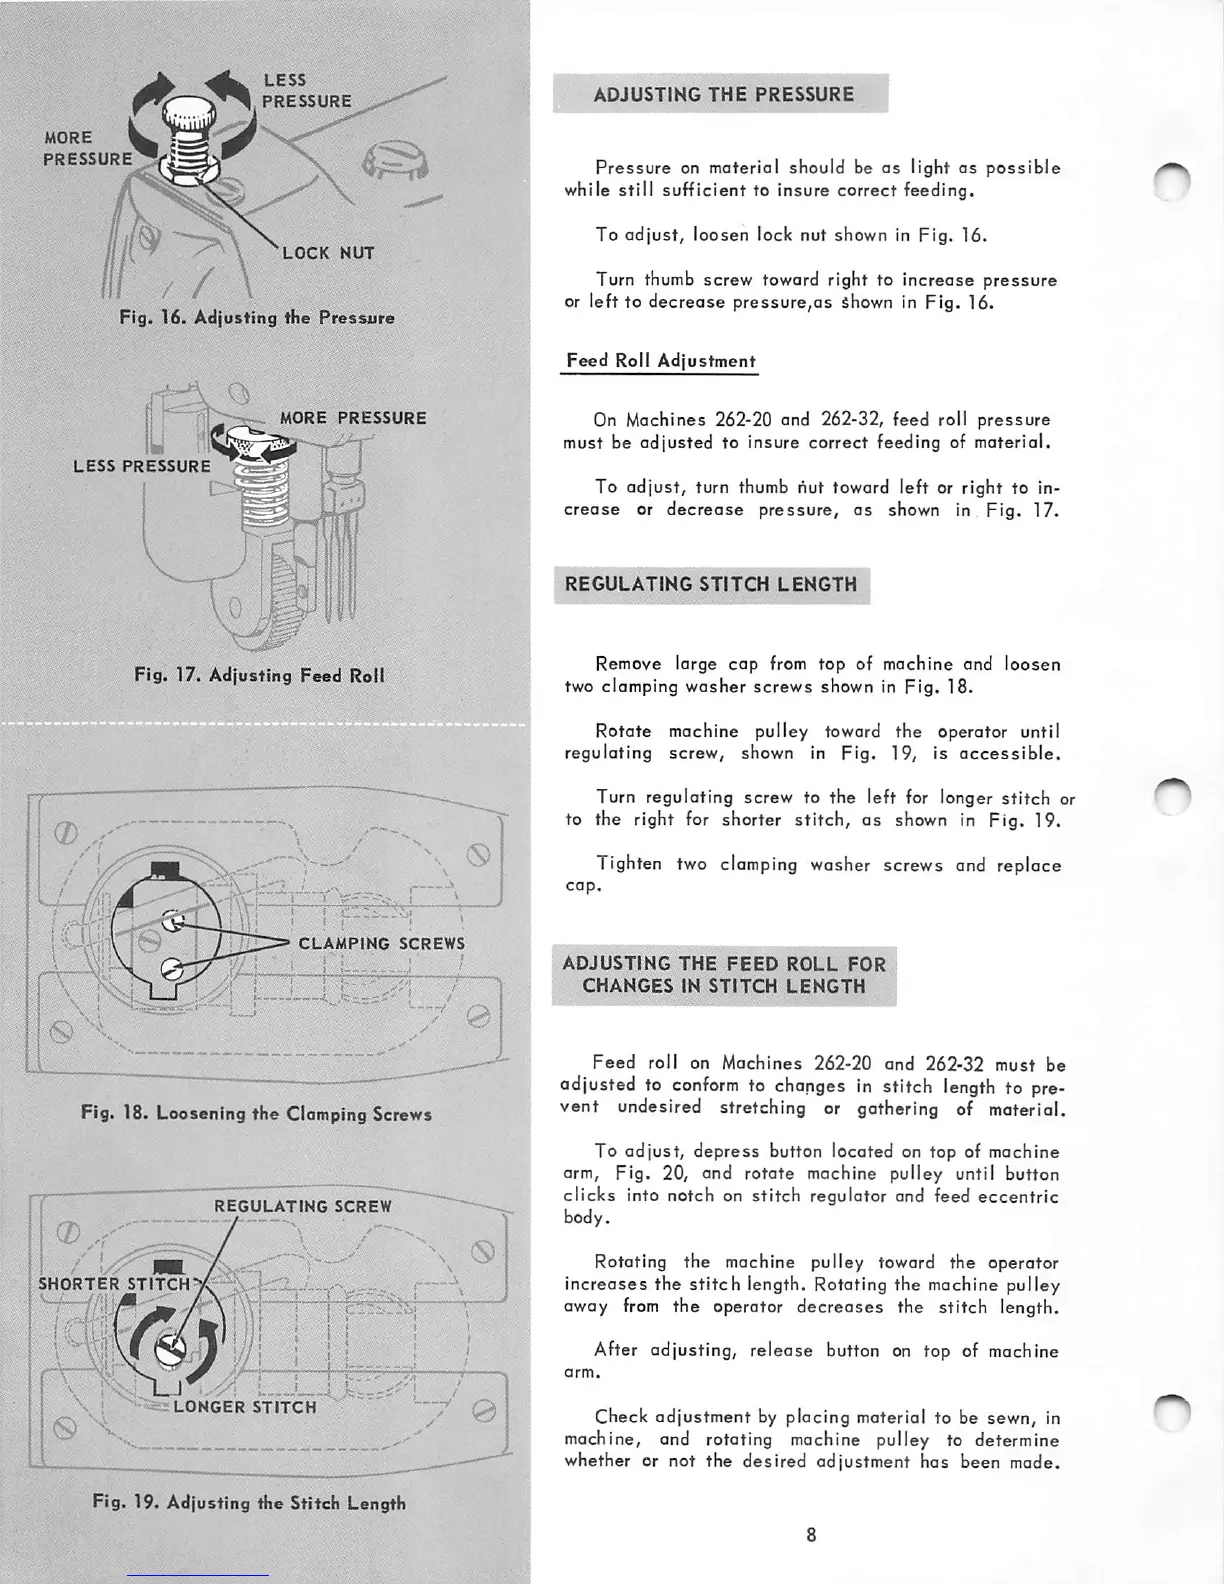
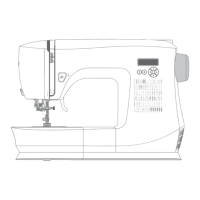
Fig. 16. Adjusting
the
Pressure
MORE
PRESSURE
LESS
PRESSURE
Fig. 17. Adjusting
Feed
Roll
/ » ^
CLAMPING
SCREWS
//
> '
Fig. 18. Loosening the Clamping Screws
REGULATiNG
SCREW
SHORTER
STITCH
(L:¥,
\\
^\{li
jiii
1
!
);
i »
..
1—I
. i J 1
LONGER
STITCH
Fig. 19. Adjusting the Stitch Length
•s
(5
ADJUSTING
THE
PRESSURE
Pressure
on material should be
as
light
as
possible
while still sufficient to insure correct feeding.
To
adjust,
loosen lock nut shown in Fig. 16.
Turn thumb screw toward right to increase
pressure
Or
left to decrease pressure,as shown in Fig. 16.
Feed
Roll Adjustment
On Machines 262-20 and 262-32, feed roll
pressure
must be
adjusted
to insure correct feeding of material.
To adjust, turn thumb hut toward left or right to in
crease
or
decrease
pressure, as shown in Fig. 17.
REGULATING
STITCH
LENGTH
Remove large
cap
from
top
of machine and
loosen
two clamping
washer
screws
shown in Fig. 18.
Rotate machine pulley toward the operator until
regulating screw, shown in Fig. 19, is
accessible.
Turn regulating screw to the left for longer
stitch
or
to the right for shorter stitch, as shown in Fig. 19.
Tighten two clamping washer screws and replace
ADJUSTING
THE
FEED
ROLL
FOR
^g^ANGES
IN
STITCH
LENGTH
Feed
roll on
Machines
262-20 and 262-32
must
be
adjusted to
conform
to changes in stitch
length
to pre
vent undesired stretching or gathering of material.
To
adjust,
depress
button located on top of machine
arm. Fig. 20, and rotate machine pulley until button
clicks into notch on stitch regulator and feed eccentric
body.
Rotating the machine pulley toward the operator
Increases the stitch length. Rotating the machine pulley
away
from
the operator decreoses the stitch length.
After adjusting, release button on top of machine
Check adjustment by placing material to be sewn, in
machine, and rotating machine pulley to determine
whether or not the
desired
adjustment has been made.