102
CLEANING HOOK AREA AND FEED
DOGS
CAUTION
Always disconnect the machine from power
supply by removing the plug from the wall-outlet.
To ensure the best possible operation of your machine, it
is necessary to keep the essential parts clean at all times.
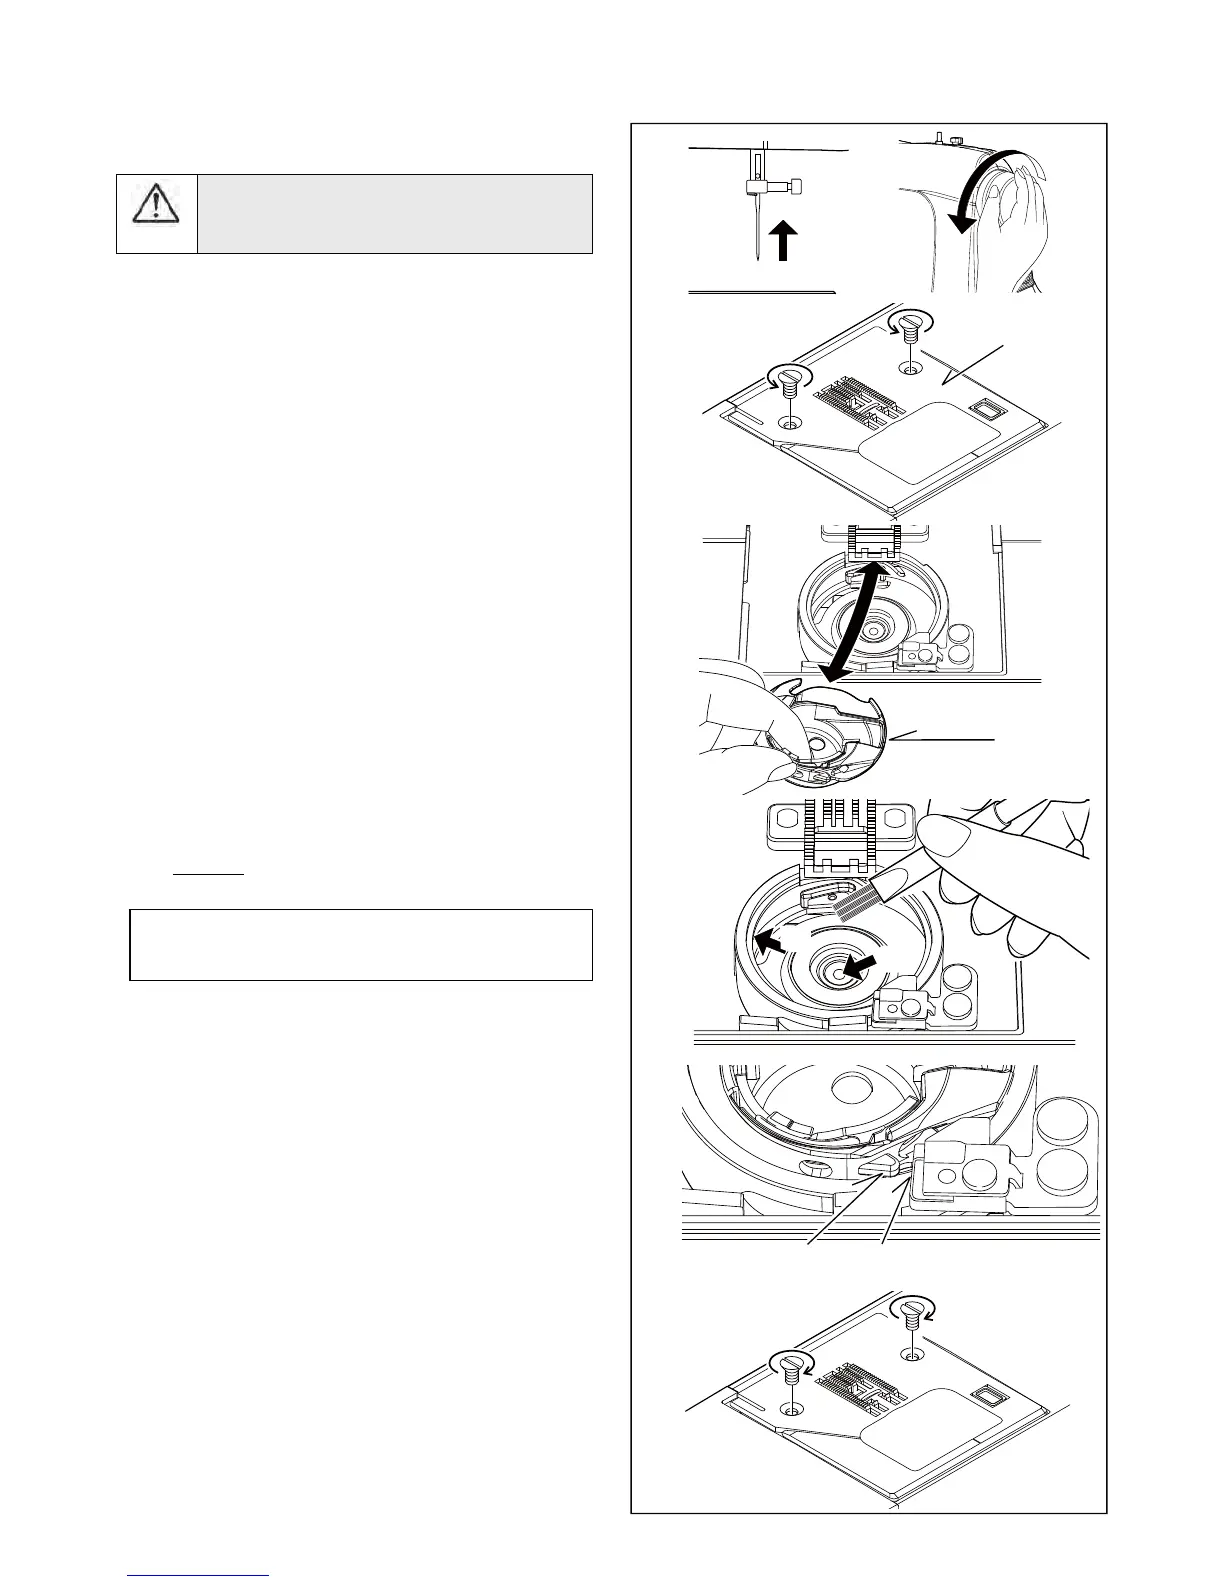
1. Raise the needle to its highest position.
2. Remove two screws on the needle plate (1) and slide the
needle plate toward you as illustrated for removal.
3. Remove the bobbin case (2).
&OHDQWKHIHHGGRJVDQGKRRNDUHDZLWKWKHOLQWEUXVK
Put one drop RI VHZLQJ PDFKLQHRLORQWKH KRRN UDFH DV
indicated by the arrows. (A, B)
5. Replace the bobbin case with the projection (3) positioned
against the spring (4).
0DNHVXUHWKDWWKHQHHGOHLVDWLWVKLJKHVWSRVLWLRQDQGSXW
and slide the needle plate into position as illustrated.
Cleaning the sewing machine and footcontroller
$IWHUXVLQJNHHSVHZLQJPDFKLQHDQGIRRWFRQWUROOHUFOHDQ
Use dry rags to remove dust from the sewing machine and
footcontroller.
127(8VHGU\UDJVWRDYRLGHOHFWULFDOVKRFN
NOTE: Singer Brand Sewing Machine Oil is suggested.
'2127XVH ³DOOSXUSRVH´RLODVLWLV QRWVXLWHGIRU
sewing machine lubrication.
2
1
3
4
5
(3) (4)
(2)
(A)
(B)
6
(1)
 Loading...