INSTRUCTIONS
Grounding
Instructions
WARNING: To protect
the
operator from electrical shock,
this
machine should
be
grounded.
Cord-Connected Machine
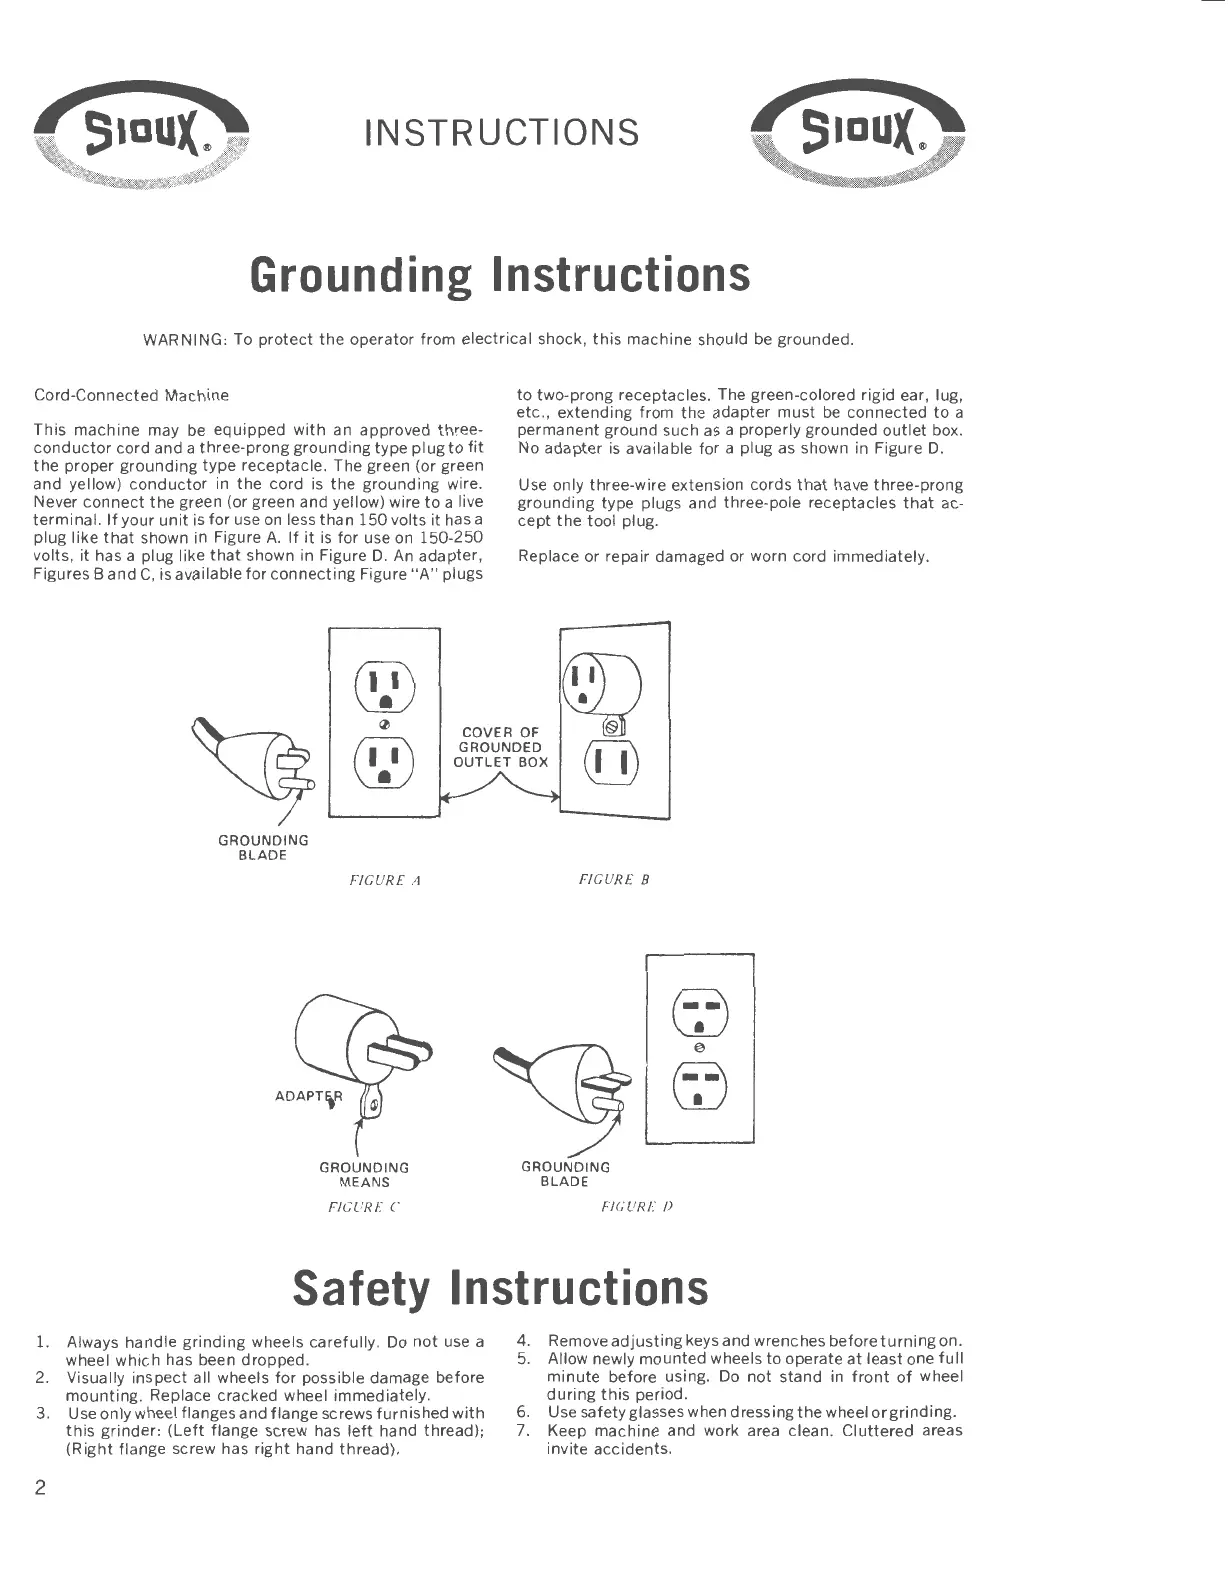
This machine may be equipped
with
an approved three-
conductor
cord and a three-prong grounding type plug
to
fit
the
proper grounding
type
receptacle. The green (or green
and yellow)
conductor
in
the
cord is
the
grounding wire.
Never connect
the
green (or green and yellow) wire
to
a live
terminal.
If
your
unit
is
for
use
on
less than 150 volts
it
has a
plug like
that
shown in Figure
A.
If
it
is
for use on 150-250
volts,
it
has a plug like
that
shown in Figure
D.
An
adapter,
Figures
Band
C,
is available
for
connecting
Figure
"A"
plugs
(!})
to two-prong receptacles. The green-colored rigid ear, lug,
etc
.,
extending from the adapter
must
be
connected
to
a
permanent ground such
as
a properly grounded
outlet
box.
No adapter
is
available for a plug
as
shown in Figure D.
Use only three-wire extension cords
that
have three-prong
grounding type plugs and three-pole receptacles
that
ac-
cept
the
tool plug.
Replace or repair damaged or worn cord immediately.
~
~
<I!
COVER OF
(!})
GROUNDED
[]
OUTLET BOX
GROUNDING
BLADE
FIGU
RE
A
GROUNDING
MEANS
FI
GU
RE C
FIGURE
B
GROUNDING
BLADE
FI
GU
RI
:"
D
Safety
Instructions
1.
Always handle grinding wheels carefully.
Do
not
use
a
wheel which has been dropped.
2. Visually inspect all wheels for possible damage before
mounting
. Replace cracked wheel immediately.
3. Use only wheel flanges and flange screws furnished with
this
grinder
:
(Left
flange screw has
left
hand thread);
(Right flange screw has
right
hand thread).
2
4. Remove
adjusting
keys and wrenches before
turning
on.
5. Allow newly mounted wheels to operate
at
least one
full
minute
before using.
Do
not
stand in
front
of
wheel
during
this
period.
6.
Use safety glasses when dressing the wheel
or
grinding.
7. Keep machine and work area clean. Cluttered areas
invite accidents.
 Loading...