31
ZAMENJAVA PROTINOŽA
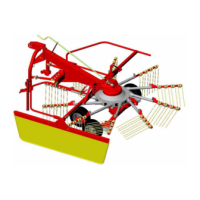
Za dobro kvaliteto siliranja je med drugim
pomembno, da dela stroj vedno z ostrim
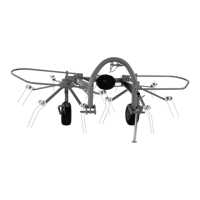
protinožem »N« (slika 9). Protinož ima dve
rezilni ostrini. Šestrobna vijaka »O« odvijete
za tri vrtljaje v levo, nato ju potisnete z
udarcem kladiva malo globlje.
Protinož potegnete iz držala, ga obrnete
(izvrtina ostane na spodnji strani), vstavite v
držalo ter privijete šestrobna vijaka »O«.
COUNTER BLADE REPLACEMENT
For good quality ensilaging it is important that
the machine always works with sharp counter
blade »N« (fig. 9). The counter blade has two
cutting edges. Unscrew the 6-edge screws
»O« three times to the left, then push them
deeper by using the hammer.
Pull the counter blade out of the holder, turn
it around (the hole stays on the lower side),
return it into the holder and screw the 6-edge
screws »O«.
MENJAVA SPODNJEGA NOŽA
Po 50 ha kontrolirajte obrabo spodnjega
noža. Če je razdalja med spodnjim nožem in
protinožem pri »I« (slika 12) manjša kot
0,1 mm, morate zamenjati spodnji nož z
novim. To naredite tako, da odstranite jarem
»P« (slika 9) in spodnji del ohišja koluta
455.03.001.0 (slika 11).
Po demontaži držala 455.02.085.0 lahko
zamenjate spodnji nož.
Pri montaži novega spodnjega noža
uporabite priložena posebna vijaka in matici.
Nastavite novi nož na njegovo mesto,
vstavite vijaka in privijte varovalni matici
samo toliko, da ostane nož prestavljiv. Pri
tem pazite, da podložno ploščo pod spodnjim
nožem namestite na isto stran vijakov, kot je
bila prej. Potisnite spodnji nož nazaj do
naslona »R« (slika 12).
Pri »I« je lahko razlika med spodnjim nožem
in protinožem 0,3 – 0,5 mm. Ko potisnete
kolut z noži s pomočjo matice »M« (slika 11)
do spodnjega rezila na mestu »I«, nastavite
spodnji nož pri »II« približno 0,1 – 0,3 mm od
noža na kolutu. Nato privijte varovalni matici
na spodnjem nožu.
REPLACEMENT OF THE LOWER
BLADE
After 50 ha of working check the condition of
the lower blade. If the distance between the
lower blade and the counter blade at the
point »I« (fig. 12) is less than 0,1 mm, the
lower blade must be replaced. Remove the
yoke »P« (fig. 9) and the lower part of the
disc housing 455.03.001.0 (fig. 11).
After removing the holder 455.02.085.0 you
can replace the lower blade.
When replacing new lower blade use the
enclosed special screws and nuts. Adjust
new blade in its seat, insert the screws and
screw the safety nuts so much that you can
still move the blade. Make sure that the plate
under the lower blade is set on the same side
of the screws as it was before. Push the
blade back to the point »R« (fig. 12).
At the point »I« the difference between lower
blade and counter blade is 0,3 – 0,5 mm.
When you push the disc with blades to the
lower cutting edge »I« by using the nut »M«
(fig. 11), you can adjust the lower blade at
the point »II« to 0,1 – 0,3 mm away from the
blade on the disc. After that screw the safety
nuts on the lower blade.
 Loading...