30
BRUŠENJE IN NASTAVITEV
KOLUTA Z NOŽI
Poženite stroj tako, da se priključna gred
traktorja vrti s 540 vrt/min. Vrtite gumb za
nastavitev brusilnega kamna »L« (slika 13)
tako dolgo v levo, da se brusni kamen
dotakne nožev.
Nato pomikajte brusilno napravo »K«
enakomerno po celi dolžini sem in tja. Če se
brusni kamen ne dotika več nožev, zavrtite
gumb za nastavitev zopet za toliko v levo, da
zaskoči. Vse to ponavljajte, dokler niso noži
ostri. Nato vrnite brusni kamen s privijanjem
gumba v desno, v začetni položaj.
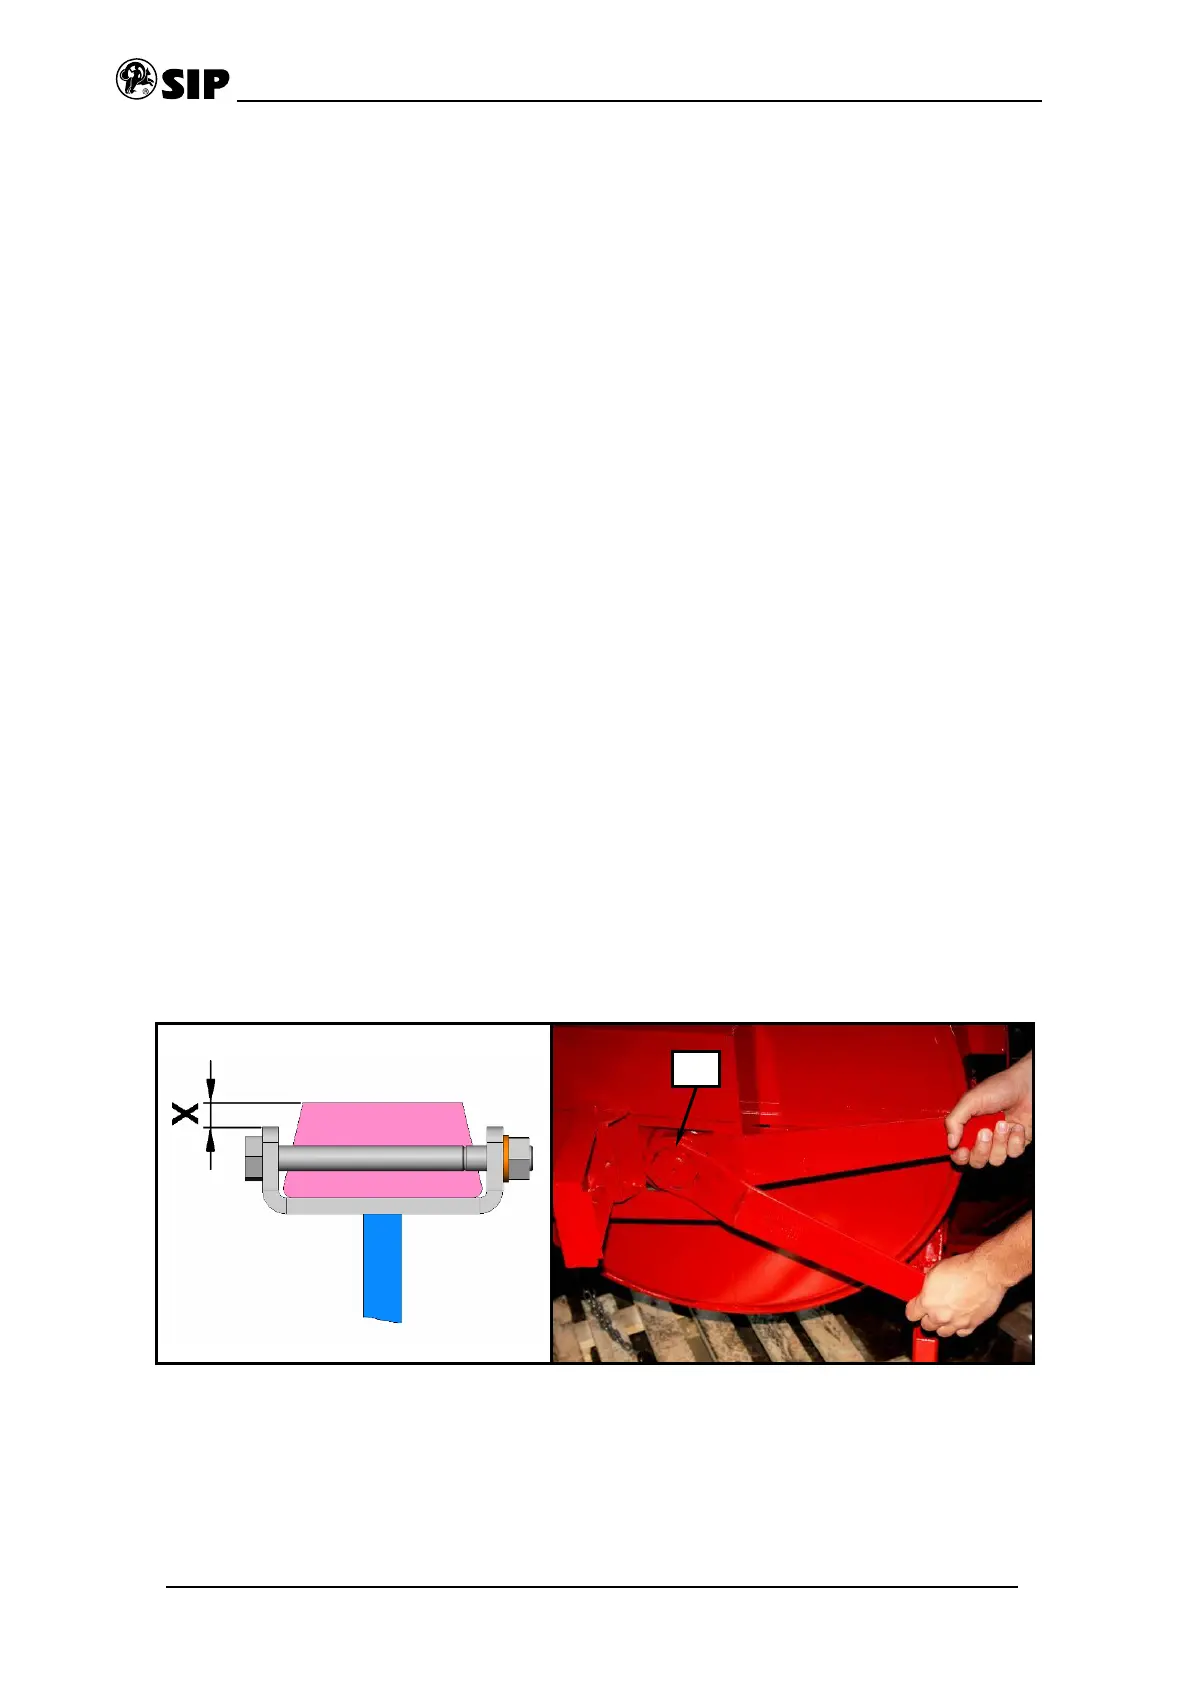
Če se brusni kamen toliko izrabi, da je
razdalja »X« manjša od 1 mm, ga
zamenjajte, ker bodo sicer noži udarjali ob
držalo kamna (slika 10).
Po brušenju nastavite zrak med protinožem
in noži na kolutu!
Odvijte s pomočjo priloženih ključev matico
»M« (slika 11), blokirajte kolut in zavrtite
drugo matico tako daleč, da se noži nalahko
dotikajo dotikajo spodnjega rezila. Nato
odvijte isto matico toliko, da noži ravno še
prosto tečejo. Ko ste ponovno zategnili
matico »M«, kontrolirajte, če noži na kolutu
ne zadevajo v spodnje rezilo.
GRINDING AND ADJUSTING THE
DISC BLADES
Start the machine with 540 rpm on P.T.O.
shaft. Turn the button for adjusting the
grinding stone »L« (fig. 13) until the grinding
stone reaches the blades.
After that move the grinding part »K«
regularly to and fro through the whole length.
If the grinding stone does not touch the
blades turn the button to the left again till it
stucks. Repeat the procedure till the blades
get sharp. After that return the grinding stone
to its initial position by turning the button to
the right.
If the distance »X« is less than 1 mm the
grinding stone is used and must be replaced.
Otherwise the blades will hit to the stone
holder (fig. 10).
After sharpening the air between counter
blade and disc blades must be adjusted!
By using added tool unscrew the nut »M«
(fig. 11) block the disc and turn the other nut
so long that the blades lightly touch the lower
blade. After that unscrew the same nut only
so much that the blades run freely. After
screwing the nut »M« tightly, make sure the
disc blades do not hit to the lower blade.
Fig. 10, 11
M
 Loading...