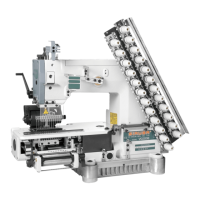
2.
&'~~
~
B~:
$t
f~
ml
~J:
**
(3)
}..Z
(
4),
J:.l'
j~!JJ
J:.
5(jj~*?~~~(2)
.~~
~~~
~
;Z.
Fig.9
A
2.
To adjust, loosen Screw
(3)
and
{4),
and move j
the Spreader Thread Take-up
(2)
up or down,
and then tighten screw again.
B Fig.10
Fig.11
--
--
-----------
------
-~
-
-
--
--
..
--------------------------
---
----
-------
......
--
....
-
..
--
---
..........
---
...
--
..
---
-·-----
..
-
..
-
---
----
---
---
--
..
-~-
'
ADJUSTING
PRESSER
FOOT
'
'
------
--~
----------
--
---
..
--------
-------__
....
-
-------
_.
___
-
-~
------
----
---
-
-----
--
-
..
--------
..
--
--
----
--------
-
..
- -
----
..
---
--
---
----
--
--:
f~mliJ:**
(1) ,
tc
:ti
}~}it~
~tiJl
~(2),
ff
it
~uffil~~
~ffiltl~~o
~z
c:r
,GN~li.~
~
~~
.
~~~mm*m(1).
(Ill 12)
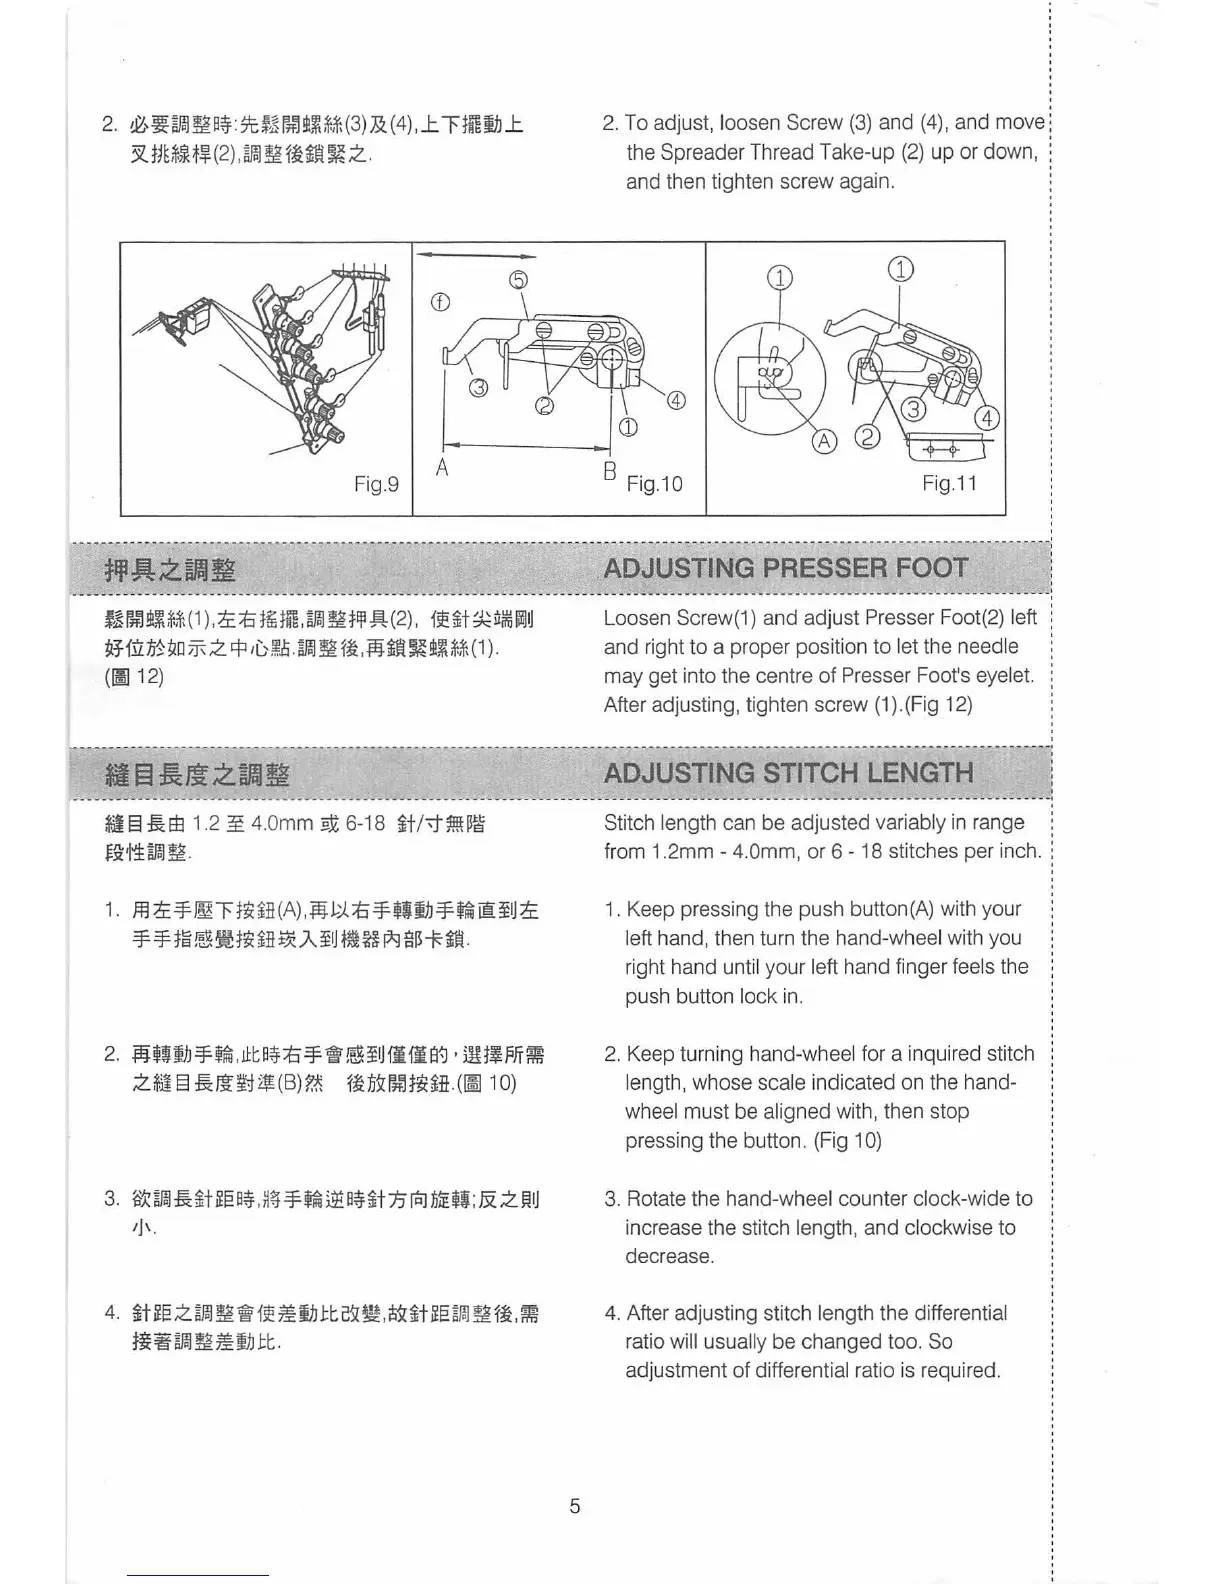
Loosen Screw(1) and adjust Presser Foot(2) left
l
and right to a proper position to let the needle l
may get into the centre
of
Presser Foot
's
eyelet. l
After adjusting, tighten screw (1). (Fig 12) l
'
'
·
--
--
--------------
__
_
.._
__
-·
--
-·----
-----
.....
----
-~-
- -----------------------------------------------------
..
-----------
--
--:
*IEI~JlZIDfd~
ADJUSTING
STITCH
LENGTH
j
~El~EB
1.2 ~ 4.0mm
~
6-18
it/'f?!!W~
~11~~.
1.
ffl
ti:
-=F
~
"'F
HHH
(A),~
1...:1.
ti
-=F
~ij}J
-=FfRirn:
~IJ
ti:
-=F-=Fm~~~&~A~~H~~~O.
2.
~
~imh-=FfRi,
J.I:
tB~:ti=F~~~iJfifla~
·
i~Hi.PJT?m
z~
El
*llJt~(B)f..t{
~inimJt~iH.(~
1
o)
3.
s.t
~
~
iH§
B~
J~
-=F
fRi
~
B~~
t
1i
rPJ
fil£,3;
& Z
~IJ
I J \.
4. it
~e
z ~
~
~
1~
~
j}]
tt
21
w.
i!ii
it
~e
~m
~
~i,
?m
~~~
~~IJ.Jl:t.
5
Stitch length can
be
adjusted variably
in
range
from 1.2mm - 4.0mm, or 6 - 18 stitches per inch.
1. Keep pressing the push button(A) with your
left hand, then turn the hand-wheel with you
right hand until your left hand f
in
ger feels the
push button lock
in
.
2. Keep turning hand-wheel for a inquired stitch
length, whose
sca
le indicated on the hand-
wheel must
be
aligned with, then stop
pressing the button. (Fig 1
0)
3.
Rotate the hand-wheel counter clock-wide to
increase the
sti
tch length, and clockwise
to
decrease.
4.
After adjusting stitch length the differenti
al
ratio
wi
ll
usua
ll
y
be
changed too. So
adjustment of differential ratio is required.
 Loading...