C2)
~~rc
CUTR-K
,
UTS-K)
?±mt
im~2~~tfm~·m~~l't.JJ7J~~
~ff!Ut.JJ~2fi1~
·
~~~tJJ~H~
~OOIOJ•~l't.JJ7J~1fo
C3)
~¥11'75*1.&11UlUiffi~~
•
~~
~ttf'F§JtJ.Jt.JJ~~m
o
4
3
2
1
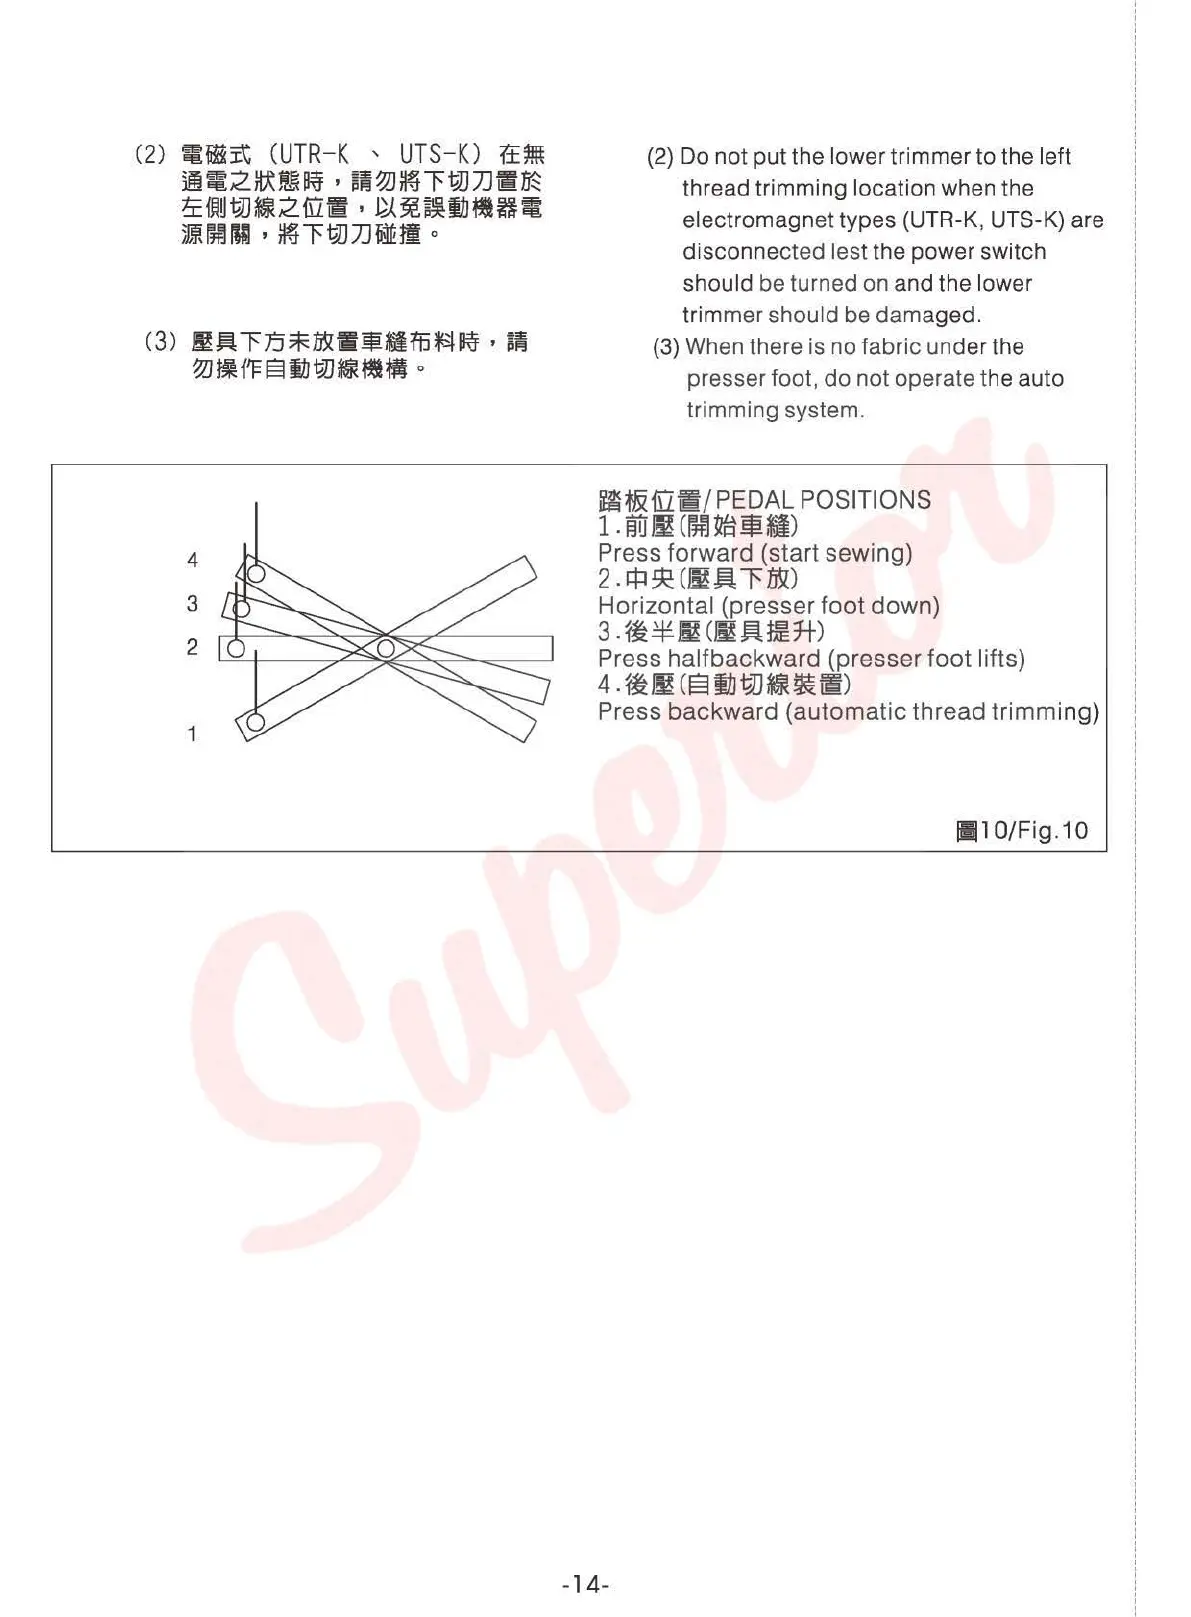
(2)
Do
not
put the lower trimmer to the left
thread trimming location when the
electromagnet types (UTR-K, UTS-K) are
disconnected
lest the power switch
should be turned on and the lower
trimmer should be damaged.
(3}
When there
is
no fabric under the
presser foot, do not operate the auto
trimming system.
~~~[le/
PEDAL POSITIONS
1.
Wi~
(!m~tH~*i)
Press forward (start sewing)
2.
t:P~
c~m~
l'm)
Horizontal (presser
foot
down)
3.
~*1m
C!m
~~H)
Press halfbackward (presser
foot
lifts}
4
.~~
(§lftli?JJ&R~~)
Press backward (automatic thread trimming)
!Ill O/Fig.1 0
-14-
From the library of: Superior Sewing Machine & Supply LLC
 Loading...