23
5) ADJUSTMENT, PREPARATION AND USE
INTRODUCTION
Connection to the tractor is highly dangerous. Take great care and carry out the entire
operation in strict compliance with the following instructions. Nobody should go near the
area between the tractor and the machine. Check that all warning and danger signs are in
place and legible. Check that the tractor is in good running order. Refer to the tractor
operator’s manual.
ATTACHMENT OF MACHINE TO THE TRACTOR
The lever 1must be positioned horizontally (see Fig. A). Apply the end 2 of the cardan to
the socket on the machine 3 (see Fig. B). Rest the end 4 of the cardan on the support 5 (see
Fig. C-D). Connect the lifting arm 6 to the pins 7 of the machine and fasten with the split
pins 8 (see Fig. C-D-E-F). Remove the split pin 9 and the pin 10, connect the tie-rod (or
hydraulic cylinder) 11 to the 3
rd
point hitch and fasten with the pin 9 and the split pin 10
(see Fig. A-C-E). Connect part 4 of the cardan to the socket on the tractor 12 (see Fig. C-D-
E). Secure the cardan shaft 5 to the fastener 13 (see Fig. G). Remove the split pin 14 and lift
the support leg 15, then lock the support leg back into place by inserting the split pin 14 into
the hole in the bottom of the support leg 15 (see Fig. H-I). RT/5200 hydraulic fold: at this
point the quick-release coupling 16 should be attached to the tractor coupling 17 (see Fig.
D-L). Fasten the rope 18 to lever 19 (see Fig. D-L).
CONNECTING CARDAN SHAFT INFORMATION
More detailed information may be found in the cardan shaft manual which, together with
this manual, is an essential part of the accident-prevention documentation. It is your
responsibility to read and comply with this documentation. If information given in this
manual should conflict with that given in the cardan shaft manual, you should follow the
instructions given by the cardan shaft manufacturer.
CONNECTING THE CARDAN SHAFT
Fit the inner cardan shaft 2 onto the machine shaft 1. Fit the
outer cardan shaft 4 onto the tractor shaft 3. Note: If a safety
system is provided, this should be fitted to the machine shaft,
not to the tractor shaft.
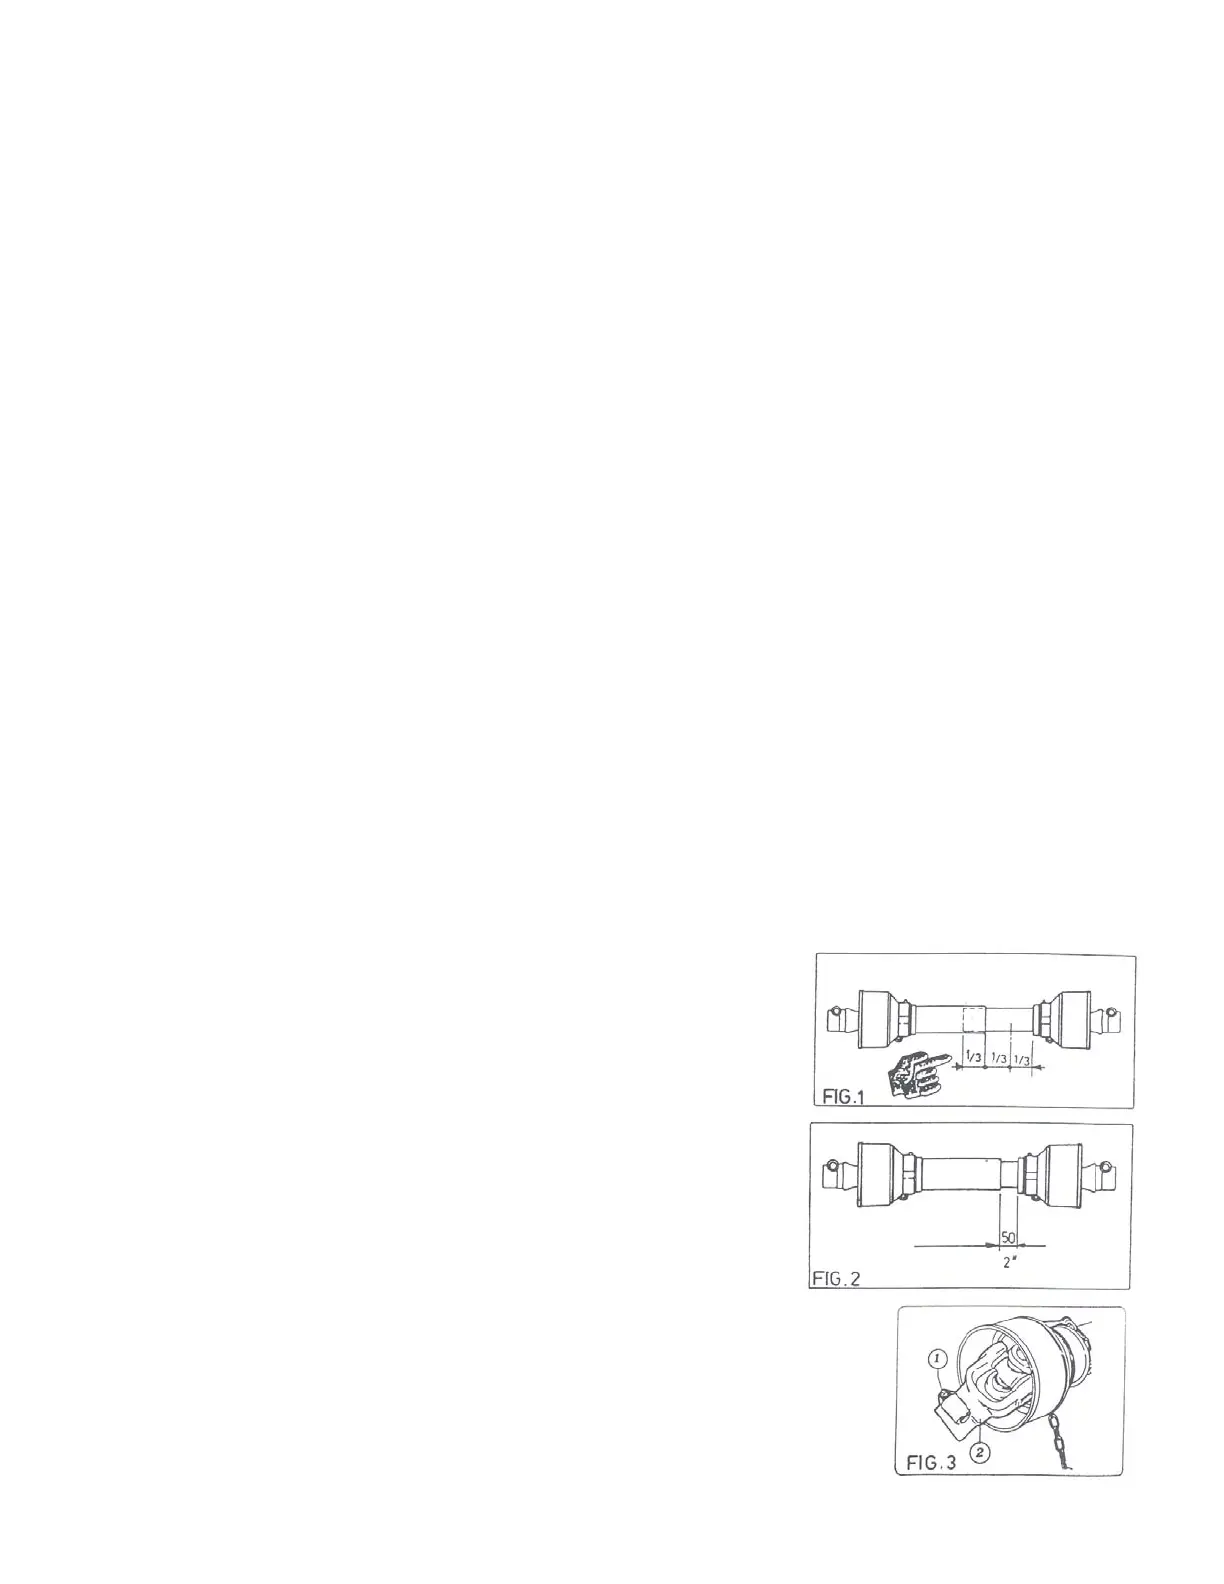
NOTE: During both transport and use, avoid conditions where
the cardan shaft is extended to the maximum. In all
working conditions, the telescopic tubes must overlap by at
least 1/3 of their length (fig. 1). Conversely, when the cardan
shaft is contracted to the maximum, there should still be a gap
of approximately 50mm-2” (Fig. 2).Take particular care when
connecting the two cardan shaft end forks and make sure that
they are fully secured. This is achieved by inserting the safety
pins and bolts 1 into the special slots 2 (fig. 3) on the power
takeoff shafts on both the tractor and machine ends. A loose
shaft could come apart and cause considerable mechanical
damage and serious injury to person.