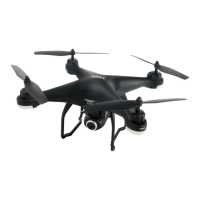
DRONE PARTS
1. HD Camera 3. Blade 5. LED indicator
2. Landing Rack 4. Motor
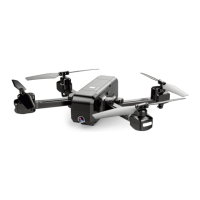
QUADROTOR LI-POLYMER
1. Batter power indicator
2. USB charging port
3. Battery switch
Press the battery shortly to switch on, hold for 2 seconds to switch it off.
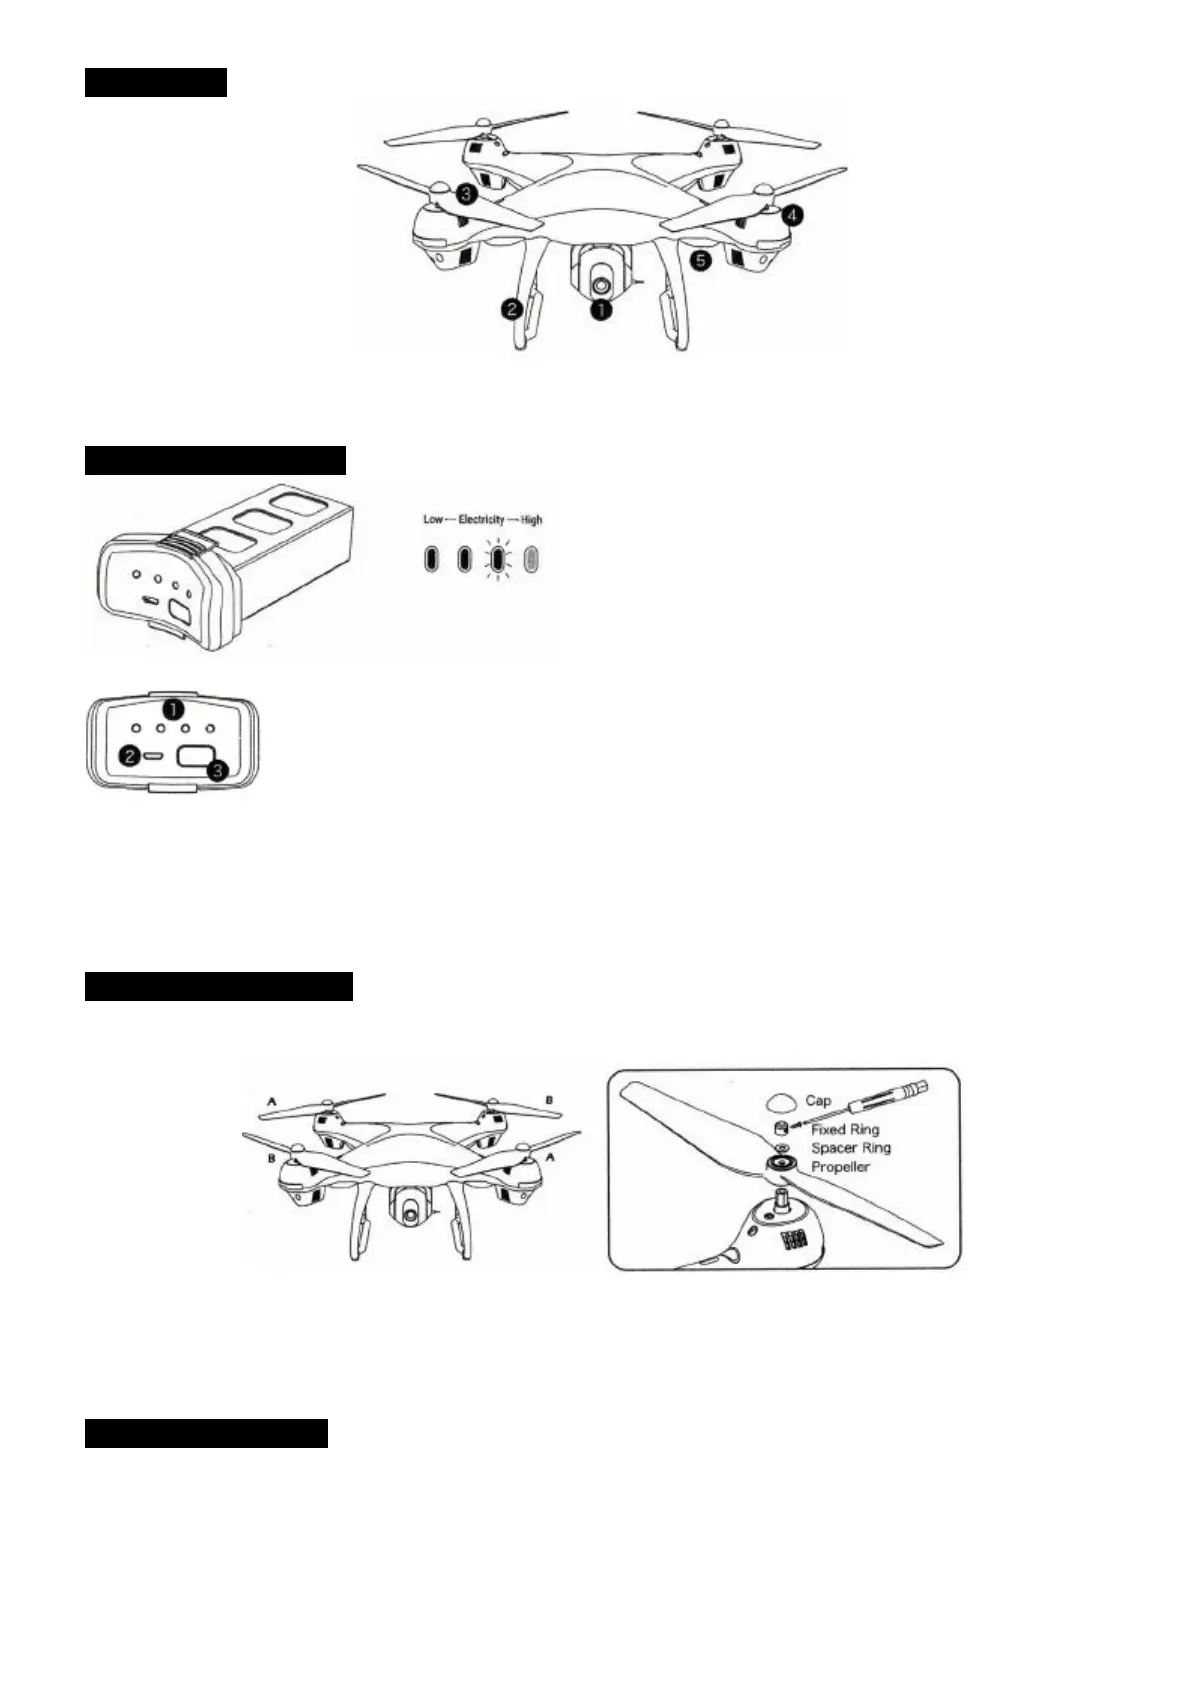
ASSEMBLE THE PROPELLER
Please note that the letter "A" or "B" is printed on each propeller, and make sure all the propellers are
attached in the correct motor position.
1. Unscrew the Propeller cap 4. Attach the correct propeller and the pad
2. Remove the Propeller Cap 5. Attach the Propeller Cap
3. Remove the pad and the blade 6. Tighten the screws
ASSEMBLE THE CAMERA
1. Plug the camera wires accordingly into the connection ports on the bottom of the drone. (Smaller wire
connects to small port while the Bigger wire connects to big port Pic. 1. Wire connector has two sides A/B
Pic. 2, A side of the small interface faces drone's Head and A side of Bigger interface faces drone's Tail
direction).
2. Push the camera into the camera installation track on the bottom of the drone.
 Loading...