-7-
<<.6+5B
&.*; 058?.< *7- 95*,.
9;8=.,=2?. 0>*;- 87 =1.
+5*-.+./8;. ;.68?270 8; 27<=*55270=1.
+5*-.
"##
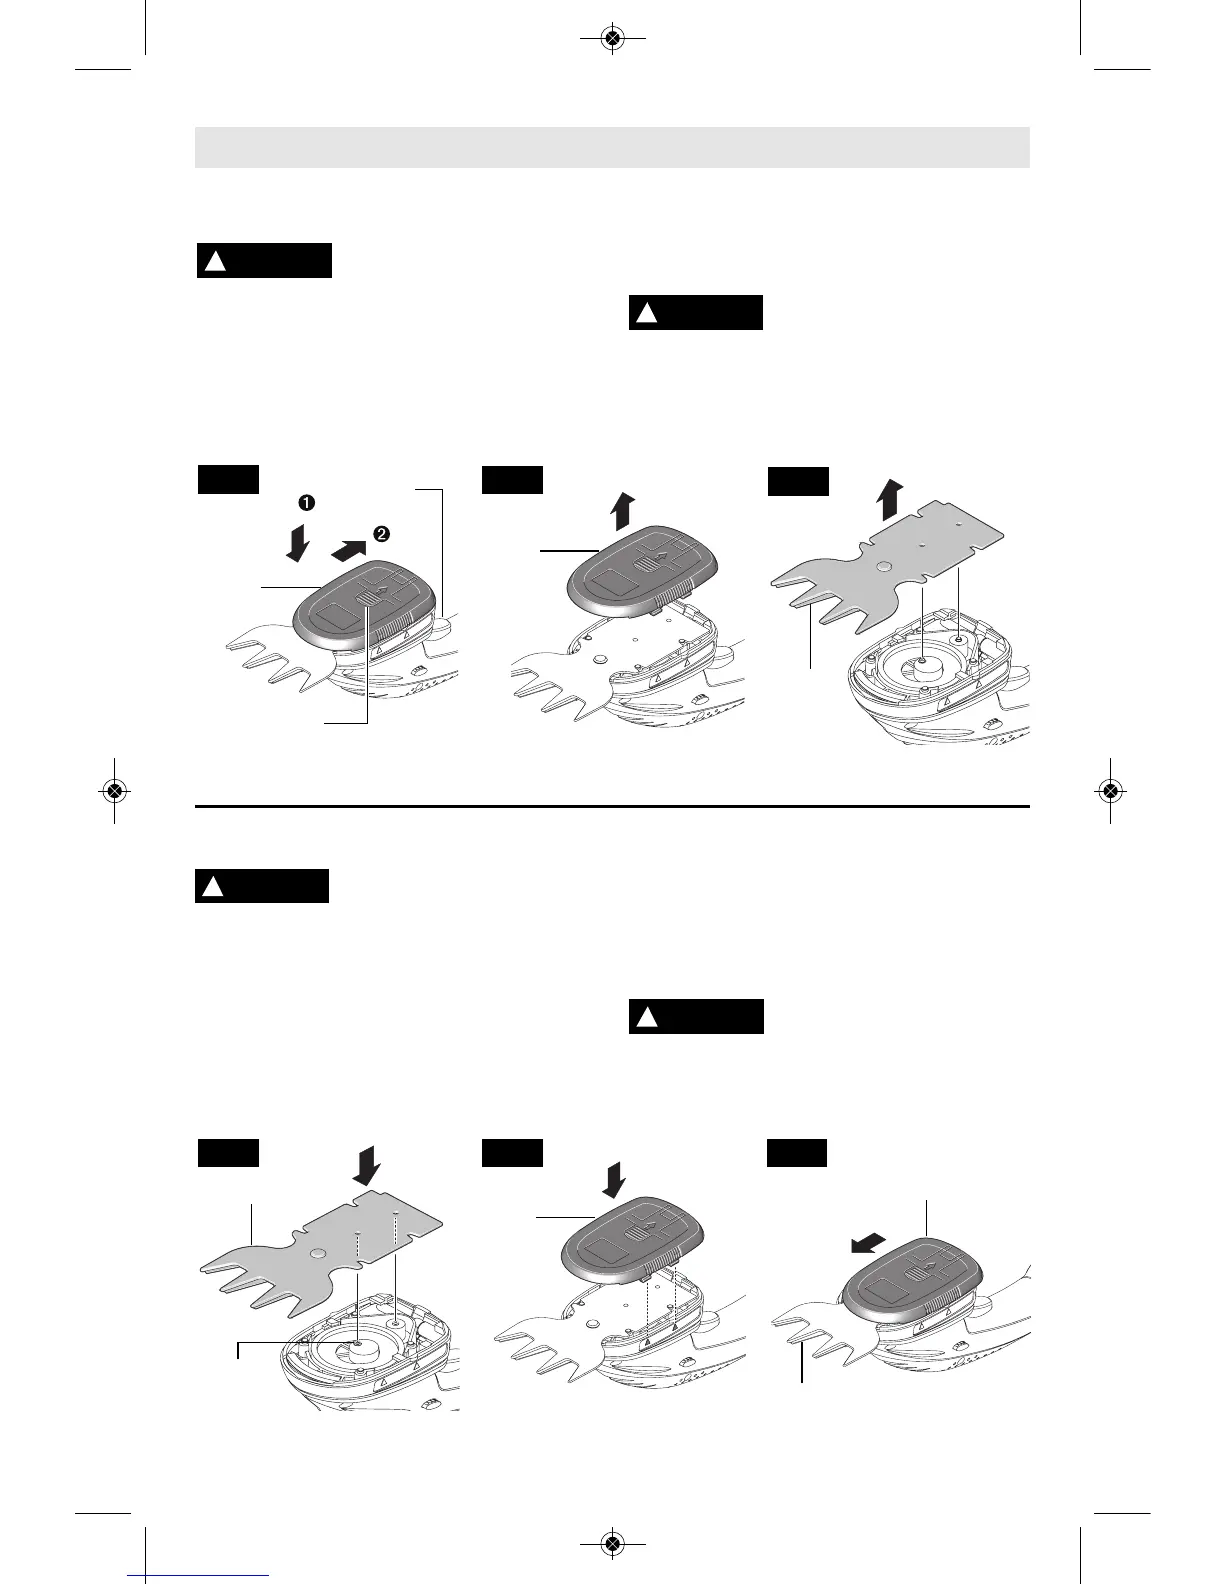
1. Position blade as shown, while aligning
holes in blade with drive pins and push blade
onto drive pins in direction of arrow (Fig. 5).
8=. If the appliance appears to have no
grease in the gears, add a small amount of
general purpose grease such as MOBILUX EP-2.
8=. When attaching the blade cover ensure
that all four locating tabs are inside the housing
before sliding blade cover into place (Fig. 6).
2. Slide the blade cover toward the blade to
secure (Fig. 7).
8 78= *==.69= =8 89.;*=.
=1. *9952*7,. >75.<<=1.
,8?.;2<9;89.;5B*==*,1.-The blade could
unexpectedly detach if the cover is not properly
attached.
&.*; 058?.< *7- 95*,.
9;8=.,=2?. 0>*;- 87 =1.
+5*-.+./8;. ;.68?270 8; 27<=*55270=1.
+5*-.
!%#
1. Push the blade cover release button and
slide cover toward On/Off switch (Fig. 2).
2. Lift the blade cover in direction of arrow and
remove from the housing (Fig. 3).
3. Lift the blade in direction of arrow and
remove (Fig. 4).
8 78= *==.69= =8 89.;*=.
=1. *9952*7,. >75.<<=1.
,8?.;2<9;89.;5B*==*,1.-The blade could
unexpectedly detach if the cover is not properly
attached.
!
WARNING
"
 Loading...