Do you have a question about the Skil Skilsaw 5064 and is the answer not in the manual?
Maintain a clean, well-lit work area, avoid explosive atmospheres, and keep children and bystanders away.
Ensure proper plugs, avoid earthed surfaces, protect from rain/wet, do not abuse the cord, and use outdoor extension cords.
Stay alert, use personal protective equipment, prevent unintentional starting, and dress properly.
Do not force the tool, use the correct tool, maintain power tools, and disconnect before adjustments.
Kickback is a sudden reaction to a pinched, bound or misaligned saw blade, causing uncontrolled lift.
Maintain a firm grip, resist kickback forces, release trigger on binding, restart carefully, and support panels.
Check lower guard before use, ensure it moves freely, never clamp it open, and service if sluggish.
Tool usage restrictions for age, wet conditions, cord damage, asbestos, dust, and saw table requirements.
Check supply voltage, remove fasteners from workpiece, clear cutting path, secure workpiece, use utility detectors, and use extension cords.
Observe noise levels, use guards, avoid small workpieces, do not work overhead, and switch off immediately on malfunction.
Switch off the motor, ensure all parts stop, and do not stop the blade by lateral force.
Disconnect power, use wrench, press spindle-lock, remove/mount flanges, and tighten blade bolt securely.
Loosen lever, adjust foot to desired depth (0-64mm), and tighten lever. Ensure blade extends 3mm below workpiece.
Loosen knob, tilt tool to set angle (0-45°), and tighten knob. Check depth scale correspondence.
Adjust depth to max, set angle to 0°, and check for 90° between blade and foot using a square.
Use indicator for guiding along desired cut line, especially for 0° or 45° bevel cuts.
Ensure the wide part of the foot rests on the supported section of the workpiece for stability.
Cutting width is determined by the blade teeth width, not the blade body width.
Connect vacuum cleaner or dust bag. Ensure hose does not interfere with guard or operation.
Connect power, hold handles firmly, ensure teeth clear workpiece, press safety switch then trigger.
Always face the good side of the workpiece down for the best cut quality and minimal splintering.
Use sharp, correct type blades. Carbide tipped blades last longer. Teeth count affects cut quality.
Use rip fence for exact cuts along workpiece edges. Can be inserted on either side of the foot.
Loosen knob, adjust fence to desired width using scale, and tighten knob.
Set depth, align indicator, open guard, switch on, lower tool gradually using front foot as hinge.
Support panels close to the cut. Set depth to cut through panel, not support. Use a clamped guide if needed.
Keep tool/cord clean, disconnect plug before cleaning. Clean blade after use. Seek authorized service for repairs.
Do not dispose of tools/accessories with household waste. Return to compatible recycling facility as per EU directive.
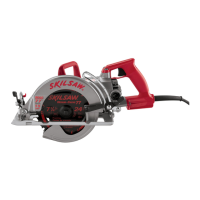
| Type | Circular Saw |
|---|---|
| Blade Diameter | 7-1/4 in |
| No-Load Speed | 5300 RPM |
| Bevel Capacity | 51 degrees |
| Max Cutting Depth at 45° | 1-3/4 inches |