16
ASSEMBLY AND ADJUSTMENTS
WARNING
Disconnect the plug from the power source before making any
adjustments or changing accessories. Such preventive safety measures
reduce the risk of starting the tool accidentally.
Tile Saw Blade Removal and
Installation
WARNING
To reduce the risk of
injury, do not use tile saw
blade larger or smaller than 7” diameter, do
not use tile saw blade with speed rating
less than 3600 Rpm. only use smooth edge
tile blade free of openings and grooves.
Tile Saw Blade Removal:
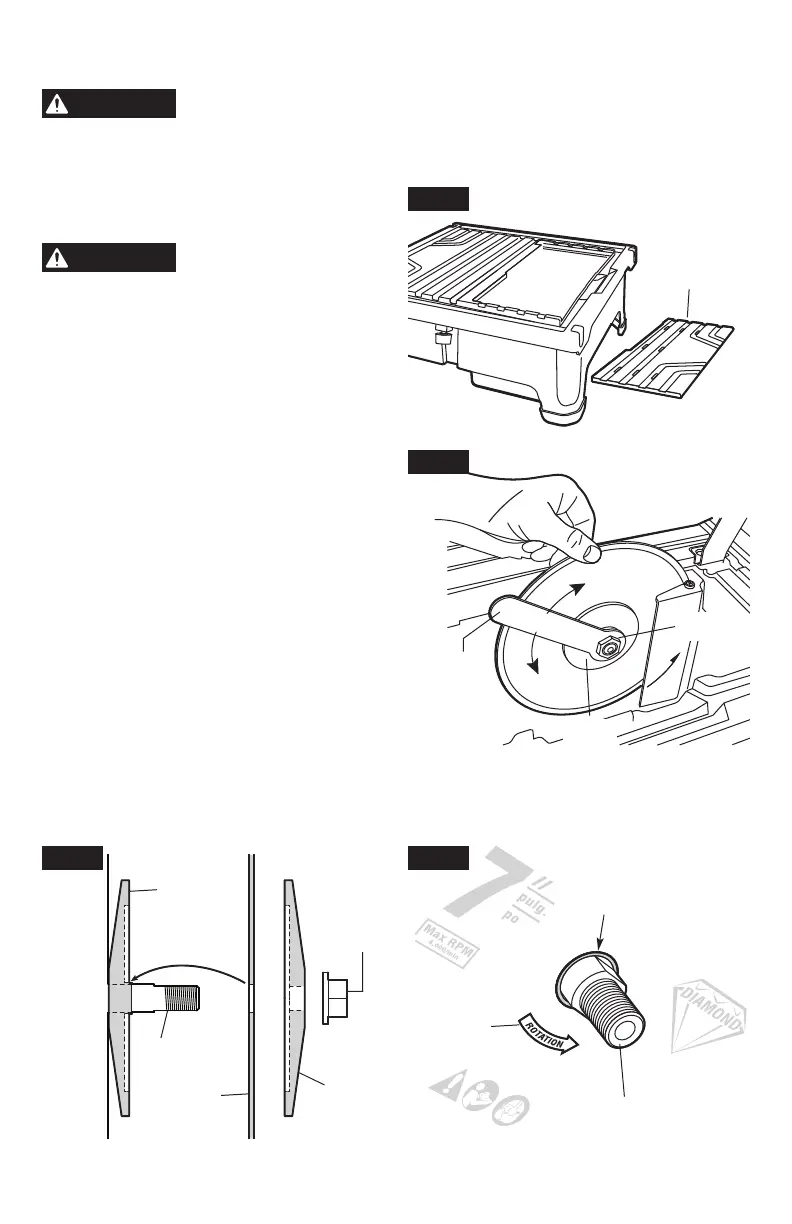
1. Remove the bevel table (Fig. 1).
2. Hold the tile saw blade rmly by hand,
then loosen the nut with nut wrench in a
counterclockwise direction (Fig. 2).
3. Remove outer ange and the tile saw blade.
Tile Saw Blade Installation:
1. Ensure that the shaft and the anges are
clean.
2. Ensure that the inner ange is properly
positioned on the shaft (Fig. 3).
3. Ensure that the directional arrow marked on
the new tile saw blade is counterclockwise
with the shaft (Fig. 4).
4. Place new tile saw blade on the shaft and
seat the tile saw blade on the rim of the inner
ange (Fig. 3 & 4).
5. Place outer ange on shaft. Rotate outer
ange until it aligns with shaft and slides against tile saw blade (Fig. 3).
6. Tighten the tile blade nut (Fig. 2), but DO NOT OVERTIGHTEN.
7. Ensure the tile blade is secure before using.
Fig. 1
Remove
Bevel Table
Fig. 2
Wrench
Outer
Flange
Tile Blade
Nut
Fig. 3
Inner
Flange
Tile
Blade
Nut
Outer
Flange
Shaft
Blade
Fig. 4
Rim of Inner
Flange
Tile Blade
Direction
Shaft
Blade must be
seated on rim
of inner ange
Install
Remove