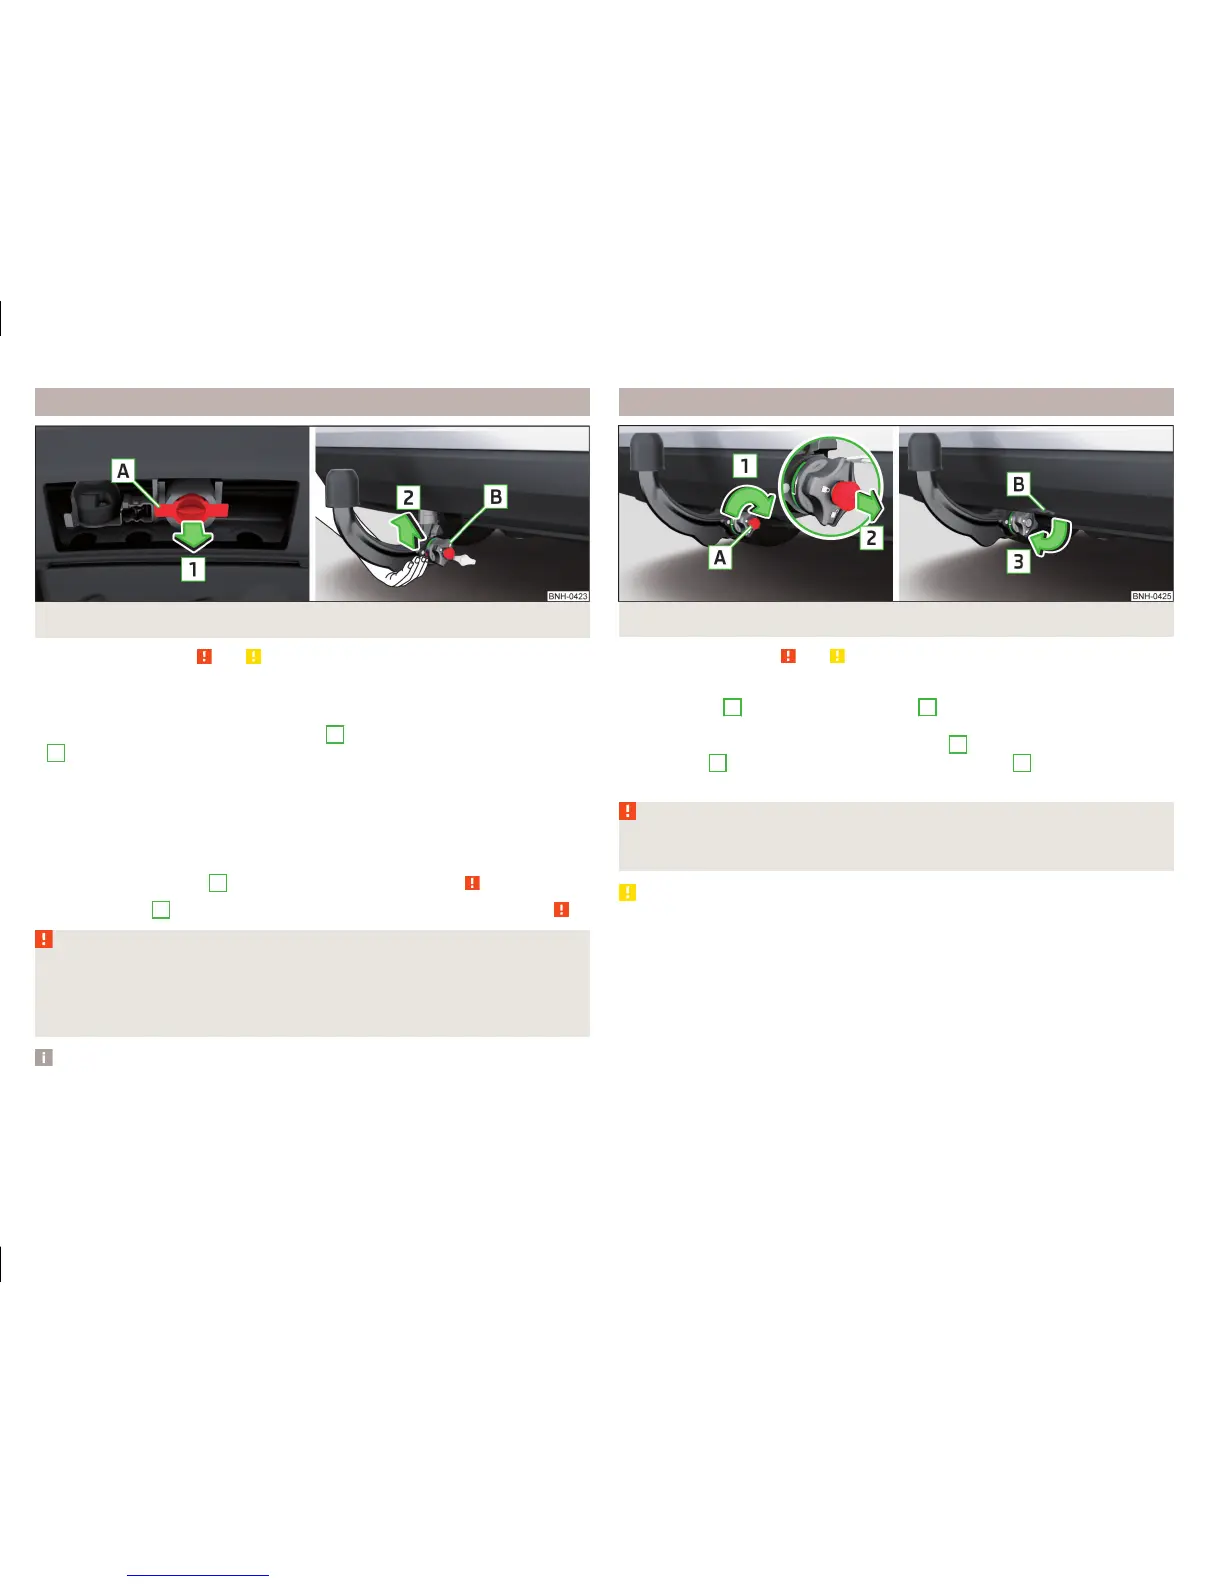
Assembling the bar ball - 1. Step
Fig. 115 Remove cap for receiving shaft / use ball bar
Read and observe and on page 120 first.
Preliminary work
Before installing the tow bar the following work must be carried out.
›
Remove the end cap for receiving shaft
A
in the direction of arrow
1
» Fig. 115.
The tow bar must be set to the standby position » page 121, A correctly set
ready position. If this is not in the standby position, then it must be set to the
standby position » page 121, Adjusting the ready position.
Fitting
›
Grip the tow bar from underneath » Fig. 115 and insert into the mounting re-
cess in arrow direction
2
until you hear it click into place » .
The hand wheel
B
rotates back automatically and rests on the ball rod » .
WARNING
■
Do not hold the hand wheel with your hand when attaching the ball bar -
there is a risk of finger injury.
■
If the tow bar is not in the ready position, it cannot be fitted in the
mounting recess.
Note
Store the cover of the mounting recess in a suitable place in the luggage com-
partment store after removal.
Assembling the bar ball - 2. Step
Fig. 116 Secure the lock and remove key / place cap on lock
Read and observe
and on page 120 first.
›
Initially carry out the first step of the ball rod assembly » page 122.
›
Turn the key
A
in the direction of arrow
1,
so that the arrow on the key
symbol
» Fig. 116 shows.
›
Remove the key in the direction of the arrow
2
.
›
Fit the cap
B
on the lock in the direction of the arrow
3
.
›
Check that the tow bar is securely attached » page 123.
WARNING
■
After fitting the tow bar, always secure the lock and remove the key.
■
The tow bar must not be operated with the key inserted.
CAUTION
After removing the key, always replace the cover on the lock – there is a risk of
the lock getting dirty.
122
Driving

 Loading...