OCTAVIA
Lubrication System 17
Edition 06.01
S00.5125.51.20
------------
-------------
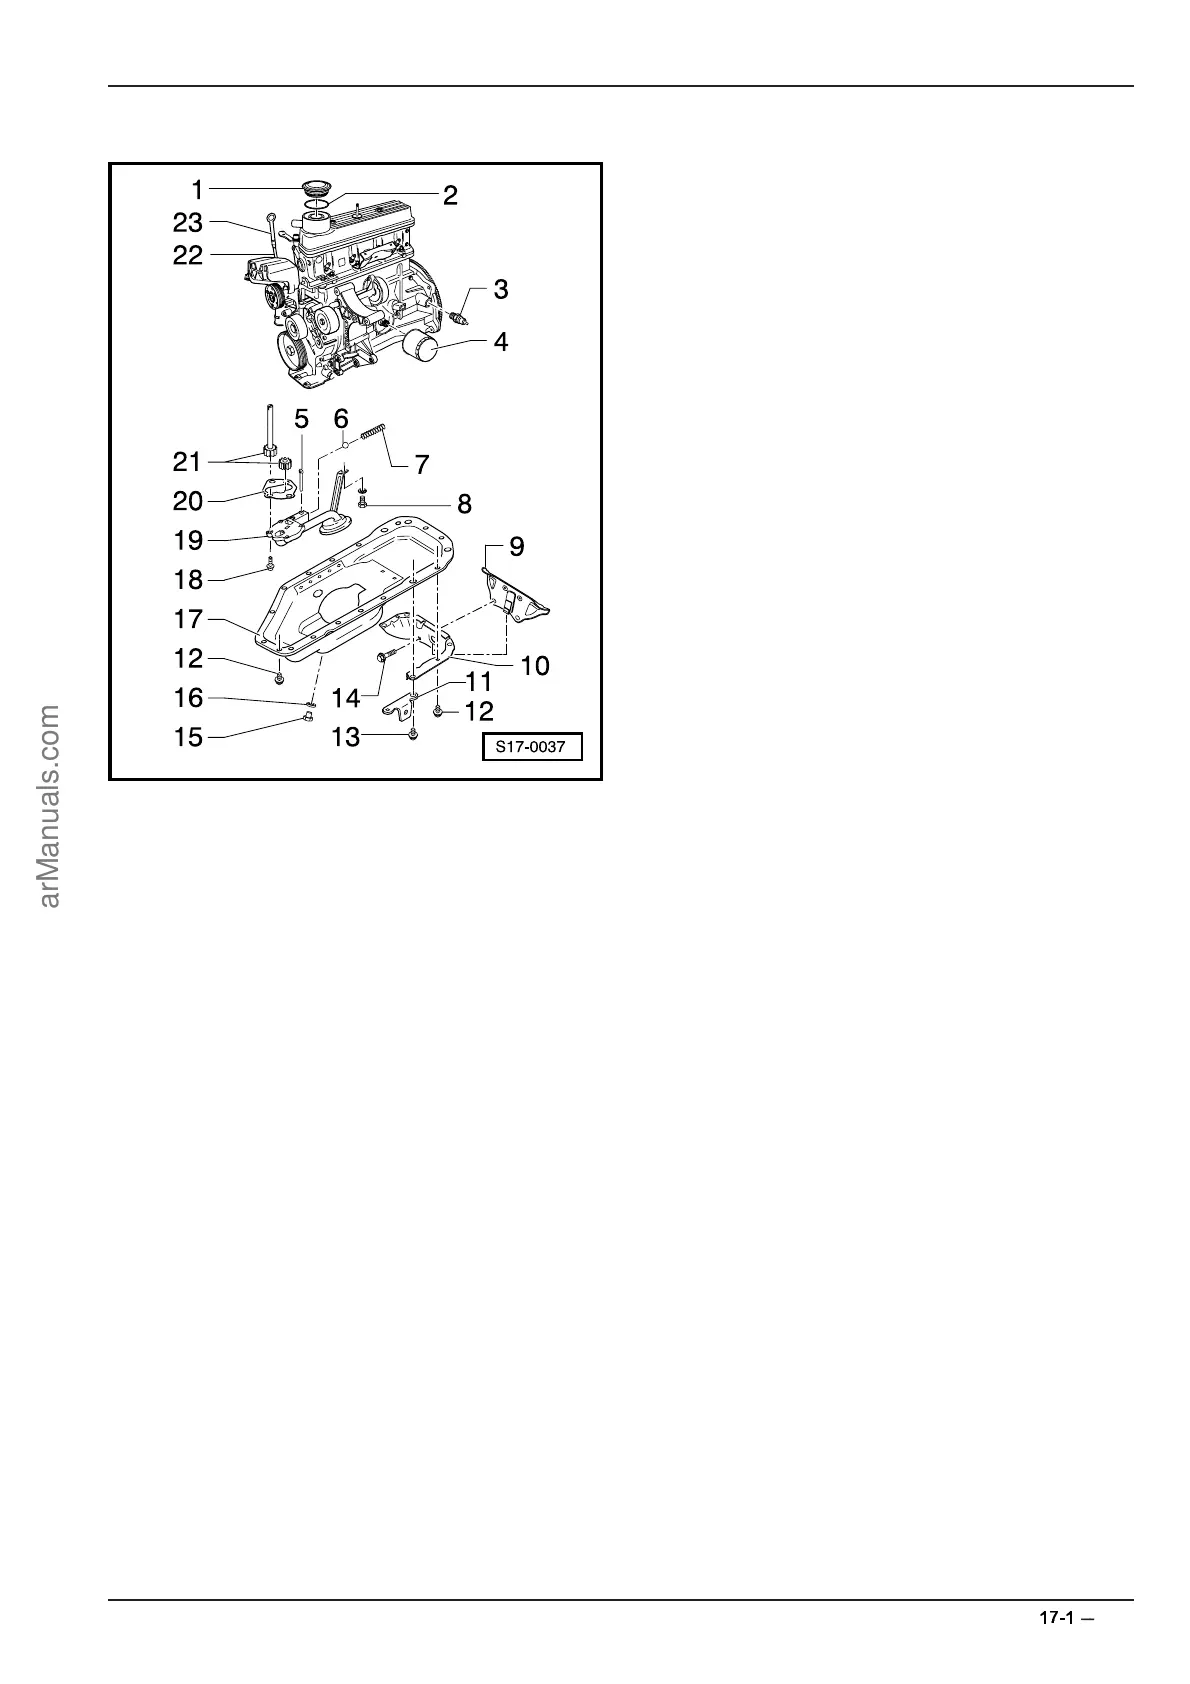
Removing and installing parts of the lubrication system
Notes:
♦ If considerable quantities of metal swarf and
abrasion -caused by contact damage such
as damage to crankshaft and conrod bear-
ings- are found in the engine oil when carry-
ing out repair work in the engine, clean the
oil galleries carefully in order to avoid con-
sequential damage.
♦ The oil level must not extend beyond the
max. marking - risk of damage to catalytic
converter!
Checking quantity of oil, oil specification and
engine oil level:
⇒ Inspection and Maintenance
1 - End cover
♦ fit on for removal and installation work
2 - Gasket
♦ replace if damaged
♦ at engine cover
3 - Oil pressure switch -F1-, 45 Nm
♦ testing ⇒ page 17-6
♦ cut open seal if leaking, and replace
4 - Oil filter
♦ slacken with tensioning strap
♦ moisten seal with oil
♦ tighten by hand
♦ pay attention to installation instructions
on oil filter
♦ pay attention to replacement intervals
5 - Split pin
6 - Ball
♦ for pressure relief valve
♦ knock slightly with aluminium drift
when installing so that the ball seat is
smoothed
7 - Compression spring
♦ for pressure relief valve
8 - 8 Nm
9 - Intermediate plate
♦ clamp onto oil pan support
10 - Oil pan support
♦ may also be welded to oil pan
11 - Bracket
♦ for front coolant pipe
12 - 10 Nm
13 - 20 Nm
14 - 45 Nm
15 - Oil drain plug, 30 Nm
16 - Seal
♦ replace
17 - Oil pan
♦ removing and installing ⇒ page 17-3
ProCarManuals.com
 Loading...