MIDI CONTROL ASSIGNMENTS
HOW TO EDIT THE MIDI CHANNEL:
- Unplug the power from the MR10 Loop System.
- Press the EDIT bu on and hold it while connec ng power to the unit.
- Press the EDIT bu on repeatedly un l the desired MIDI channel is selected. Look at the MIDI channel diagram below.
- When the desired MIDI channel is selected, press the EDIT bu on for 2 seconds. The LED’s will now blink to indicate that the programming is stored.
MIDI CONTROL CHANGE NUMBERS:
LOOP 1 is CC# 11 LOOP 6 is CC# 16
LOOP 2 is CC# 12 LOOP 7 is CC# 17
LOOP 3 is CC# 13 LOOP 8 is CC# 18
LOOP 4 is CC# 14 LOOP 9 is CC# 19
LOOP 5 is CC# 15 LOOP 10 is CC# 20
The MIDI controller numbers can be changed by so ware revision.
Contact SKRYDSTRUP R&D for details.
MIDI PROGRAM CHANGE:
Select a preset on your MIDI Foot Controller, or MIDI controlling device.
By pressing the EDIT bu on, you can now scroll through Loop 1 - 10. Press the EDIT bu on once and the LED of Loop 1 will start fl ashing.
If you wish to ac vate the loop, hold the EDIT bu on for 2 seconds. The LED’s will fl ash three mes to indicate that the selec on has been stored.
Repeat the procedure if addi onal loops should be ac vated or deac vated within the selected preset.
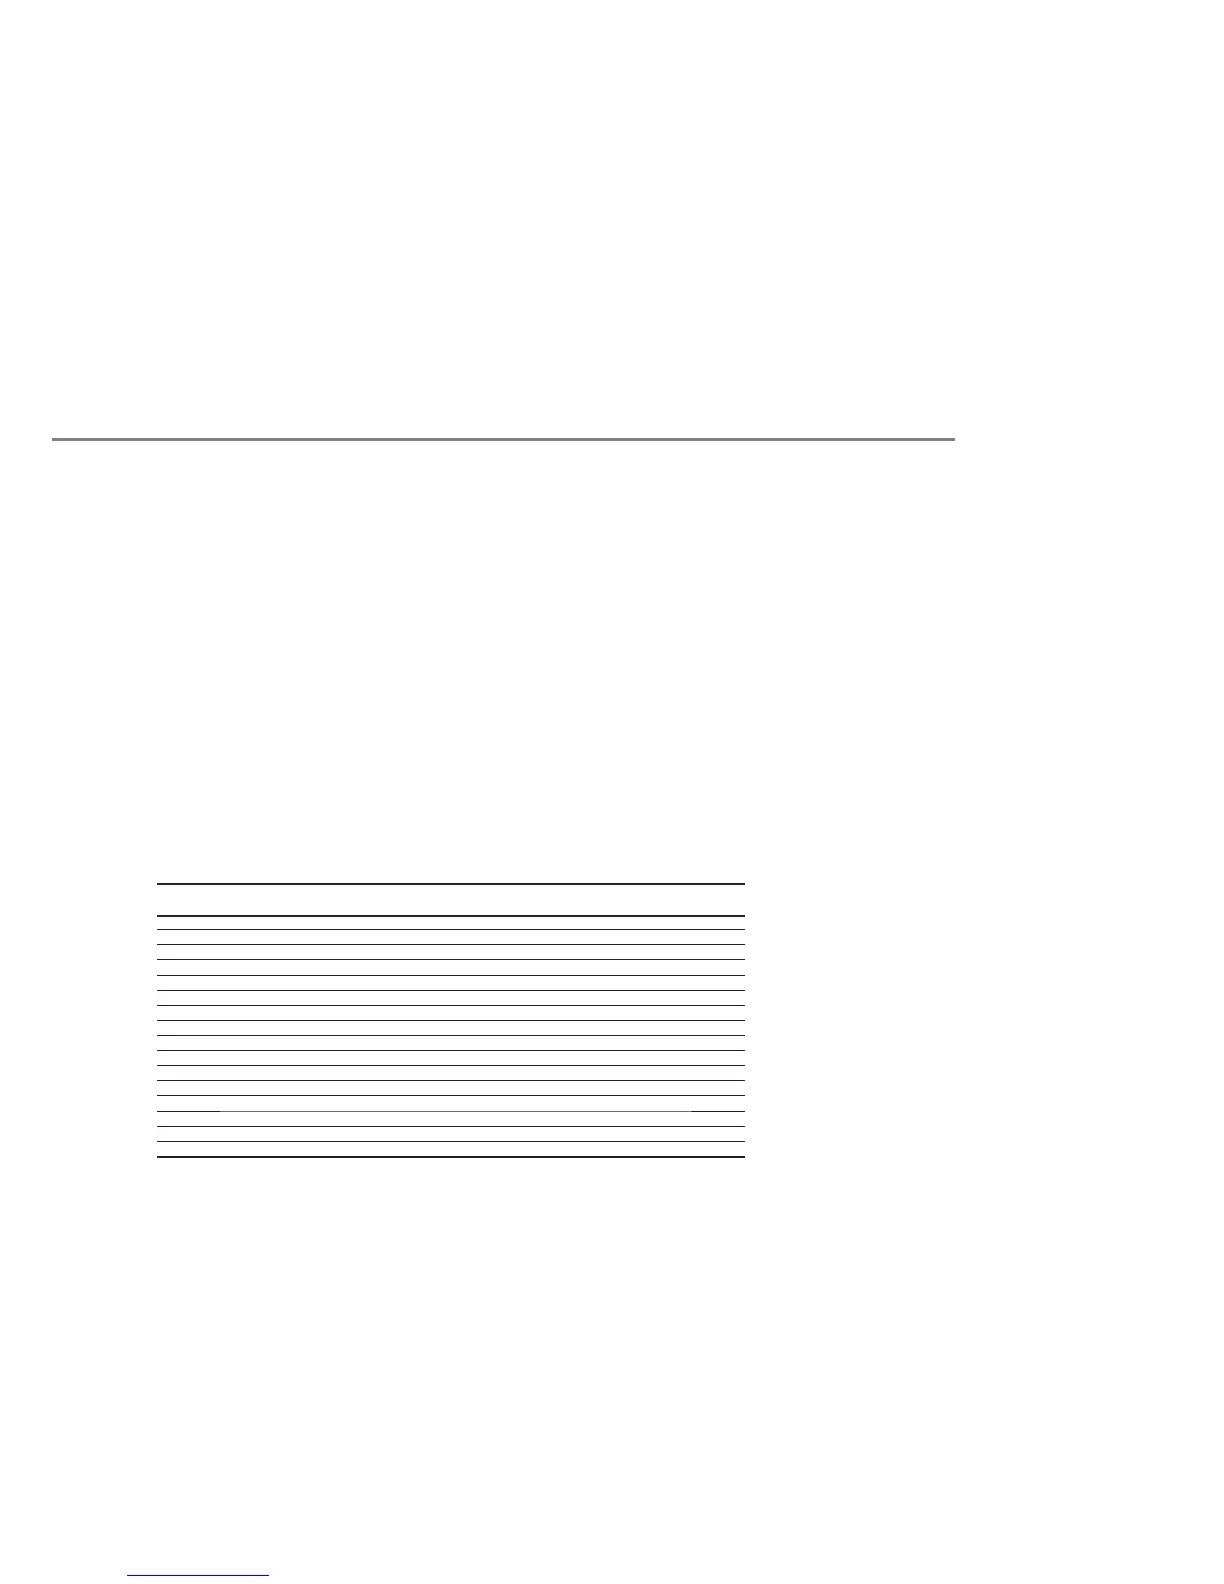
MIDI CHANNEL DIAGRAM:
MIDI CHANNEL LED L1 LED L2 LED L3 LED L4
1
{{{{
2
z
{{{
3
{
z
{{
4
zz
{{
5
{{
z
{
6
z
{
z
{
7
{
zz
{
8
zzz
{
9
{{{
z
10
z
{{
z
11
{
z
{
z
12
zz
{
z
13
{{
zz
14
z
{
zz
15
{
zzz
16
zzzz