Do you have a question about the Skytron DoVera DE12 Series and is the answer not in the manual?
Initial use requires user instruction. Personnel must be trained on operation, cleaning, and maintenance for safe use.
Summary of WARNINGS & CAUTIONS. Includes electrical shock, flammable mixtures, eye protection, and avoiding foreign objects.
For medical personnel, short-term, active, noninvasive, local site illumination for treatments and diagnosis.
Refer to Installation Manual. Ensure compliance with state, local, and national electrical codes & OSHA.
Specifies ambient temperature, relative humidity, and atmospheric pressure ranges for transport, storage, and use.
Lists various medical electrical equipment standards (CSA, AAMI, IEC) to which the device is certified by ETL.
Details data labels containing model number, fuse type, electrical specs, and product serial number for various models.
Explains symbols used on the device, including warnings, cautions, fuse, ground, serial number, and CE marking.
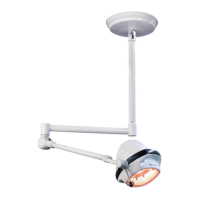
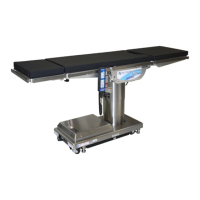
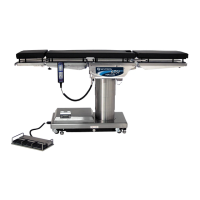
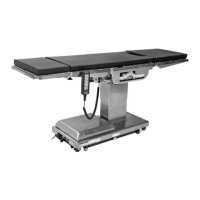
Provides visual identification of different DoVera DE12 models (Ceiling, Wall, Mobile Floor Stand) with dimensions.
Lists detailed technical specifications for the lighthead, power connection, and general data including illumination and voltage.
Describes the lighthead's 12 LEDs, indirect lighting, and its single-point ceiling mounting with continuous rotation.
Emphasizes connection to mains with earth protection and requires installation by a licensed electrician using recognized materials.
Advises inspecting the product for safe and correct operation. Malfunctioning units should be removed and serviced by a qualified representative.
Details how to operate the light, including positioning, turning on/off, and adjusting intensity levels via the control pad.
Explains the procedure for removing and installing the sterilizable grip for cleaning and sterilization.
Describes the wall-mount lighthead's 12 LEDs, indirect lighting, and its 180° radial arm rotation capability.
Stresses connection to mains with earth protection and installation by a licensed electrician with approved materials.
Recommends inspecting the light for safe operation, checking for damage, and ensuring mechanical integrity before use.
Guides users on positioning, powering on/off, and adjusting light intensity using the control pad for the wall mount fixture.
Details the steps for removing and installing the sterilizable grip for proper cleaning and sterilization purposes.
Covers the mobile lighthead's 12 LEDs, indirect lighting, and its mounting on a portable base with casters and articulation.
Specifies requirements for a properly grounded 100-240VAC, 50/60Hz supply, noting the power cord and main switch location.
Instructs users to inspect the light for safe operation, check for damage, verify connections, and unlock casters before moving.
Outlines the operation steps for the mobile light, including positioning, braking, and ensuring stability for use.
Describes how to remove and install the sterilizable grip, referencing the sterilization process in Section 6-2.
Provides guidelines for daily cleaning and disinfecting using compatible agents to maintain fixture appearance and function.
Details the process for sterilizing the grip, emphasizing proper cleaning and adherence to sterilization parameters.
Clarifies that only authorized technicians should service the unit. Users are responsible for inspections and reporting issues.
Lists essential pre- and post-use inspection points for all models to ensure safety and proper operation.
States that periodic inspection by an authorized representative is required. Provides a maintenance matrix for reference.
Indicates a 10-year lifespan and advises contacting representatives for proper disposal in accordance with environmental regulations.
Advises on proper disposal methods for parts and adherence to regulatory standards for environmental protection.
Outlines adjustments for radial and spring arms by authorized personnel, focusing on tension and friction for position maintenance.
Details the method for adjusting the spring arm tension by turning a ring nut to correct drooping or lifting issues.
Explains how to adjust arm friction by turning set screws clockwise to increase braking force and prevent drifting.
Lists serviceable replacement parts and provides guidance on obtaining them and authorized service.
Discusses EMC directive compliance, potential interference, and necessary precautions for installation and operation.
Provides manufacturer declarations and compliance levels for RF emissions, harmonic emissions, and voltage fluctuations.
Details electromagnetic immunity tests and intended use environments, including separation distances.
Tracks changes and revisions made to the manual, including the initial release date and version.
| Brand | Skytron |
|---|---|
| Model | DoVera DE12 Series |
| Category | Medical Equipment |
| Language | English |