EN
46 Installing the reserve chute
INSTALLING THE RESERVE CHUTE
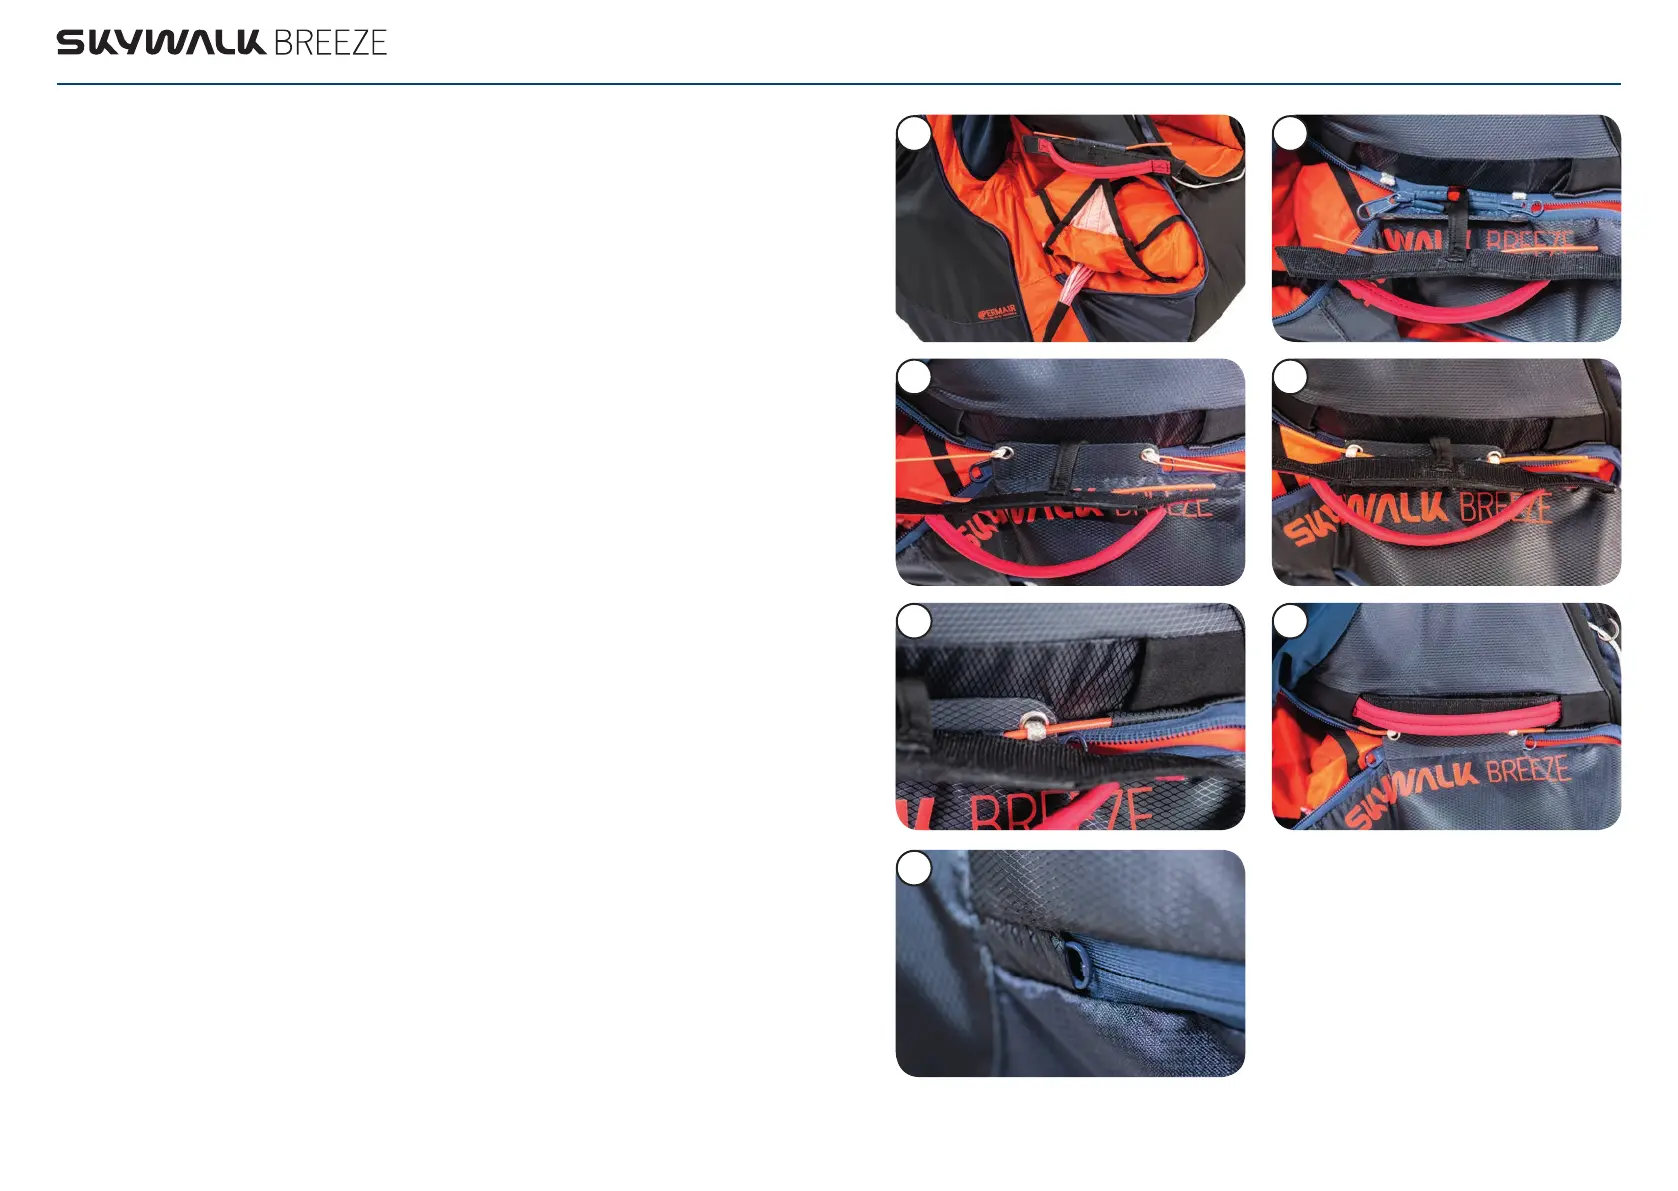
1. Place the reserve chute in the BREEZE reserve compartment lines first and the V-lines
untwisted next to it. Guide the V-lines up the side channel. (pic 1)
2. Guide the two zipper pullers counter to the actual functional direction to the opening
of the reserve compartment until the sliders abut each other at the stopper and place
the connection strap of the deployment bag between the two stops of the zippers, so
that the reserve chute is in the reserve compartment and the handle is on the outside
of the harness. The zippers must remain in this position until the end. (pic 2)
3. After the reserve chute has been properly inserted into the harness, it must be closed
by means of the split pins on the reserve chute handle. For this you need two short
auxiliary lines (due to the low friction, we recommend uncoated, not too thin paraglider
lines), which you thread into the two loops on the outer container. Pull the two loops
with the help of the auxiliary lines through the two lugs. (pic 3)
4. Secure the two loops with the split pins on the reserve handle. (pic 4)
5. Insert the ends of the split pins into the small pockets. (pic 5)
6. Secure the handle in the neoprene pouches, making sure the handle is not twisted
and the Velcro is in the correct position. (pic 6)
7. Remove the auxiliary lines carefully and slowly. Pulling too fast could damage the loops.
8. The zipper sliders must still abut the stoppers, so return them to position in case they
have slipped. Close the zippers completely, making sure they completely disappear into
the zipper garages. (pic 7)
9. Check that the split pins absorb the tension on the zippers by holding the
harness above and below the reserve compartment and pulling it apart.
Installing the reserve chute 47
1
3
5 6
2
4
7