PRO GUIDE // RANGE X-ALPS3
STEERABLE RESCUE PARACHUTES
The RANGE X-ALPS3 can also be used with steerable reserve parachutes, provided that
the specified volumes are observed. To assemble the rescue system, two screw cara-
biners with a total tensile strength of at least 2.400daN are directly connected to the
color-coded suspension points in the upper part of the V-line channel.
The control handles of the rescue system can be stored in the small compartment in
the upper part of the V-line channel. The straps are routed from the V-line channel
into the rescue compartment. The unused serial V-line can remain in the upper part
of the V-line channel.
During assembly, make sure that the control handles of the rescue parachute fit in the
upper part of the V-line channel and do not come into contact with the inner container.
COMPATIBILITY TEST
The correct installation of the reserve chute should now be verified with a test deploy-
ment. To do this, put on the harness, close the leg straps and hang the main carabiners
in a harness simulator. Then pull out the reserve chute by the handle.
For this test, it is not enough to deploy the reserve chute without sitting in the harness.
It must be possible for you to reach and pull the handle with no problem from the flying
position, in accordance with the instructions of this manual. The deployment force must
not be below 2 daN and must not exceed 7daN. In case of uncertainties you should con-
sult a specialist or contact your competent skywalk dealer.
The reserve chute must be deployed with the correct throwing technique, with a con-
tinuous and steady pull in a sideward movement away from the harness. Otherwise, de-
ployment may be difficult.
BEFORE EACH FLIGHT, CHECK TO SEE IF THE RESCUE HANDLE IS IN THE
RIGHT POSITION AND WHETHER THE SPLINTS OF THE HANDLE ARE SITTING
CORRECTLY. REACHING FOR THE RELEASE HANDLE TO TEST ITS POSITION
EVERY FLIGHT CAN HELP YOU MEMORIZE THE POSITION SUBCONSCIOUSLY.
44 Mounting the Reserve Chute
Mounting the Reserve Chute 45
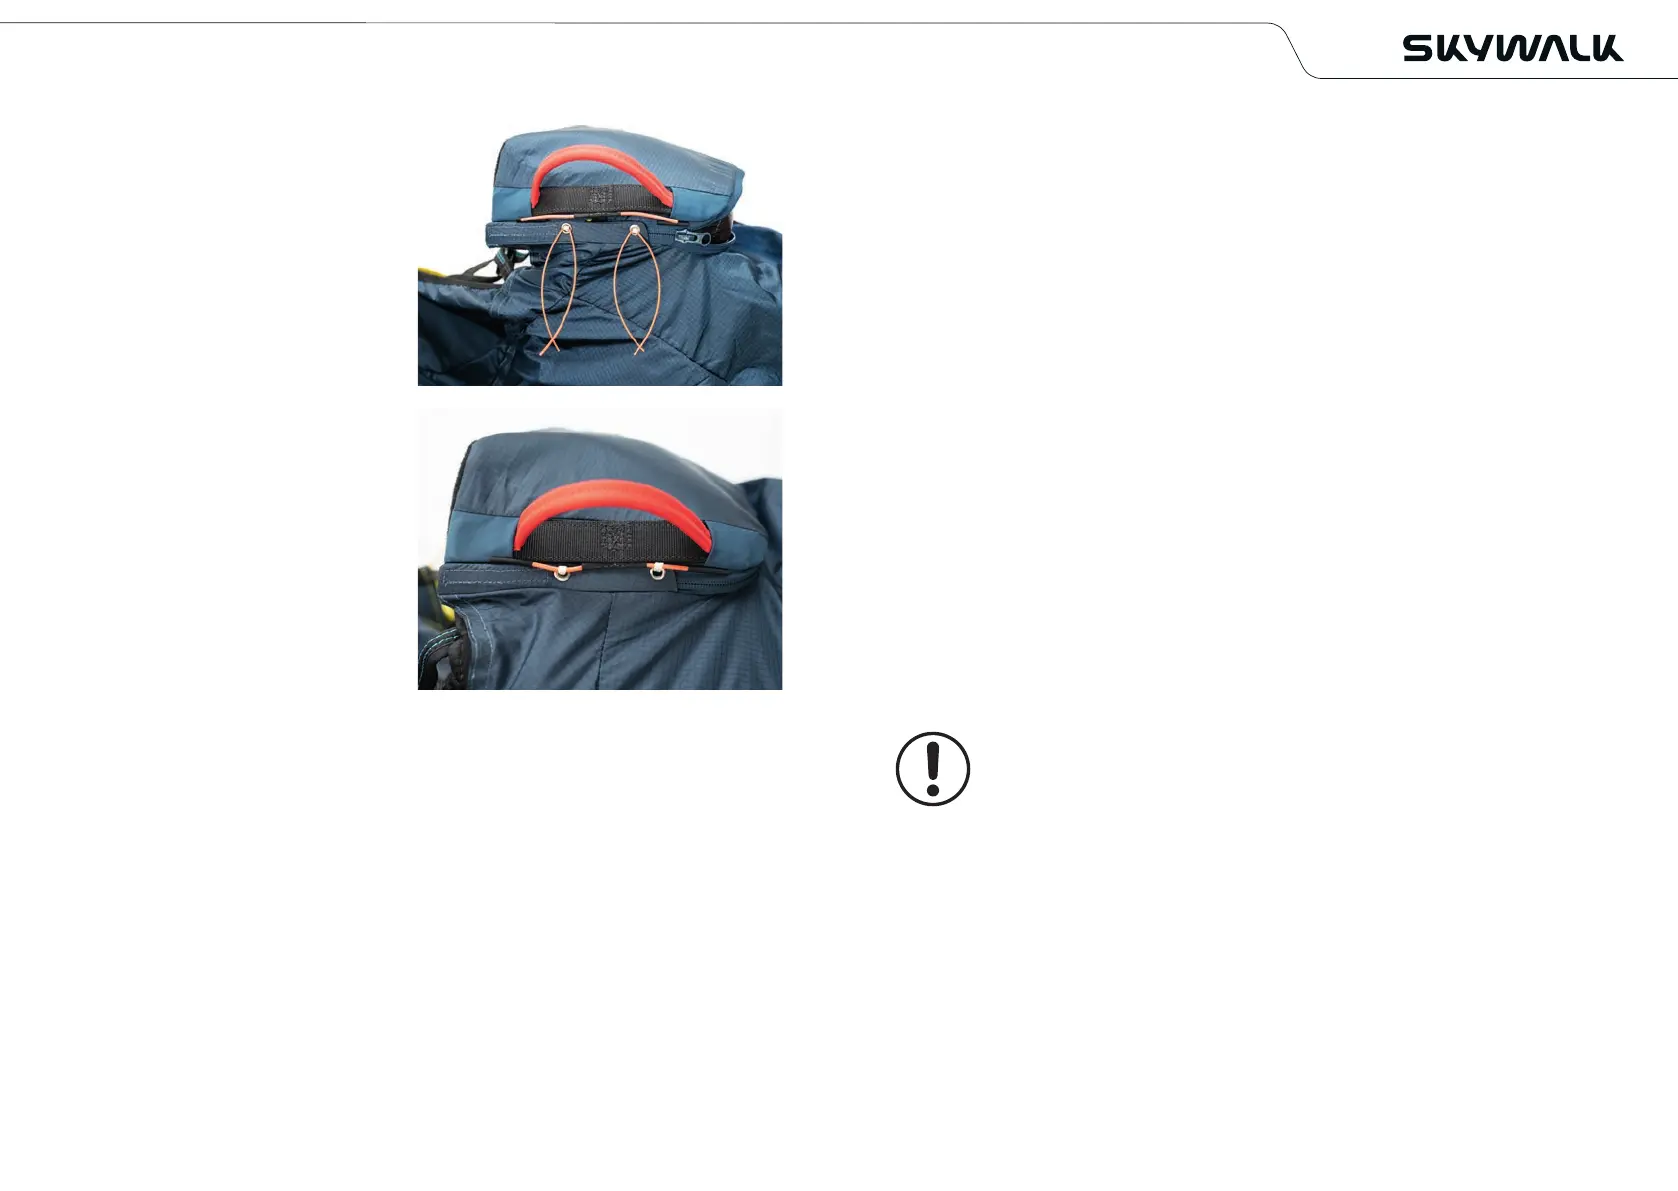
short auxiliary lines (due to the low
friction we recommend unsheathed,
not too thin paraglider lines or rigid
foils), which you thread into the two
loops on the front container. Pull the
two loops through the two eyelets
with the help of the auxiliary lines.
4. Secure the two loops with the cotter
pins on the rescue handle.
5. Insert the ends of the cotter pins into
the channels .
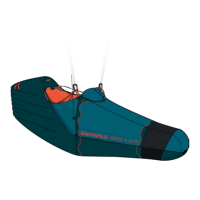
6. Secure the handle in the neoprene
pockets, making sure that the handle
is not twisted and that the Velcro is
in the correct position.
7. Pull off the auxiliary lines carefully and
slowly. Moving too quickly could damage
the loops.
8. The slider of the zipper must still touch
the stopper, guide it back into posi-
tion in case it has slipped.
Close the zipper completely, making
sure it disappears completely into the
zipper garage