PRO GUIDE // RANGE X-ALPS3
6 INITIAL SETUP
SPEED SYSTEM
The supplied speed system is already mounted on the seat of the harness when delivered.
However, the length of the speed bar travel must still be set individually on the paraglider.
Proceed as follows:
1. If the speed system is set too short, it won’t be possible to fully extend your legs.
2. If the speed system is set too long, the pulleys on the risers will not meet.
3. In the optimal case, your legs are stretched out fully just as the pulleys on the risers
of the paraglider touch each other.
4. To adjust the length, open the knot on the brummel hooks.
5. After finding the optimal length, tie the brummel hook with a bowline knot.
6. You can also adjust the second step of the speedbar by means of a knotted line.
PERMAIR PROTECTOR
The RANGE X-ALPS3 is a harness with permanent-airbag protector. The protector
is approved according to the rigorous criteria of LTF91/09 and meets these require-
ments when inflated. The protector provides the best protection when fully inflated
and can be inflated with the Inflation Bag, the PERMAIR mouthpiece or the PERMAIR
pump (optional). skywalk recommends to use any of the three inflation aids mentioned
above, as the humid air you breathe can lead to condensation, which in turn encourag-
es the formation of mold.
The protector can be removed behind the storage compartment underneath the seat
to make any repairs. Make sure to keep sharp objects, such as sticks, away from the
harness.
THE PROTECTOR IS NO SEAT CUSHION! SITTING ON THE HARNESS MAY
DAMAGE THE PROTECTOR OR SHORTEN ITS LIFE. IF YOU SUSPECT DAM-
AGE, TEST FOR LEAKS. WHEN IN DOUBT, CONTACT YOUR SKYWALK DEAL-
ER OR US DIRECTLY.
INFLATION BY INFLATION BAG
1. Make sure that there are no sharp or pointed objects on the ground.
2. Lay the harness flat on its side and make sure that there are no heavy objects on top
of the protector, making inflation difficult.
3. Open the back compartment.
4. Insert the valve into the valve base, making sure that the valve closes completely and
no gap remains. If the check valve is not yet fully seated in the base, press the valve into
the base with both thumbs until a slight click is heard and no gap is visible between the
valve and the base. This can be a little more difficult in colder temperatures, such as
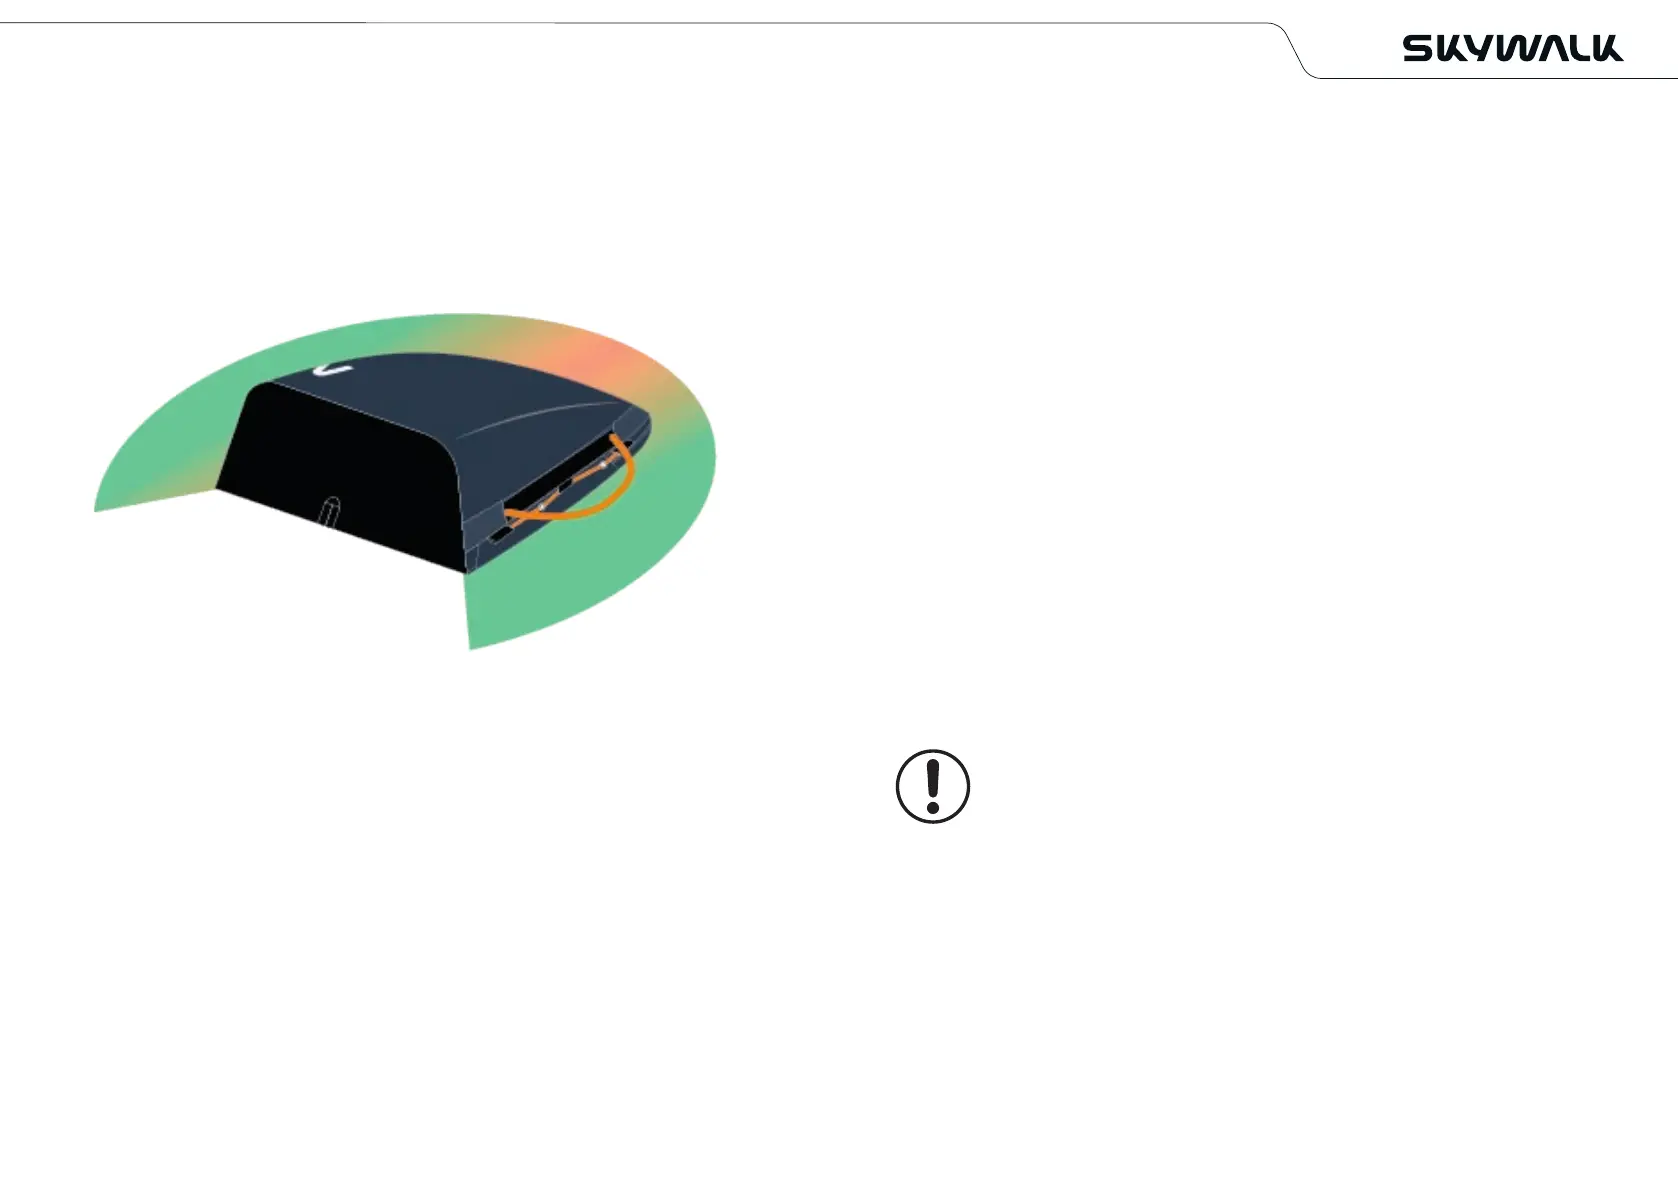
green = very good
orange = moderately difficult
red = adverse
due to seat position and arm length
Initial setup 4746 Mounting the Reserve Chute
DEPLOYMENT OF THE RESCUE PARACHUTE
In the design of the release unit, the highest value was placed on ease of release.
The rescue release was checked in numerous tests in the G-Force simulator.
When releasing the rescue, pay attention to the direction of movement. Here you will
find an overview of ideal and rather unfavourable directions:
A reserve chute deployment can be made more difficult by the following
factors:
> The reserve chute is too large or too bulky for the compartment or the deployment bag.
> The reserve chute is not packed in the shape of the deployment bag.
> The reserve chute is not thrown with the appropriate throwing technique.
> The reserve chute has too much volume after repacking.
> Because arm length is crucial for a successful reserve chute deployment, smaller
persons with short arms may not be able to deploy the reserve chute.
> In emergency situations, high G-loading can occur, which can make deployment
even more difficult.