24
7
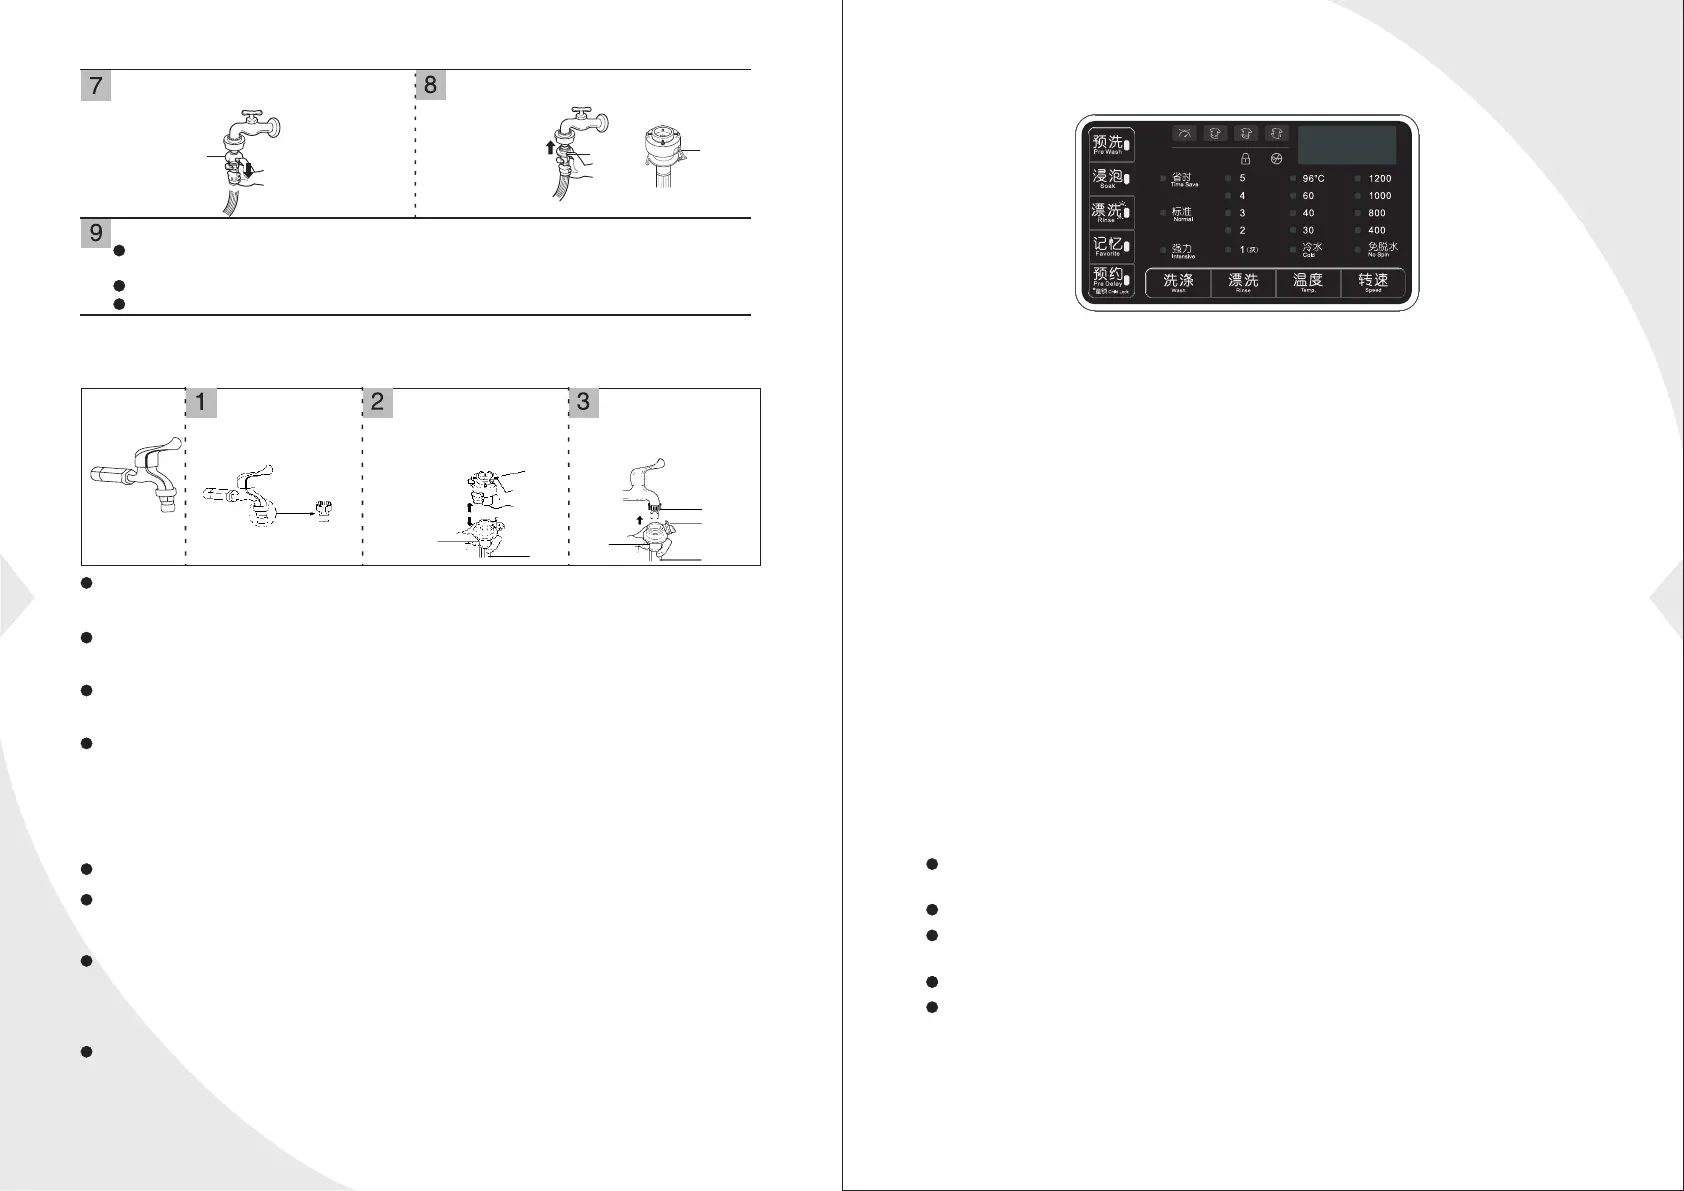
Take Off the Inlet Pipe: Press down the
retaining ring of the inlet pipe.
Install the inlet pipes, please insert it up
into the connector,then undo the retaining
ring.
Please make sure the connector and the inlet pipe joint tightly.
please tighten the connector of inlet pipe and inlet valve, turn on the water faucet
slowly to check whether leak.
If leak happens, please turn off the stopcock and install again.
It will loosen after long period of usage, please stall again as per 1--9.
Remark:
If you use special stopcock. Please install as following processes.
Replace the original
connector to the
standard connector
provided.
In one hand holds the
connector, the other
hand holds the buckle
down,to seperate the
inlet pipe and connector.
To pull the buckle
down,connect the
inlet pipe directly
inserted into the
standard connetor.
Such washing machine is designed for home appliances, please
do not install it on ship,traveling truck or plane.
Please turn off the stopcock if long time out of use.
(e.g vacation)
Please remove plug and cancel door lock function to avoid child
locking himself/herself inside.
Packing materials(e.g film, foam) could harm child's safety and
cause asphyxia! Attention: MAKE ALL PACKING MATERIEALS
OUT OF CHILD REACH.
Install drain-pipe
Please fix the drain-pipe by a lifting rope.
For the sake of lightening damage of leak towards ground, please
place the drain-pipe correctly.
In order to avoid siphon,the height of drain-pipe should between
(0.85m-1.25m),moreover, the terminal of is should not be placed in
water.
If the drain-pipe is too long, please do not force to insert it into
washing machine, which would cause abnormal noise.
(Please check sketch map next page)
standard
connector
Retaining
ring
replace
Retaining
ring
standard
connector
Make sure
the retaining
ring on the
connector
Retaining
ring
standard
connector
Retaining
ring
Inlet
Inlet
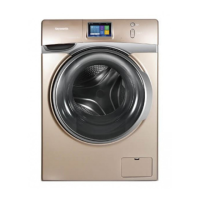
Function Introduction of Operating Panel
1. Prewash: If the cloths are too dirty, you can choose this program
before washing.
2. Soak: After selecting this function, there is a period of time for cloth
soaking, which can enhance the performance of washing. If the
program has the “weight” function, push one more time for “soak”
button can select the function of “weight”. If the programs do not have
“weight” function, or the “weight” function finished and the screen
display the remaining time, push the button of “soak”, you can
choose “soaking 16mins.”- “soaking 24mins”-cancelling soaking” for
optional. (The above operation should be done before running.)
3. Rinse: After selecting this function, the machine will heat the water
during last time of rinse in order to enhance the performance of rinse.
4. Memory: Used to memory the commonly used programs make it
convenient for users to select the used program by push one time
button. Push the “memory” button for 3 seconds and hear a chime,
at this time this program has been already memorized successfully. If
you want to use the memorized program, you can push the program
button when it is not running. (Do not push the buttons too long time,
just light up the lamp; the above operation should be done when it is
not running).
5. Prewash Function: When use “Prewash” function for washing, the
delay time is 3 hours to 19 hours.
When pushing the button for the first time, the screen display “3:00”, then
the maximum prewash time can be 19 hours.
Push one more time for button, it will increase 1 hour.
If want to cancel the prewash function, push “power: button or push one
cycle of “prewash” button.
The prewash time means from prewash to wash ending time.
You should operate the prewash function after selecting the grogram
and before push the button of “start/pause”.
6. Drum clean: The program of drum clean is use the high water level,
high water temperature, high speed to clean the drum and kill the bacteria.
The detailed operations ways, please take reference of Page 18.