NOTE: If desired, please change the door swing prior to installation.
CAUTION: To avoid personal injury to yourself and/or damage to property, it is highly
recommended that someone assist you during the door reversal process.
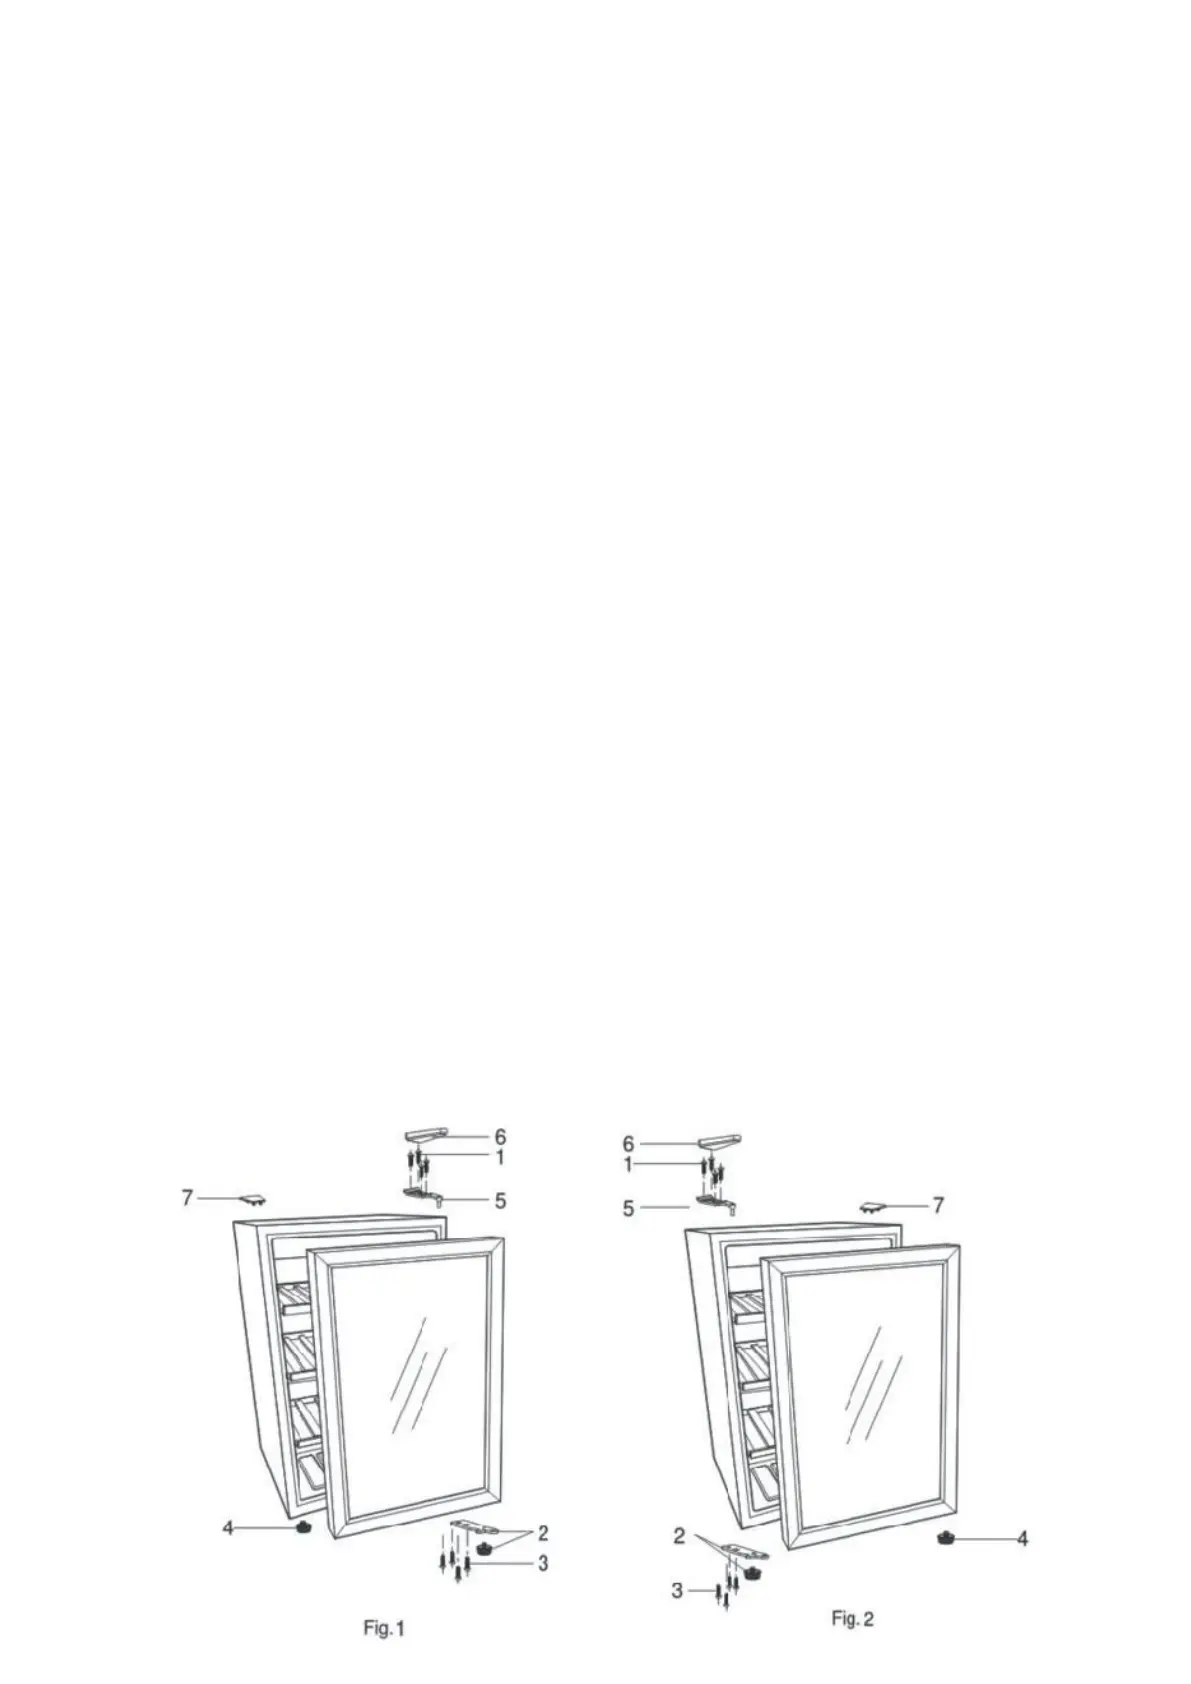
Door Removal
Turn off the unit and disconnect the power plug from the wall outlet.
Tilt the unit backwards and secure at an angle of 45 degrees.
Remove the upper hinge cover (Fig.1: No.6).
Remove the screws (Fig.1: No.1) that secure the upper hinge (Fig.1: No.5) to the frame.
Remove the upper hinge (Fig 1: No. 5).
Lift the door, remove from lower hinge and place it on a padded surface to prevent
damage and scratches.
Remove the screws (Fig 1: No.3) that hold the lower hinge, front leg (Fig.1: No.2).
Remove the lower hinge, front leg (Fig. 1: No.2).
Remove the front leg (Fig. 1: No. 4) and transfer to opposite side.
Door Installation
Remove the cover plate (Fig. 2: No.7) covering the upper hinge holes.
Reverse the direction of lower hinge (Fig. 2: No. 2).
Install the lower hinge, front leg (Fig. 2: No. 2) on the lower frame with screws (Fig. 2:
No. 3).
Secure door onto lower hinge.
Holding the door in the closed position, secure the upper hinge (Fig. 2: No. 5) to the
door and screw into the frame (Fig. 2: No. 1).
Note: Do not fully tighten the screws (Fig. 2: No. 1) until the top of the door is level with
the top of the unit.
Install upper hinge cover (Fig. 2: No. 6) over the upper hinge.
 Loading...