This document provides comprehensive instructions for the installation, operation, and maintenance of your washing machine, ensuring safe and efficient use.
Function Description
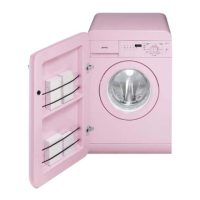
The washing machine is designed for domestic use, specifically for washing and drying clothes or fabrics suitable for machine washing, as indicated by their labels. It offers various washing programs tailored to different fabric types, soil levels, and desired outcomes, such as refreshing, light dirt, normal dirt, and heavy dirt. The appliance incorporates features like prewash, intensive wash, easy iron, water plus, extra rinse, flexi time, rapid wash, and a buzzer to customize cycles. It also includes a child lock function to prevent accidental changes to settings during operation. The machine is equipped with a display that shows settings such as spin speed, cycle status, flexi time, child lock on/off, and maximum recommended weight, allowing for easy monitoring and adjustment of the washing process.
Usage Features
Preparation for Washing:
Before loading, subdivide items by fabric type and colorfastness, washing whites and colors separately. New colored items should be washed individually the first time. Always check garment labels for washing instructions. Ensure pockets are empty, buttons are secure, and zippers are fastened to prevent damage. Unhemmed or torn items should not be washed to avoid fraying. Small items like belts, handkerchiefs, socks, and padded bras should be placed in a white canvas bag. For difficult stains, pre-treat them before washing, as older stains are harder to remove. Only wool marked as "pure new wool" or "shrink-proof, machine-washable" should be washed using the specific wool program.
Loading the Machine:
Open the door and load washing evenly into the drum, ensuring items are opened out and not bundled. Mix large and small items for optimal results. The washing machine can handle up to 7kg of laundry per wash. Overloading can lead to poor washing results and potential appliance malfunction. Close the door firmly until it clicks shut, taking care not to trap any items between the door and the rubber gasket. A safety device prevents the machine from starting if the door is not properly closed.
Detergent and Additive Dispensing:
The internal detergent tray has three compartments: one for prewash detergent, one for main wash detergent, and one for fabric conditioner, starch, or other additives. Additives are automatically dispensed during the final rinse. For liquid main wash detergent, use the provided tang in the main wash compartment. Do not fill liquid compartments above the maximum level to prevent premature dispensing. Always dilute dense additives with a little water to prevent clogging. Use only low-foam detergents suitable for washing machines. The amount of detergent needed depends on water hardness, load size, and soil level. Refer to detergent packaging for recommended doses based on water hardness levels (soft, medium, hard, very hard). Descalers can be added to prewash and main wash compartments as recommended by their producers, always placing detergent first.
Selecting and Starting a Program:
Turn the program selector knob to switch on the machine and choose a washing program. The display will show the estimated time remaining and the maximum recommended weight for the selected program. Default spin speed values are displayed and can be adjusted using the spin speed selection button. If "no spin" is selected, the appliance will stop with the tank full, omitting the final spin. To start the program, press the "Start/Pause" button. The display will show the remaining time and the "Start Pause" symbol will remain lit. Symbols identifying prewash, wash, rinse, and final spin phases will light up during the cycle.
Customizing Programs with Options:
The "Option Selection" button allows you to choose additional features:
- Prewash: Adds a 20-minute prewash at 35°C for very dirty items.
- Intensive: Increases the main wash temperature to 60°C and extends the wash stage for better enzyme effectiveness on delicate but dirty items.
- Easy Iron: Reduces creasing, making items easier to iron.
- Water Plus / Extra Rinse: Increases water volume for washing and rinses, or adds an extra rinse to the program.
- Flexi Time / Rapid: Reduces the cycle duration. "Flexi Time" offers intermediate and minimum settings, while "Rapid" is for small, lightly soiled loads.
- Buzzer: Toggles the end-of-cycle buzzer sound. The buzzer setting is retained for subsequent cycles unless "Night Wash" is chosen.
Confirm selected options by pressing the "Confirm options" button; the corresponding LED will light up. To delete an option, select it again and press "Confirm options." To annul all options, hold "Confirm options" for 4 seconds.
Delay Timer (Time to End):
Press the "Time to End" button repeatedly to select the desired time after which the washing program will finish. The display will show the set delay time. The "Start Pause" symbol will flash until the cycle begins. To cancel the delay, press the button repeatedly until the display shows "0."
Interrupting or Changing a Program:
To interrupt a program, press and hold the "Start/Pause" button for about 3 seconds. The display will show "PAUS" alternating with the remaining time. The "Start/Pause" light will flash. Programs can also be interrupted by turning the program/temperature setting knob. To change the program, simply turn the knob to select a new one; the new cycle will start from the beginning. If the tank was already filled, the water intake phase will be skipped. To restart the cycle, press "Start/Pause" again.
Program End:
When a program is complete, "END" appears on the display, and the "Time remaining" light turns off. Turn the program knob to "OFF," unload laundry, leave the door ajar to dry the interior, and turn off the water intake tap. If "no spin" was selected, "STOP" will appear, alternating with "0" spin speed. To proceed with pump-out and spin, press the spin selection button twice. To pump out water without spinning, set the spin speed to "0."
Child Lock:
Activate the child lock by pressing and holding the "Child Lock" button and simultaneously pressing the "Option selection" button within 3 seconds. The "Child Safety Function" symbol will light up. This prevents modifications to options, temperatures, spin speed, and the washing/drying cycle. Repeat the procedure to deactivate.
Emergency Door Opening:
In case of a power failure, the door can be opened using the mechanical release lever at the bottom of the appliance. Turn the knob to "Off," disconnect the power plug, drain the water (refer to maintenance section 5.4), then pull the lever down to open the door. Exercise caution as water may be boiling hot. Do not use the emergency release lever while the drum is turning.
Maintenance Features
Safety Precautions for Maintenance:
Always disconnect the appliance from the power supply socket before performing any cleaning or maintenance procedures.
Cleaning the Outside of the Appliance:
Regular cleaning helps maintain the appliance's appearance. Clean the exterior with soap and water, then dry thoroughly with a soft cloth. Wipe plastic parts with a damp cloth. Avoid using pointed objects, solvents, or abrasive substances, as these can damage surfaces. Never spray the washing machine directly with water jets.
Cleaning the Drum:
Remove any rust marks from the drum using a stainless steel cleaner or very fine sandpaper for stubborn cases. For descaling, use only brand-name descalers with anti-corrosion agents, following the manufacturer's instructions for use and dosage. After descaling or rust removal, run a few rinse cycles to remove any acid residues that could damage the appliance. Never use cleaners containing solvents, as they can form flammable and explosive vapors.
Cleaning the Door Gasket:
Regularly check the folds of the door gasket for any paper clips, buttons, nails, or pins.
Cleaning the Drain Pump:
The drain pump only requires cleaning if it becomes blocked by objects like buttons or brooches, or if water is not being pumped out.
- Disconnect the appliance from the electricity supply by removing the mains plug.
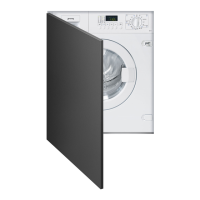
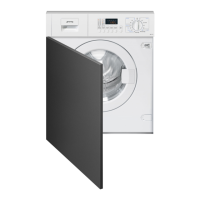
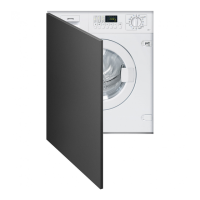
- Depending on the model:
- Built-in/totally concealed model: Use a small screwdriver to remove the plugs, turn the plinth downwards, and access the pump.
- Free-Standing Model: Insert a small screwdriver through the slits in the front of the plinth, apply upward leverage to release the top of the plinth from the cabinet, then tilt it forward slightly and pull it upward to remove it completely.
- Extract the drain hose "A." If the water is hot, use caution. Place a shallow container on the floor and remove plug "B" to drain the water. Empty the container multiple times if necessary. Once water stops flowing, push plug "B" firmly back into place.
- Unscrew the pump cover "D" by turning it to the left. Clean the pump and remove any foreign bodies. Check that the impeller "E" turns freely and remove any obstructions.
- Screw the pump cover back on. Secure the drain hose by snapping plug "C" back into place. Replace the plinth by fitting the bottom first, then pushing it towards the cabinet until it snaps into place.
Cleaning the Detergent Drawer:
The detergent drawer should be kept clean to remove solid deposits. To simplify cleaning, completely remove the drawer by pulling it out, pressing the "PUSH" zone, and then removing it completely. Remove the siphon "A" and clean all parts with hot water. Re-insert the siphon and remove any detergent deposits before putting the drawer back in position.
Cleaning the Water Intake Filters:
The machine has a filter in the intake hose fitting that protects the water intake valves. This filter needs cleaning if the machine is not taking in water or if the water flow is insufficient.
- Remove the mains plug to disconnect the appliance from the electricity supply.
- Turn off the water tap.
- Unscrew the intake hose fitting from the tap.
- Clean the filter with water and a small brush.
- When screwing the intake hose fitting back into place, ensure the filter is correctly positioned.
Troubleshooting:
The manual includes a troubleshooting table to help diagnose common issues before contacting After-Sales Service. It covers problems such as the appliance not starting, no water filling, water not pumping out, strong vibrations, excessive foam, water on the floor, and unused fabric conditioner. The display also shows error codes (e.g., "O.P:E.N." for door not closed, "E.1." for aqua stop tripped, "E.5." for water not taken in, "E.6." for water not pumped out) to help identify malfunctions. For other error codes, disconnect power, turn off the water tap, and contact a Service Centre.