EasyManua.ls Logo

Smoby GOURMAND CHALET User Manual

Smoby GOURMAND CHALET
4 pages
To Next Page IconTo Next Page
Page #1 background imageLoading...
Page #1 background image
A
B
X1
0h20
12
9
3
6
3
FRATTENTION!
GB WARNING!
DEACHTUNG!
NLWAARSCHUWING!
ES¡ADVERTENCIA!
PT ATENÇO!
IT AVVERTENZA!
DKADVARSEL!
SEVARNING!
FIVAROITUS!
NOADVARSEL!
HUFIGYELMEZTETES!
CZUPOZORNN!
SKUPOZORNENIE!
AR
PLOSTRZEENIE!
BG !
ROAVERTISMENT!
GRΔ!
SIOPOZORILO!
HRUPOZORENJE!
TRUYARI!
RU !
UA!
EE HOIATUS
LT DMESIO!
LVUZMANBU!
ans
years
Jahre
jaar
años
anos
anni
år
år
vuotta
år
év
let
rokov
lata
години
ani
χρόνια
let
godina
yaşından
лет
роки
aastastele
metų
gadiem
H
J
x1
x2
x2
x1
x7
x1
x1
x1
x1
x1
C
E
F
G
K
L
M
N
Q
R
P
FR •Outils non fournis
GB •Tools not provided.
DE •Werkzeug nicht inbegrien
NL •Gereedschap niet inbegrepen
ES •Herramientas no incluidas
PT •Ferramentas não fornecidas.
IT •Utensili non forniti
DK •Værktøj medfølger ikke.
SE •Verktyg ingår inte.
FI •Ei sisällä työkaluja
NO •Verktøy følger ikke med
EE •Tööriistu ei ole kaasas.
LT •Įrankių komplekte nėra
LV •Rīki komplektā nav ietverti.
HU •A szerszámok nem tartozékai a terméknek.
CZ •Nářadí není součástí dodávky
SK •Náradie nie je súčasťou dodávky
PL •Narzędzia niedostarczone w zestawie.
BG •Инструменти не са предоставени.
RO •Scule neincluse
GR •Τα εργαλεία δεν περιλαμβάνονται
SI •Orodje ni priloženo.HR •Alati se ne isporučuju
TR •Ürüne dahil değildir
RU •Инструменты не поставляются.
UA •Інструменти не входять у комплект
.
•AR
D
I15037
I21034
AAP2334
AAK0401
I15059
I15053
I15052
I16085
I21035
OUT1152
x1
x2
TS
U
1
2
1
2
4,5x20
I14083
OUT1976
AAP2333A p1/4
Question and Answer IconNeed help?

Do you have a question about the Smoby GOURMAND CHALET and is the answer not in the manual?

Smoby GOURMAND CHALET Specifications

General IconGeneral
Product TypePlayhouse
MaterialPlastic
Recommended Age2 years and up
UV ProtectionYes
Batteries RequiredNo

Summary

Product Components and Identification

Component List

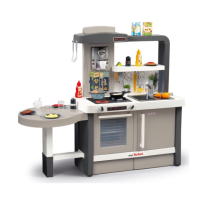
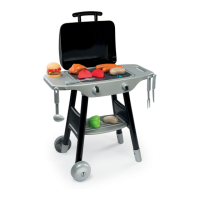
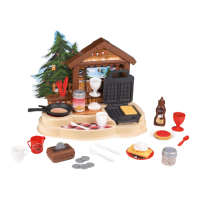
Lists all parts of the product with their respective codes and quantities for identification.

Tools Not Provided

Informs users that tools required for assembly are not included with the product.

Assembly Instructions

Step 1: Assemble Base Structure

Connect parts A, B, and C to form the initial structure.

Step 2: Attach Back Panel

Secure part K to the main structure using screws Q (x7).

Step 3: Position Front Base

Place part A onto the assembled base.

Step 4: Assemble Grill and Lid

Connect grill parts H, J, G, and F, ensuring proper locking (CLICK x6).

Step 5: Add Cooking Surface

Attach the pan (L) and its handle (M, N) to the grill assembly.

Step 6: Attach Door and Drawer

Fit parts E (door) and D (drawer) into the main structure.

Step 7: Final Assembly

Complete assembly by attaching the lid and other components.

Step 8: Add Accessories

Insert accessories U, S, and T into their designated slots.

Safety and General Information

General Safety Precautions

Advises keeping instructions, avoiding packaging hazards, and adult supervision.

Product Usage Guidelines

Stresses not using the product before correct assembly and monitoring young children.

Important Warnings and Service

Assembly Safety Warning

Toy assembly must be done by an adult due to potential sharp points or edges.

Customer Service Information

Provides contact details and a form for after-sales service and warranty claims.
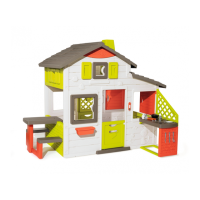
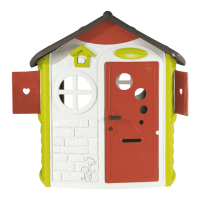
Related product manuals