EasyManua.ls Logo

Smoby 7600330121 User Manual

Smoby 7600330121
5 pages
To Next Page IconTo Next Page
Page #1 background imageLoading...
Page #1 background image
x1
x1
x1
x1
x1
x1
x1
A
A
A
A
x1
x1
B
C
D
OUT24210
I16089
I16089
J
G
E
H
I14146
I16097
0 h20
12
9
3
6
X1
3
F •ATTENTION!
GB • WARNING!
D •ACHTUNG!
NL • WAARSCHUWING!
E •¡ADVERTENCIA!
P • ATENÇÃO!
I • AVVERTENZA!
DK • ADVARSEL!
S • VARNING!
FIN • VAROITUS!
N • ADVARSEL!
H • FIGYELMEZTETES!
CZ • UPOZORNĚNÍ!
SK •UPOZORNENIE!
AR
PL • OSTRZEŻENIE!
BG • ВНИМАНИЕ!
RO •AVERTISMENT!
GR • ΠΡΟΕΙΔΟΠΟΊΗΣΗ!
SI • OPOZORILO!
HRV • UPOZORENJE!
TR •UYARI!
RU •ВНИМАНИЕ!
UA • УВАГА!
EST• HOIATUS
LT• DĖMESIO!
LV• UZMANĪBU!
ans
years
Jahre
jaar
años
anos
anni
år
år
vuotta
år
év
let
rokov
lata
години
ani
χρόνια
let
godina
yaşından
лет
роки
aastastele
metų
gadiem
K
L
N
P
R
S
T
M
Q
F
I22051
I22052
I22066
x3
x2
AAK0404
3,5x20
I22068
AAP2464A P1/5
!
WARNING: CHOKING HAZARD.
Small parts. Not for children under 3 yrs.
!
!
WARNING:
Never allow a child to play without adult supervision.
WARNING:
Toy must be assembled by an adult, as it contains
hazardous points or edges. A sharp tool shall be used.
Question and Answer IconNeed help?

Do you have a question about the Smoby 7600330121 and is the answer not in the manual?

Smoby 7600330121 Specifications

General IconGeneral
BrandSmoby
Model7600330121
CategoryToy
LanguageEnglish

Summary

Smoby Ironing Board Set: Components and Safety

Product Part Identification and Quantities

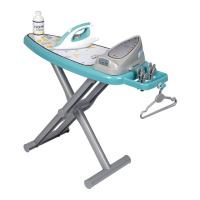
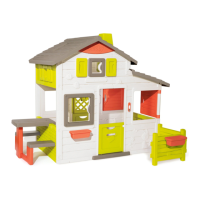
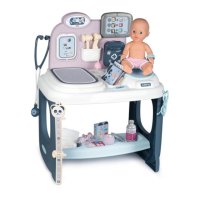
Lists all included parts (A-T) with their corresponding labels and quantities for easy identification.

Essential Safety Precautions for Use

Highlights critical safety warnings including choking hazards, adult supervision, and assembly requirements.

Assembly Steps: Base and Structure

Connecting Main Board Supports (Steps 1-4)

Details the initial assembly of the ironing board's foldable structure and base connections.

Attaching Basin and Stability Components (Step 5)

Explains how to attach the ironing board basin and secure it with clips for stability.

Assembly Steps: Iron and Final Setup

Assembling the Toy Iron and Board Attachments (Steps 6-10)

Covers the setup of the ironing board, water bottles, and the construction of the toy iron.

Completing Assembly and Product Storage (Steps 11-13)

Finalizes the assembly of the iron, attachment of all parts, and illustrates the finished product.

Related product manuals