EasyManua.ls Logo

Smoke hollow WS30C User Manual

Smoke hollow WS30C
60 pages
To Next Page IconTo Next Page
Page #1 background imageLoading...
Page #1 background image
WWW.SMOKE-HOLLOW.COM
Manual Code: 9825180003 180814-GSB
PELLET SMOKER
FUMOIR À GRANULES
AHUMADOR DE PERLAS DE MADERA
Manual applies to the following model number(s)
Le manuel s’applique aux numéros de modèle suivants
El manual se aplica a los siguientes números de modelo
These numbers are located on the rating label of the unit.
Le numéro de série se trouve sur la plaque signalétique de l’unité .
El número de serie se encuentra en la etiqueta de la unidad.
Mfg. Date - Serial Number | Date de fabrication - Numéro de
série | Fecha Fabricado - Número de serie
Your model number | Votre numéro de modèle | Su número de modelo
SH19252519
Please record this information immediately and keep in a safe place for
future use.
Veuillez noter cette information immédiatement et la conserver dans un
endroit sûr pour une utilisation future.
Por favor, registrar esta información inmediatamente y guardar en un lugar
seguro para su uso futuro.
IMPORTANT | IMPORTANTE
WS30C
Question and Answer IconNeed help?

Do you have a question about the Smoke hollow WS30C and is the answer not in the manual?

Smoke hollow WS30C Specifications

General IconGeneral
BrandSmoke hollow
ModelWS30C
CategorySmokers
LanguageEnglish

Summary

Important Information Recording

Record Model and Serial Numbers

Essential details like model and serial number should be recorded for future reference.

Critical Safety Warnings and Hazards

General Safety Precautions

Crucial safety advice regarding installation, use, and manual adherence.

Carbon Monoxide Hazard Information

Information on the dangers, symptoms, and prevention of carbon monoxide poisoning.

Structural Proximity and Safe Usage

Clearance Requirements for Safe Operation

Minimum distance requirements from structures and combustible materials.

General Safety Safeguards and Best Practices

Key instructions for safe operation, handling, and maintenance of the smoker.

Continued Safety Safeguards and Precautions

Electrical Safety and Extension Cord Guidelines

Guidelines for safe use of electrical components and proper extension cord selection.

Creosote Management and Fire Prevention

Creosote Fire Risk and Removal Procedure

Explains creosote formation, fire hazard, and steps for its safe removal.

Component Identification and Lists

Smoker Parts List

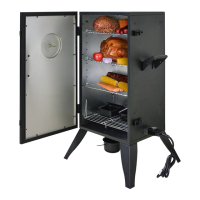
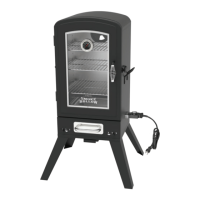
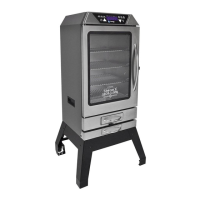
Lists and identifies all individual components included with the smoker.

Smoker Hardware List

Lists and identifies all hardware required for smoker assembly.

Assembly Preparation and Safety Guidelines

Safe Smoker Rolling Procedures

Instructions for safely moving the smoker on various surfaces to prevent damage.

Pre-Assembly Instructions and Checklist

Essential instructions and preparation steps before beginning smoker assembly.

Smoker Assembly: Initial Steps

Step 1: Body Orientation

Instructions for orienting the smoker body correctly for assembly.

Step 2: Attaching Front Legs

Detailed steps for attaching the front legs to the smoker's main body.

Smoker Assembly: Leg Supports and Wheels

Step 3: Attaching Rear Leg Supports

Instructions for attaching the rear leg support braces for stability.

Step 4: Attaching Wheel Mounting Brackets

Steps for attaching the brackets that hold the smoker's wheels.

Smoker Assembly: Base and Hopper Installation

Step 5: Attaching the Lower Frame

Instructions for securing the smoker's bottom frame structure.

Step 6: Installing the Pellet Hopper Plate

Steps for installing the mounting plate for the pellet hopper.

Smoker Assembly: Hopper and Airflow Components

Step 7: Attaching Pellet Hopper and Controller

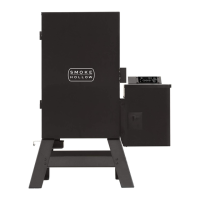
Instructions for attaching the pellet hopper and control module assembly.

Step 8: Installing the Air Damper Assembly

Steps for correctly installing the air damper mechanism.

Smoker Assembly: Heat and Smoke Flow Components

Step 9: Installing the Heat Diffuser

Instructions for placing the heat diffuser inside the smoker body.

Step 10: Installing the Grease Deflector

Steps for correctly installing the grease deflector component.

Smoker Assembly: Control Module and Racks

Step 11: Mounting Controller and Air Damper

Instructions for mounting the main control unit and air damper.

Step 12: Installing Smoking Rack Supports

Steps for inserting the internal supports for the smoking racks.

Smoker Assembly: Racks and Grease Tray

Step 13: Inserting Smoking Racks

Instructions for inserting the main smoking racks into their positions.

Step 14: Attaching the Grease Tray Assembly

Steps for attaching the grease collection tray assembly.

Smoker Assembly: Final Connections

Step 15: Connecting Door Panel Parts

Instructions for connecting the door panel and its related components.

Step 16: Connecting Meat Probe Sensors

Steps for connecting the meat probe sensors to the control panel.

Operating Instructions: Initial Setup

Auger Priming Instructions

Steps to prime the auger system for proper pellet feeding.

Pre-Seasoning Instructions

Instructions for the initial seasoning process before first use.

Smoker Operation: Setting the Cook Cycle

Setting Temperature, Time, and Smoke

Guide to setting temperature, time, and smoke generation for cooking.

Smoke Program (SP) Settings Explained

Understanding and Adjusting SP Settings

Explanation of SP settings for optimizing smoke output based on climate.

Cleaning and Storage Procedures

Post-Use Cleaning and Storage Methods

Procedures for cleaning the smoker after use and proper storage.

Troubleshooting: Controller and Power Issues

Addressing Power and Display Malfunctions

Solutions for problems related to the controller not powering on or displaying.

Troubleshooting: Smoker Performance Problems

Resolving Smoke, Auger, and Flame Issues

Guidance for issues like no smoke, auger feeding problems, or flame extinction.

Troubleshooting: Error Codes and Probe Readings

Interpreting Error Codes and Probe Malfunctions

Solutions for error codes and problems with meat probe readings.

Component Checks and Maintenance Procedures

Controller Access and Fuse Replacement

Steps for accessing the controller and replacing its fuse.

Element and Auger Function Checks

Procedures for checking the heating element and auger functionality.

Performance Verification and Testing

Meat Probe and Fan Verification Tests

Tests to verify the accuracy of meat probes and the intake fan.

Auger System Maintenance

Auger Access and Tube Cleaning Guide

Instructions for accessing and cleaning the auger tube and related parts.

Smoke Hollow® 1-Year Limited Warranty

Warranty Terms and Claim Process

Details of the limited warranty, coverage, and procedures for making a claim.

Related product manuals