Do you have a question about the Snapper XD ESXDST82 and is the answer not in the manual?
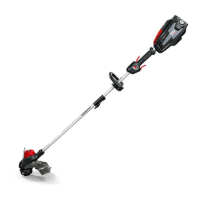
This document describes the Snapper XD 82V Battery String Trimmer, model ESXDST82, designed and manufactured to a high standard for dependability, ease of operation, and operator safety. With proper care, it promises years of rugged, trouble-free performance.
The Snapper XD 82V Battery String Trimmer is intended exclusively for outdoor use. Its primary function is to cut grass, light weeds, and other similar vegetation at or about ground level, with the cutting plane approximately parallel to the ground surface. It is not designed for cutting or trimming hedges, bushes, or other vegetation where the cutting plane is not parallel to the ground surface.
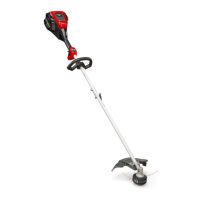
The trimmer features a rear handle (1), a switch trigger (2), a grass deflector (3) with a sharp line cut-off blade (4), a shaft coupler (5) for telescopic adjustment, a front handle (6), an on/off power button (7), a speed switch (8), and a lock-out trigger (9).
The trimmer is designed for user convenience and safety. To start the trimmer, press the on/off power button (7), then depress the lock-out trigger (9) and squeeze the switch trigger (2). The speed can be increased by pressing the high speed button (8), with two LEDs illuminating above it to indicate high-speed mode. To stop, release the switch trigger (2) and press the on/off power button (7) again. The unit will automatically power down after 1 minute of inactivity.
For optimal cutting, hold the trimmer with your right hand on the rear handle (1) and your left hand on the front handle (6), maintaining a firm grip with both hands. The rear handle should be held at approximately hip height for a comfortable operating position. When cutting tall grass, it is recommended to cut from the top down to prevent grass from wrapping around the shaft housing and string head, which can cause overheating and damage.
The trimmer is equipped with bump feed line advancement. When the cutting line wears down, simply bump the rotating head on the ground to advance additional line. The integrated line cut-off blade (4) on the grass deflector (3) will trim the line to maintain an accurate cutting swath. For best results, keep the trimmer tilted towards the area being cut, moving from left to right. Avoid forcing the cutting head into uncut grass. Be aware that wire fences, picket fences, stone walls, brick walls, curbs, and wood can cause rapid line wear or breakage. Avoid contact with trees and shrubs, as the cutting line can easily damage bark, wood moldings, siding, and fence posts.
Regular maintenance is crucial for the trimmer's longevity and safe operation. Before each use, visually inspect the entire product for any damaged, missing, or loose parts such as screws, nuts, bolts, and caps. Tighten all fasteners and caps securely, and do not operate the product until all missing or damaged parts have been replaced.
For cleaning plastic parts, avoid using solvents, as most plastics are susceptible to damage from commercial solvents. Instead, use a clean cloth to remove dirt, dust, oil, and grease. Never allow brake fluids, gasoline, petroleum-based products, or penetrating oils to come into contact with plastic parts, as these chemicals can damage or destroy plastic, potentially leading to serious personal injury.
For spool replacement, remove the battery pack, push in the tabs on the sides of the spool cover, and pull the cover up. Remove the old spool and install a new one, ensuring the cutting line is captured in the slot and extends approximately 15cm beyond it. Align the line and slot with the eyelet in the cutting head, thread the line through, and pull it until it releases from the spool slot. Reinstall the spool cover by depressing the tabs into the slots until it clicks into place.
For cutting line replacement, align the slots on the spool cap with the slots on the string head. Insert the line through the string head hole and push it until it exits the opposite hole, ensuring equal length on both sides. Turn the spool cap clockwise to wind the string into the string head, leaving approximately 5 inches of string protruding from each side.
Before storing, always remove the battery pack and clean all foreign material from the trimmer. Store it in a cool, dry place inaccessible to children, away from corrosive agents like garden chemicals and de-icing salts. Never store batteries in a discharged condition; allow them to cool after use and fully charge them immediately. For prolonged storage (over one month), recharge batteries every one to two months to extend their lifespan.
For any repairs, use only identical replacement parts and refer to the Operator's Manuals for your battery pack and charger models for complete charging instructions. It is essential to remove the battery pack from the product when assembling parts, cleaning, or performing any maintenance to prevent accidental starting and serious personal injury.